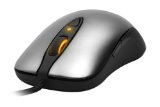
8LED ColorYou can choose from a wide variety of colors for the scroll wheel, logo on the mouse, and both CPI settings.LCD Setup and BitmappingThe LCD Setup allows you to set the brightness and contrast for the LCD screen at the bottom of your mouse.The LCD screen at the bottom of the mouse can be set to display user deined, custom images. Under LCD setup, press the “Load Custom Bitmap” button, then browse for your custom image and select it. After saving, the image should be viewable on the LCD screen of the Sensei. There are a few things to consider:• The dimensions of the image must be 128x32 pixels. Any invalid dimensions will be rejected.• The image must be a bitmap, and so must have a .bmp extension. Creating or saving a bitmap image is available on all graphical image editors.• Color images will work for the LCD bitmapping, but since the LCD screen is monochrome, the result may not be as expected. Furthermore, the colors on a black and white image will be inverted on the LCD screen. Black lines on a white image will come out as white lines on a black LCD screen.MaintenanceIf at any point you want to undo all the changes made on the Sensei, press the Restore to Factory Settings button to revert the mouse to its original settings. Note: that restoring the mouse will not affect buttons and macros on the proile in the SteelSeries Engine.On-board proile savingAs mentioned before, the Sensei has ive proiles saved onto the mouse. There are instructions in the menu for how to save settings to one of the on-board proiles and how to load from them onto the SteelSeries Engine as well.


