
V2220HPの取扱説明書・マニュアル [全34ページ 1.76MB]


6


28 / 34 ページ
28 / 34 ページ


現在のページURL
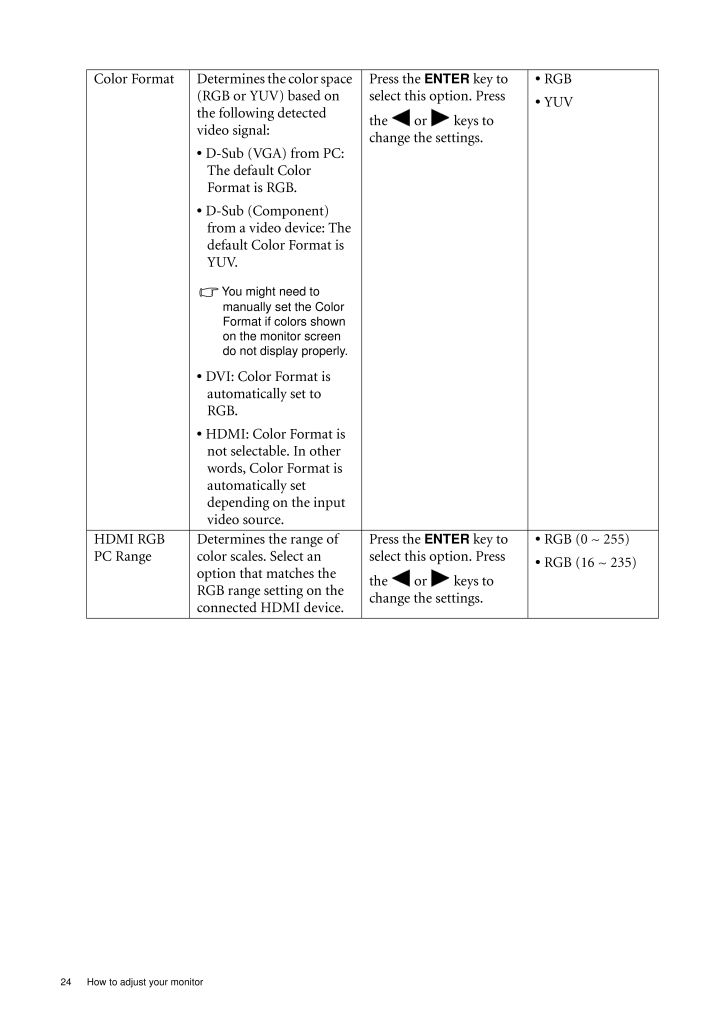
24 How to adjust your monitor Color Format Determines the color space (RGB or YUV) based on the following detected video signal:* D-Sub (VGA) from PC: The default Color Format is RGB.* D-Sub (Component) from a video device: The default Color Format is YUV.You might need to manually set the Color Format if colors shown on the monitor screen do not display properly.* DVI: Color Format is automatically set to RGB.* HDMI: Color Format is not selectable. In other words, Color Format is automatically set depending on the input video source.Press the ENTER key to select this option. Press the or keys to change the settings.* RGB* YUVHDMI RGB PC RangeDetermines the range of color scales. Select an option that matches the RGB range setting on the connected HDMI device.Press the ENTER key to select this option. Press the or keys to change the settings.* RGB (0 ~ 255)* RGB (16 ~ 235)
参考になったと評価  15人が参考になったと評価しています。
このマニュアルの目次
-
1 .iLCD MonitorUser Manual...iLCD MonitorUser ManualV2220H / V2220HPV2420H / V2420HPV2320H / VW2220HVW2420H
-
2 .ii CopyrightCopyright (...ii CopyrightCopyright (C) 2011 by BenQ Corporation. All rights reserved. No part of this publication may be reproduced, transmitted, transcribed, stored in a retrieval system or translated into any language or computer language, in any form or by any me...
-
3 .iiiCare And Cleaning•Cl...iiiCare And Cleaning•Cleaning. Always unplug your monitor from th e wall outlet before cleaning. Clean the LCD monitor surface with a lint-free, non-abrasive cl oth. Avoid using any liquid, aerosol or glass cleaners.•Slots and openings on the back or top...
-
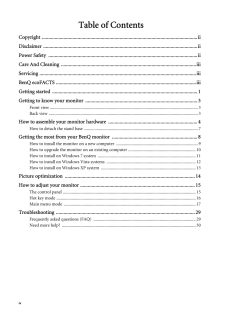
4 .iv Table of ContentsCo...iv Table of ContentsCopyright ..........................................................................................................................iiDisclaimer ...........................................................................................
-
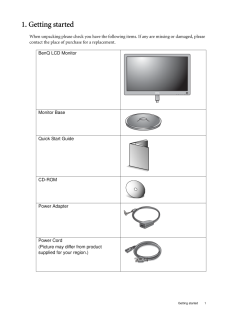
5 .1 Getting started1. G...1 Getting started1. Getting startedWhen unpacking please check you have the follow ing items. If any are missing or damaged, please contact the place of purchase for a replacement. BenQ LCD MonitorMonitor BaseQuick Start Guide CD-ROM Power AdapterPower...
-
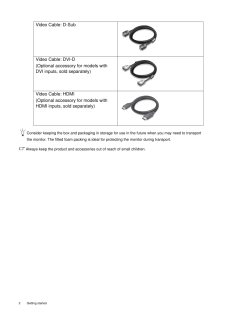
6 .2 Getting started Consi...2 Getting started Consider keeping the box and packaging in storage for use in the future when you may need to transport the monitor. The fitted foam packing is ideal for protecting the monitor during transport.Always keep the product and accessor ies ou...
-
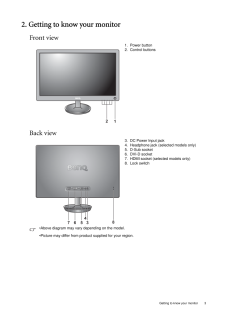
7 .3 Getting to know you...3 Getting to know your monitor2. Getting to know your monitorFront viewBack view1. Power button2. Control buttons3. DC Power Input jack4. Headphone jack (selected models only)5. D-Sub socket6. DVI-D socket7. HDMI socket (selected models only)8. Lock sw...
-
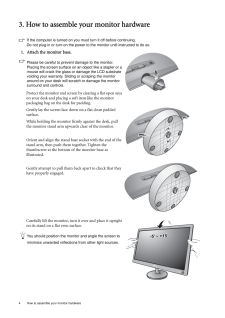
8 .4 How to assemble your m...4 How to assemble your monitor hardware 3. How to assemble your monitor hardwareIf the computer is turned on you must turn it off before continuing. Do not plug-in or turn-on the power to the monitor until instructed to do so. 1. Attach the monitor base....
-
9 .5 How to assemble you...5 How to assemble your monitor hardware2. Connect the PC video cable To Connect the D-Sub CableConnect the plug of the D-Sub cable (at the end without the ferrite filter) to the monitor video socket. Connect the other end of the cable (at the end with ...
-
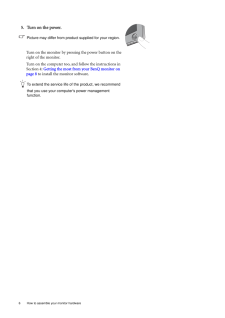
10 .6 How to assemble your m...6 How to assemble your monitor hardware 5. Turn on the power.Picture may differ from product supplied for your region.Turn on the monitor by pressing the power button on the right of the monitor. Turn on the computer too, and follow the instructions in S...
-
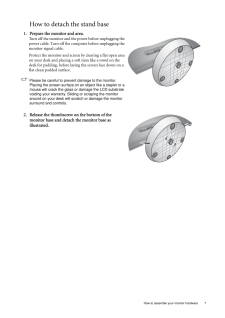
11 .7 How to assemble you...7 How to assemble your monitor hardwareHow to detach the stand base1. Prepare the monitor and area.Turn off the monitor and the power before unplugging the power cable. Turn off the computer before unplugging the monitor signal cable.Protect the monito...
-
12 .8 Getting the most from ...8 Getting the most from your BenQ monitor 4. Getting the most from your BenQ monitorTo gain the most benefit from your new BenQ color LCD flat screen monitor, you should install the custom BenQ LCD Monitor driver software as provided on the BenQ LCD Moni...
-
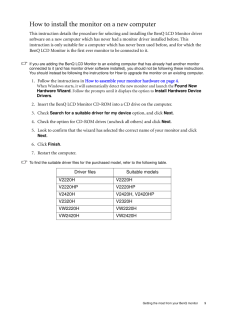
13 .9 Getting the most fr...9 Getting the most from your BenQ monitorHow to install the monitor on a new computerThis instruction details the procedure for select ing and installing the BenQ LCD Monitor driver software on a new computer which has never had a monitor driver instal...
-
14 .10 Getting the most from...10 Getting the most from your BenQ monitor How to upgrade the monitor on an existing computerThis instruction details the procedure for manual ly updating the existing monitor driver software on your Microsoft Windows computer. It is cu rrently tested as...
-
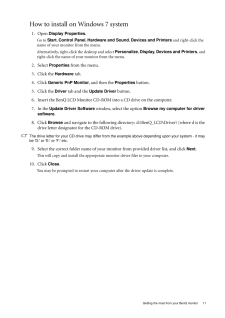
15 .11 Getting the most f...11 Getting the most from your BenQ monitorHow to install on Windows 7 system1. Open Display Properties.Go to Start , Control Panel, Hardware and Sound, Devices and Printers and right-click the name of your monitor from the menu.Alternatively, right...
-
16 .12 Getting the most from...12 Getting the most from your BenQ monitor How to install on Windows Vista systems1. Open Display Settings .Right-click the desktop and select Personalize from the popup menu.Select Display Settings from the Personalize appearance and sounds window....
-
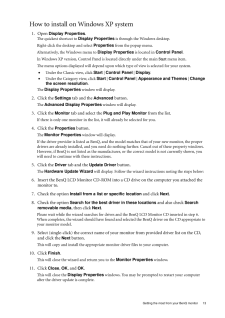
17 .13 Getting the most f...13 Getting the most from your BenQ monitorHow to install on Windows XP system1. Open Display Properties .The quickest shortcut to Display Properties is through the Windows desktop. Right-click the desktop and select Properties from the popup menu.Alte...
-
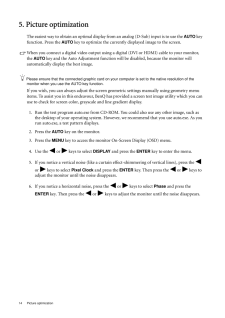
18 .14 Picture optimization ...14 Picture optimization 5. Picture optimizationThe easiest way to obtain an optimal display from an analog (D-Sub) input is to use the AUTO key function. Press the AUTO key to optimize the currently displayed image to the screen. When you connect a di...
-
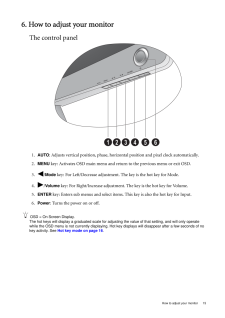
19 .15 How to adjust your...15 How to adjust your monitor6. How to adjust your monitorThe control panel1. AUTO : Adjusts vertical position, phase, horizontal position and pixel clock automatically.2.MENU key: Activates OSD main menu and return to the previous menu or exit OSD.3....
-
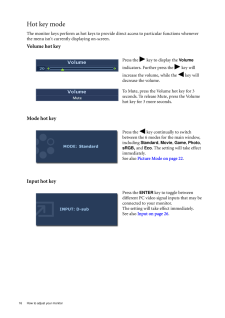
20 .16 How to adjust your mo...16 How to adjust your monitor Hot key modeThe monitor keys perform as hot keys to provide direct access to particular functions whenever the menu isn't currently displaying on-screen.Volume hot keyMode hot keyInput hot keyPress the key to display the ...
-
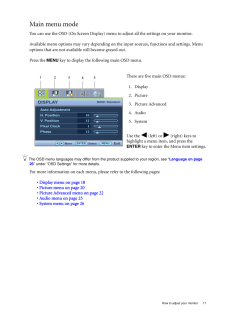
21 .17 How to adjust your...17 How to adjust your monitorMain menu modeYou can use the OSD (On Screen Display) menu to adjust all the settings on your monitor. Available menu options may vary depending on the input sources, functions and settings. Menu options that are not avai...
-
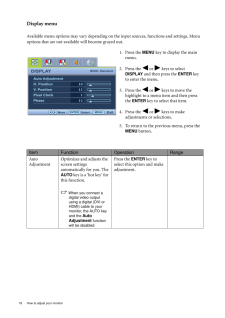
22 .18 How to adjust your mo...18 How to adjust your monitor Display menuAvailable menu options may vary depending on the input sources, functions and settings. Menu options that are not available will become grayed out.1. Press the MENU key to display the main menu.2. Press the o...
-
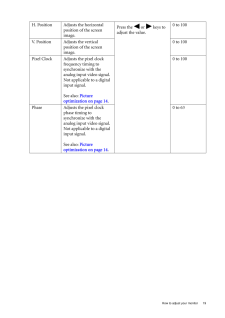
23 .19 How to adjust your...19 How to adjust your monitorH. Position Adjusts the horizontal position of the screen image. Press the or keys to adjust the value.0 to 100V. Position Adjusts the vertical position of the screen image.0 to 100Pixel Clock Adjusts the pixel clock fr...
-
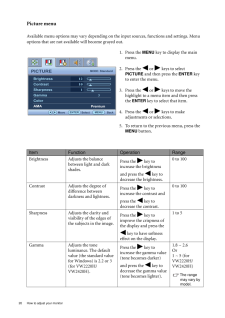
24 .20 How to adjust your mo...20 How to adjust your monitor Picture menuAvailable menu options may vary depending on the input sources, functions and settings. Menu options that are not available will become grayed out.1. Press the MENU key to display the main menu.2. Press the o...
-
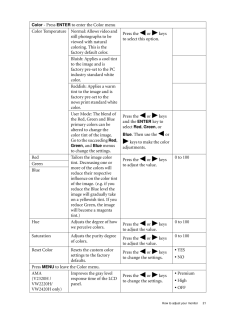
25 .21 How to adjust your...21 How to adjust your monitorColor - Press ENTER to enter the Color menuColor Temperature Normal: Allows video and still photographs to be viewed with natural coloring. This is the factory default color. Press the or keys to select this option.B...
-
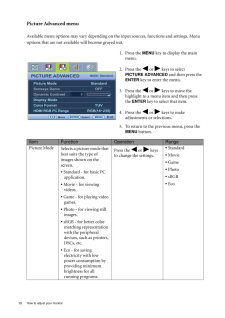
26 .22 How to adjust your mo...22 How to adjust your monitor Picture Advanced menuAvailable menu options may vary depending on the input sources, functions and settings. Menu options that are not available will become grayed out.1. Press the MENU key to display the main menu.2. Pres...
-
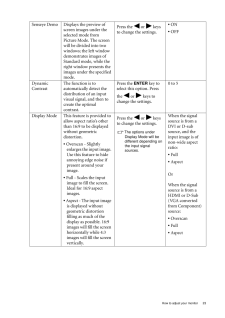
27 .23 How to adjust your...23 How to adjust your monitorSenseye Demo Displays the preview of screen images under the selected mode from Picture Mode. The screen will be divided into two windows; the left window demonstrates images of Standard mode, while the right window present...
-
28 .24 How to adjust your mo...24 How to adjust your monitor Color Format Determines the color space (RGB or YUV) based on the following detected video signal:* D-Sub (VGA) from PC: The default Color Format is RGB.* D-Sub (Component) from a video device: The default Color Format is YU...
-
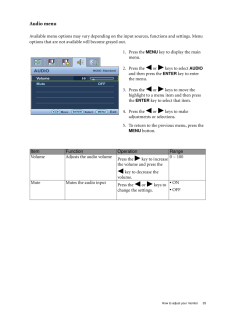
29 .25 How to adjust your...25 How to adjust your monitorAudio menuAvailable menu options may vary depending on the input sources, functions and settings. Menu options that are not available will become grayed out.1. Press the MENU key to display the main menu.2. Press the or...
-
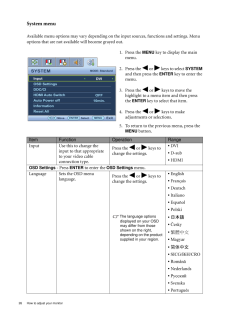
30 .26 How to adjust your mo...26 How to adjust your monitor System menuAvailable menu options may vary depending on the input sources, functions and settings. Menu options that are not available will become grayed out.1. Press the MENU key to display the main menu.2. Press the or...
-
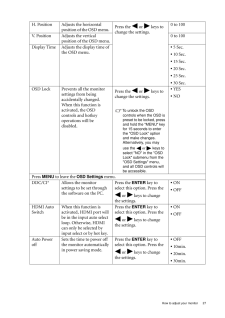
31 .27 How to adjust your...27 How to adjust your monitorH. Position Adjusts the horizontal position of the OSD menu. Press the or keys to change the settings. 0 to 100V. Position Adjusts the vertical position of the OSD menu.0 to 100Display Time Adjusts the display time of t...
-
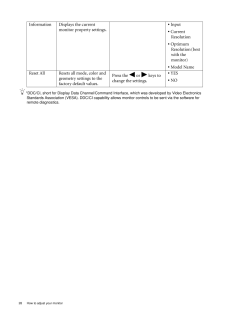
32 .28 How to adjust your mo...28 How to adjust your monitor *DDC/CI, short for Display Data Channel/Command Interface, which was developed by Video Electronics Standards Association (VESA). DDC/CI capability allows monitor controls to be sent via the software for remote diagnostics.I...
-
33 .29 Troubleshooting7. ...29 Troubleshooting7. TroubleshootingFrequently asked questions (FAQ)The image is blurred:Read the instructions on the link "Adjusting the Screen Resolution" on the CD, and then select the correct resolution, refresh rate and make adjustments based on ...
-
34 .30 Troubleshooting Is th...30 Troubleshooting Is the prompt on the display illuminated in orange?If the LED is illuminated in orange, the power management mode is active. Press any button on the computer keyboard or move the mouse. If that does not help, check the signal cable conn...
