
Inspiron 15 3521の取扱説明書・マニュアル [全94ページ 2.85MB]


1


2 / 94 ページ
2 / 94 ページ


現在のページURL
Notes, Cautions, and Warnings NOTE: A NOTE indicates important information that helps you make better use of your computer. CAUTION: A CAUTION indicates potentia l damage to hardware or loss of data if instructions are not followed. WARNING: A WARNING indicates a potential for property damage, personal injury, or death.____________________ © 2012 Dell Inc. Trademarks used in this text: Dell™, the DELL logo, and Inspiron™ are trademarks of Dell Inc.; Microsoft®, Windows®, and the Windows start button logo ar e either trademarks or registered trademarks of Microsoft Corporation in the Un ited States and/or other countries; Bluetooth® is a registered trademark owned by Bluetooth SIG, Inc. and is used by Dell under license.2012 - 11 Rev. A00OM_Book.book Page 2 Tuesday, November 20, 2012 12:43 PM
参考になったと評価  12人が参考になったと評価しています。
その他の取扱説明書

2001 view

837 view

653 view
このマニュアルの目次
-
1 .Dell Inspiron 3521/5521 O...Dell Inspiron 3521/5521 Owner’s ManualComputer model: Inspiron 3521/5521Regulatory model: P28F Regulatory type: P28F001OM_Book.book Page 1 Tuesday, November 20, 2012 12:43 PM
-
2 .Notes, Cautions, and Warn...Notes, Cautions, and Warnings NOTE: A NOTE indicates important information that helps you make better use of your computer. CAUTION: A CAUTION indicates potentia l damage to hardware or loss of data if instructions are not followed. WARNING: A WARNING ...
-
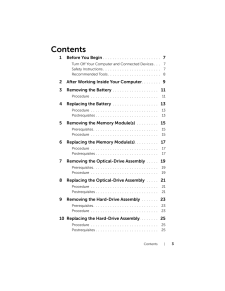
3 .Contents | 3Contents1 ...Contents | 3Contents1 Before You Begin . . . . . . . . . . . . . . . . . . . . . . . . 7Turn Off Your Computer and Connected Devices . . . 7Safety Instructions . . . . . . . . . . . . . . . . . . . . . . . . 7Recommended Tools . . . . . . . . . . ...
-
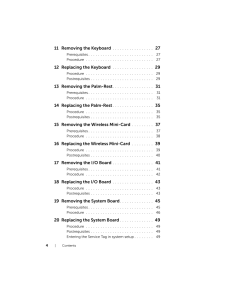
4 .4 | Contents11 Removing...4 | Contents11 Removing the Keyboard . . . . . . . . . . . . . . . . . 27Prerequisites . . . . . . . . . . . . . . . . . . . . . . . . . . . 27Procedure . . . . . . . . . . . . . . . . . . . . . . . . . . . . 2712 Replacing the Keyboard . . . . ...
-
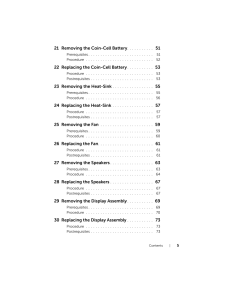
5 .Contents | 521 Removin...Contents | 521 Removing the Coin-Cell Battery . . . . . . . . . . . 51Prerequisites . . . . . . . . . . . . . . . . . . . . . . . . . . . 51Procedure . . . . . . . . . . . . . . . . . . . . . . . . . . . . 5222 Replacing the Coin-Cell Battery . ....
-
6 .6 | Contents31 Removing...6 | Contents31 Removing the Display Bezel . . . . . . . . . . . . . . 75Prerequisites . . . . . . . . . . . . . . . . . . . . . . . . . . . 75Procedure . . . . . . . . . . . . . . . . . . . . . . . . . . . . 7632 Replacing the Display Bezel . . ...
-
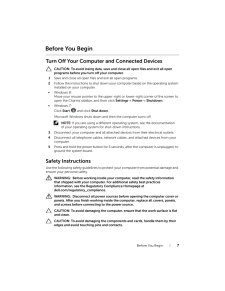
7 .Before You Begin | 7Be...Before You Begin | 7Before You BeginTurn Off Your Computer and Connected Devices CAUTION: To avoid losing data, save and close all open files and exit all open programs before you turn off your computer.1Save and close all open files and exit all open...
-
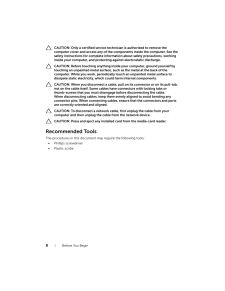
8 .8 | Before You Begin CA...8 | Before You Begin CAUTION: Only a certified service techni cian is authorized to remove the computer cover and access any of the components inside the computer. See the safety instructions for co mplete information about safety precautions, working i...
-
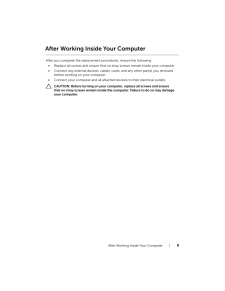
9 .After Working Inside Your...After Working Inside Your Computer | 9After Working Inside Your ComputerAfter you complete the replacement procedures, ensure the following:•Replace all screws and ensure that no stray screws remain inside your computer.•Connect any external devices...
-
10 .10 | After Working Ins...10 | After Working Inside Your ComputerOM_Book.book Page 10 Tuesday, November 20, 2012 12:43 PM
-
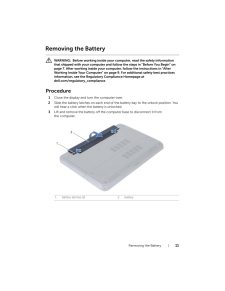
11 .Removing the Battery |...Removing the Battery | 11Removing the Battery WARNING: Before working inside your computer, read the safety information that shipped with your computer and follow the steps in "Before You Begin" on page 7. After working inside your comput er, foll...
-
12 .12 | Removing the Batt...12 | Removing the BatteryOM_Book.book Page 12 Tuesday, November 20, 2012 12:43 PM
-
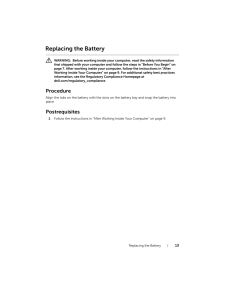
13 .Replacing the Battery | ...Replacing the Battery | 13Replacing the Battery WARNING: Before working inside your computer, read the safety information that shipped with your computer and follow the steps in "Before You Begin" on page 7. After working inside your comput er, follo...
-
14 .14 | Replacing the Batt...14 | Replacing the BatteryOM_Book.book Page 14 Tuesday, November 20, 2012 12:43 PM
-
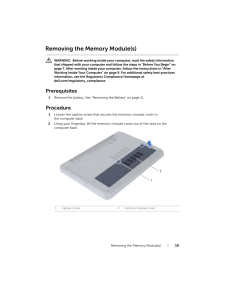
15 .Removing the Memory Modul...Removing the Memory Module(s) | 15Removing the Memory Module(s) WARNING: Before working inside your computer, read the safety information that shipped with your computer and follow the steps in "Before You Begin" on page 7. After working inside yo...
-
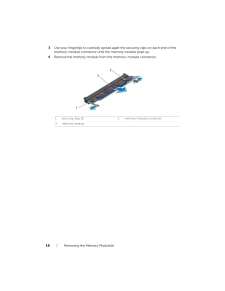
16 .16 | Removing the Memo...16 | Removing the Memory Module(s)3Use your fingertips to carefully spread ap art the securing clips on each end of the memory-module connector until the memory module pops up.4Remove the memory module from the memory-module connector.1 securing clips (...
-
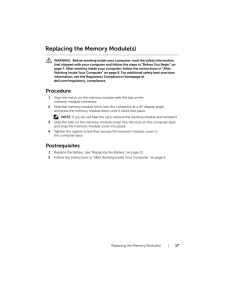
17 .Replacing the Memory Modu...Replacing the Memory Module(s) | 17Replacing the Memory Module(s) WARNING: Before working inside your computer, read the safety information that shipped with your computer and follow the steps in "Before You Begin" on page 7. After working inside you...
-
18 .18 | Replacing the Mem...18 | Replacing the Memory Module(s)OM_Book.book Page 18 Tuesday, November 20, 2012 12:43 PM
-
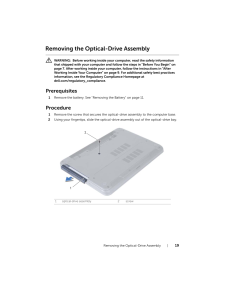
19 .Removing the Optical-Driv...Removing the Optical-Drive Assembly | 19Removing the Optical-Drive Assembly WARNING: Before working inside your computer, read the safety information that shipped with your computer and follow the steps in "Before You Begin" on page 7. After worki...
-
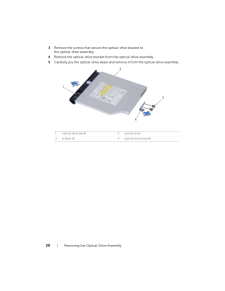
20 .20 | Removing the Opti...20 | Removing the Optical-Drive Assembly3Remove the screws that secure the optical-drive bracket to the optical-drive assembly.4Remove the optical-drive bracket from the optical-drive assembly.5Carefully pry the optical-drive bezel and re move it from t...
-
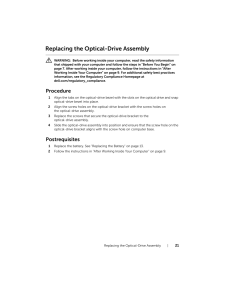
21 .Replacing the Optical-Dri...Replacing the Optical-Drive Assembly | 21Replacing the Optical-Drive Assembly WARNING: Before working inside your computer, read the safety information that shipped with your computer and follow the steps in "Before You Begin" on page 7. After wor...
-
22 .22 | Replacing the Opt...22 | Replacing the Optical-Drive AssemblyOM_Book.book Page 22 Tuesday, November 20, 2012 12:43 PM
-
23 .Removing the Hard-Drive A...Removing the Hard-Drive Assembly | 23Removing the Hard-Drive Assembly WARNING: Before working inside your computer, read the safety information that shipped with your computer and follow the steps in "Before You Begin" on page 7. After working inside...
-
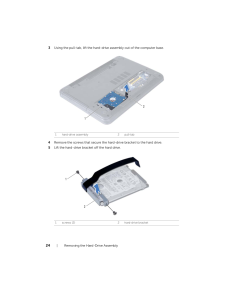
24 .24 | Removing the Hard...24 | Removing the Hard-Drive Assembly3Using the pull-tab, lift the hard-drive assembly out of the computer base.4Remove the screws that secure the hard-drive bracket to the hard drive.5Lift the hard-drive bracket off the hard drive.1 hard-drive assembly...
-
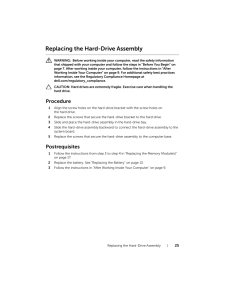
25 .Replacing the Hard-Drive ...Replacing the Hard-Drive Assembly | 25Replacing the Hard-Drive Assembly WARNING: Before working inside your computer, read the safety information that shipped with your computer and follow the steps in "Before You Begin" on page 7. After working i...
-
26 .26 | Replacing the Har...26 | Replacing the Hard-Drive AssemblyOM_Book.book Page 26 Tuesday, November 20, 2012 12:43 PM
-
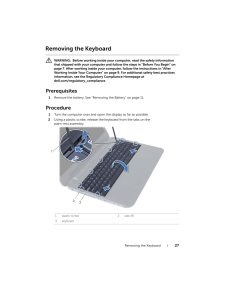
27 .Removing the Keyboard | ...Removing the Keyboard | 27Removing the Keyboard WARNING: Before working inside your computer, read the safety information that shipped with your computer and follow the steps in "Before You Begin" on page 7. After working inside your comput er, follo...
-
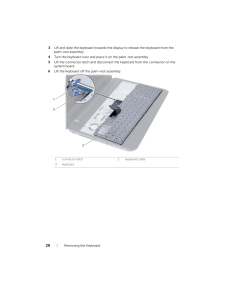
28 .28 | Removing the Keyb...28 | Removing the Keyboard3Lift and slide the keyboard towards the display to release the keyboard from the palm-rest assembly.4Turn the keyboard over and place it on the palm-rest assembly.5Lift the connector latch and disconnect th e keyboard from the...
-
29 .Replacing the Keyboard |...Replacing the Keyboard | 29Replacing the Keyboard WARNING: Before working inside your computer, read the safety information that shipped with your computer and follow the steps in "Before You Begin" on page 7. After working inside your comput er, fol...
-
30 .30 | Replacing the Key...30 | Replacing the KeyboardOM_Book.book Page 30 Tuesday, November 20, 2012 12:43 PM
-
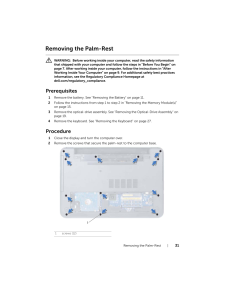
31 .Removing the Palm-Rest |...Removing the Palm-Rest | 31Removing the Palm-Rest WARNING: Before working inside your computer, read the safety information that shipped with your computer and follow the steps in "Before You Begin" on page 7. After working inside your comput er, fol...
-
32 .32 | Removing the Palm...32 | Removing the Palm-Rest3Turn the computer over and open the display as far as possible.4Lift the connector latches and pull the pu ll-tab to disconnect the touchpad cable and the power-button cable from the system board.1 touchpad cable 2 power-butt...
-
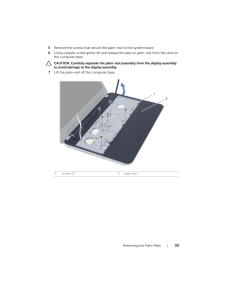
33 .Removing the Palm-Rest |...Removing the Palm-Rest | 335Remove the screws that secure the palm-rest to the system board.6Using a plastic scribe gently lift and release the tabs on palm-rest from the slots on the computer base. CAUTION: Carefully separate the palm-rest assembly fro...
-
34 .34 | Removing the Palm...34 | Removing the Palm-RestOM_Book.book Page 34 Tuesday, November 20, 2012 12:43 PM
-
35 .Replacing the Palm-Rest ...Replacing the Palm-Rest | 35Replacing the Palm-Rest WARNING: Before working inside your computer, read the safety information that shipped with your computer and follow the steps in "Before You Begin" on page 7. After working inside your comput er, f...
-
36 .36 | Replacing the Pal...36 | Replacing the Palm-RestOM_Book.book Page 36 Tuesday, November 20, 2012 12:43 PM
-
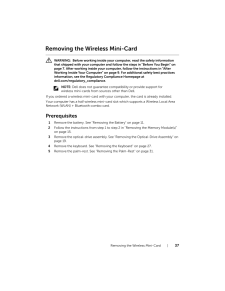
37 .Removing the Wireless Min...Removing the Wireless Mini-Card | 37Removing the Wireless Mini-Card WARNING: Before working inside your computer, read the safety information that shipped with your computer and follow the steps in "Before You Begin" on page 7. After working insid...
-
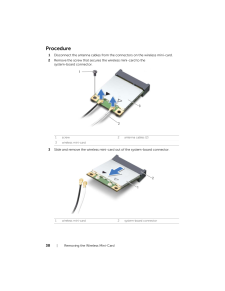
38 .38 | Removing the Wire...38 | Removing the Wireless Mini-CardProcedure1Disconnect the antenna cables from the connectors on the wireless mini-card.2Remove the screw that secures the wireless mini-card to the system-board connector.3Slide and remove the wireless mini-card out o...
-
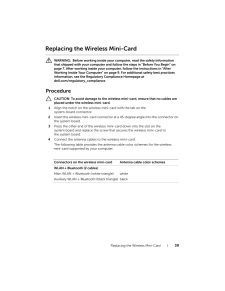
39 .Replacing the Wireless Mi...Replacing the Wireless Mini-Card | 39Replacing the Wireless Mini-Card WARNING: Before working inside your computer, read the safety information that shipped with your computer and follow the steps in "Before You Begin" on page 7. After working ins...
-
40 .40 | Replacing the Wir...40 | Replacing the Wireless Mini-CardPostrequisites1Replace the palm-rest. See "Replacing the Palm-Rest" on page 35.2Replace the keyboard. See "Replacing the Keyboard" on page 29.3Replace the optical-drive assembly. See "R eplacing the Optical-Drive Ass...
-
41 .Removing the I/O Board ...Removing the I/O Board | 41Removing the I/O Board WARNING: Before working inside your computer, read the safety information that shipped with your computer and follow the steps in "Before You Begin" on page 7. After working inside your comput er, ...
-
42 .42 | Removing the I/O ...42 | Removing the I/O BoardProcedure1Remove the screw that secures the I/O board to the computer base.2Use the pull-tab to disconnect the I/O board cable from the connector on the system board.3Gently lift and remove the I/O board off the computer base...
-
43 .Replacing the I/O Board ...Replacing the I/O Board | 43Replacing the I/O Board WARNING: Before working inside your computer, read the safety information that shipped with your computer and follow the steps in "Before You Begin" on page 7. After working inside your comput er...
-
44 .44 | Replacing the I/O...44 | Replacing the I/O BoardOM_Book.book Page 44 Tuesday, November 20, 2012 12:43 PM
-
45 .Removing the System Board...Removing the System Board | 45Removing the System Board WARNING: Before working inside your computer, read the safety information that shipped with your computer and follow the steps in "Before You Begin" on page 7. After working inside your compu...
-
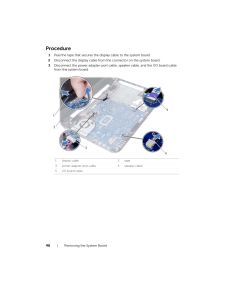
46 .46 | Removing the Syst...46 | Removing the System BoardProcedure1Peel the tape that secures the display cable to the system board.2Disconnect the display cable from t he connector on the system board.3Disconnect the power adapter-port cable, speaker cable, and the I/O board cab...
-
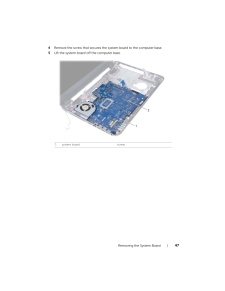
47 .Removing the System Board...Removing the System Board | 474Remove the screw that secures the system board to the computer base.5Lift the system board off the computer base.1system board screw21OM_Book.book Page 47 Tuesday, November 20, 2012 12:43 PM
-
48 .48 | Removing the Syst...48 | Removing the System BoardOM_Book.book Page 48 Tuesday, November 20, 2012 12:43 PM
-
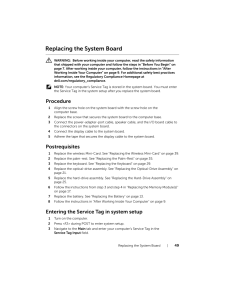
49 .Replacing the System Boar...Replacing the System Board | 49Replacing the System Board WARNING: Before working inside your computer, read the safety information that shipped with your computer and follow the steps in "Before You Begin" on page 7. After working inside your comput...
-
50 .50 | Replacing the Sys...50 | Replacing the System BoardOM_Book.book Page 50 Tuesday, November 20, 2012 12:43 PM
-
51 .Removing the Coin-Cell Ba...Removing the Coin-Cell Battery | 51Removing the Coin-Cell Battery WARNING: Before working inside your computer, read the safety information that shipped with your computer and follow the steps in "Before You Begin" on page 7. After working inside you...
-
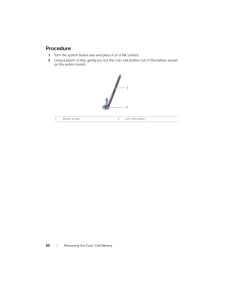
52 .52 | Removing the Coin...52 | Removing the Coin-Cell BatteryProcedure1Turn the system board over and place it on a flat surface.2Using a plastic scribe, gently pry out the coin-cell battery out of the battery socket on the system board.1 plastic scribe 2 coin-cell battery12OM_...
-
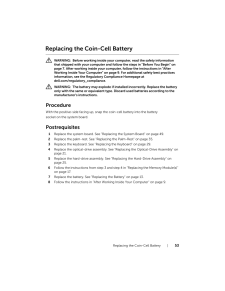
53 .Replacing the Coin-Cell B...Replacing the Coin-Cell Battery | 53Replacing the Coin-Cell Battery WARNING: Before working inside your computer, read the safety information that shipped with your computer and follow the steps in "Before You Begin" on page 7. After working inside y...
-
54 .54 | Replacing the Coi...54 | Replacing the Coin-Cell BatteryOM_Book.book Page 54 Tuesday, November 20, 2012 12:43 PM
-
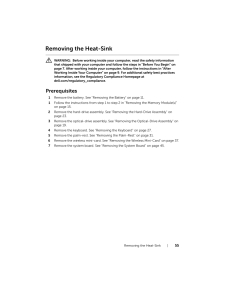
55 .Removing the Heat-Sink |...Removing the Heat-Sink | 55Removing the Heat-Sink WARNING: Before working inside your computer, read the safety information that shipped with your computer and follow the steps in "Before You Begin" on page 7. After working inside your comput er, fol...
-
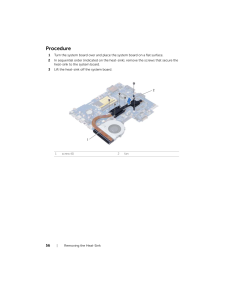
56 .56 | Removing the Heat...56 | Removing the Heat-SinkProcedure1Turn the system board over and place the system board on a flat surface.2In sequential order (indicated on the heat-si nk), remove the screws that secure the heat-sink to the system board.3Lift the heat-sink off the ...
-
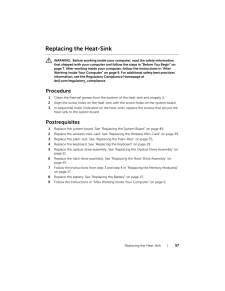
57 .Replacing the Heat-Sink ...Replacing the Heat-Sink | 57Replacing the Heat-Sink WARNING: Before working inside your computer, read the safety information that shipped with your computer and follow the steps in "Before You Begin" on page 7. After working inside your comput er, f...
-
58 .58 | Replacing the Hea...58 | Replacing the Heat-SinkOM_Book.book Page 58 Tuesday, November 20, 2012 12:43 PM
-
59 .Removing the Fan | 59R...Removing the Fan | 59Removing the Fan WARNING: Before working inside your computer, read the safety information that shipped with your computer and follow the steps in "Before You Begin" on page 7. After working inside your comput er, follow the inst...
-
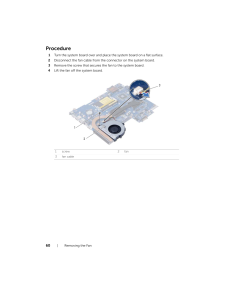
60 .60 | Removing the FanP...60 | Removing the FanProcedure1Turn the system board over and place the system board on a flat surface.2Disconnect the fan cable from the connector on the system board.3Remove the screw that secures the fan to the system board.4Lift the fan off the sys...
-
61 .Replacing the Fan | 61...Replacing the Fan | 61Replacing the Fan WARNING: Before working inside your computer, read the safety information that shipped with your computer and follow the steps in "Before You Begin" on page 7. After working inside your comput er, follow the in...
-
62 .62 | Replacing the Fan...62 | Replacing the FanOM_Book.book Page 62 Tuesday, November 20, 2012 12:43 PM
-
63 .Removing the Speakers | ...Removing the Speakers | 63Removing the Speakers WARNING: Before working inside your computer, read the safety information that shipped with your computer and follow the steps in "Before You Begin" on page 7. After working inside your comput er, follo...
-
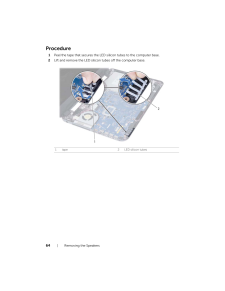
64 .64 | Removing the Spea...64 | Removing the SpeakersProcedure1Peel the tape that secures the LED silicon tubes to the computer base.2Lift and remove the LED silicon tubes off the computer base.1tape 2LED silicon tubes12OM_Book.book Page 64 Tuesday, November 20, 2012 12:43 PM
-
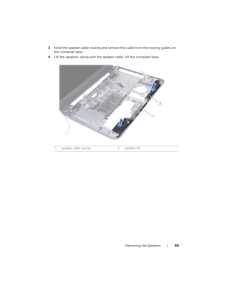
65 .Removing the Speakers | ...Removing the Speakers | 653Note the speaker cable routing and remove the cable from the routing guides on the computer base.4Lift the speakers, along with the speaker cable, off the computer base.1 speaker cable routing 2 speakers (2)12OM_Book.book Pag...
-
66 .66 | Removing the Spea...66 | Removing the SpeakersOM_Book.book Page 66 Tuesday, November 20, 2012 12:43 PM
-
67 .Replacing the Speakers |...Replacing the Speakers | 67Replacing the Speakers WARNING: Before working inside your computer, read the safety information that shipped with your computer and follow the steps in "Before You Begin" on page 7. After working inside your comput er, fol...
-
68 .68 | Replacing the Spe...68 | Replacing the SpeakersOM_Book.book Page 68 Tuesday, November 20, 2012 12:43 PM
-
69 .Removing the Display Asse...Removing the Display Assembly | 69Removing the Display Assembly WARNING: Before working inside your computer, read the safety information that shipped with your computer and follow the steps in "Before You Begin" on page 7. After working inside your ...
-
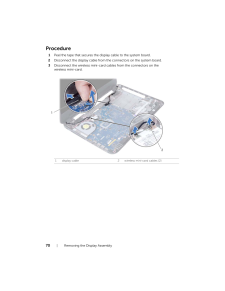
70 .70 | Removing the Disp...70 | Removing the Display AssemblyProcedure1Peel the tape that secures the display cable to the system board.2Disconnect the display cable from t he connectors on the system board.3Disconnect the wireless mini-card ca bles from the connectors on the wir...
-
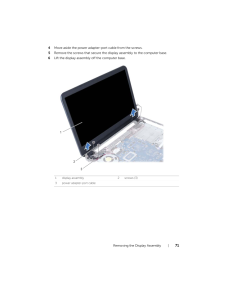
71 .Removing the Display Asse...Removing the Display Assembly | 714Move aside the power adapter-port cable from the screws.5Remove the screws that secure the display assembly to the computer base.6Lift the display assembly off the computer base.1 display assembly 2 screws (3)3 powe...
-
72 .72 | Removing the Disp...72 | Removing the Display AssemblyOM_Book.book Page 72 Tuesday, November 20, 2012 12:43 PM
-
73 .Replacing the Display Ass...Replacing the Display Assembly | 73Replacing the Display Assembly WARNING: Before working inside your computer, read the safety information that shipped with your computer and follow the steps in "Before You Begin" on page 7. After working inside you...
-
74 .74 | Replacing the Dis...74 | Replacing the Display AssemblyOM_Book.book Page 74 Tuesday, November 20, 2012 12:43 PM
-
75 .Removing the Display Beze...Removing the Display Bezel | 75Removing the Display Bezel WARNING: Before working inside your computer, read the safety information that shipped with your computer and follow the steps in "Before You Begin" on page 7. After working inside your comput...
-
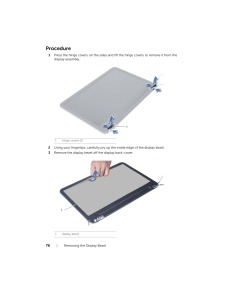
76 .76 | Removing the Disp...76 | Removing the Display BezelProcedure1Press the hinge covers on the sides and lift the hinge covers to remove it from the display assembly.2Using your fingertips, carefully pry up the inside edge of the display bezel.3Remove the display bezel off th...
-
77 .Replacing the Display Bez...Replacing the Display Bezel | 77Replacing the Display Bezel WARNING: Before working inside your computer, read the safety information that shipped with your computer and follow the steps in "Before You Begin" on page 7. After working inside your c...
-
78 .78 | Replacing the Dis...78 | Replacing the Display BezelOM_Book.book Page 78 Tuesday, November 20, 2012 12:43 PM
-
79 .Removing the Display Hing...Removing the Display Hinges | 79Removing the Display Hinges WARNING: Before working inside your computer, read the safety information that shipped with your computer and follow the steps in "Before You Begin" on page 7. After working inside your comp...
-
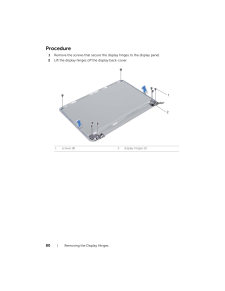
80 .80 | Removing the ...80 | Removing the Display HingesProcedure1Remove the screws that secure the display hinges to the display panel.2Lift the display hinges off the display back-cover.1 screws (8) 2 display hinges (2)21OM_Book.book Page 80 Tuesday, November 20, 2012...
-
81 .Replacing the Display Hin...Replacing the Display Hinges | 81Replacing the Display Hinges WARNING: Before working inside your computer, read the safety information that shipped with your computer and follow the steps in "Before You Begin" on page 7. After working inside your co...
-
82 .82 | Replacing the Dis...82 | Replacing the Display HingesOM_Book.book Page 82 Tuesday, November 20, 2012 12:43 PM
-
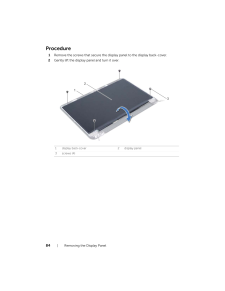
83 .Removing the Display Pane...Removing the Display Panel | 83Removing the Display Panel WARNING: Before working inside your computer, read the safety information that shipped with your computer and follow the steps in "Before You Begin" on page 7. After working inside your comput...
-
84 .84 | Removing the Disp...84 | Removing the Display PanelProcedure1Remove the screws that secure the display panel to the display back-cover.2Gently lift the display panel and turn it over.1 display back-cover 2 display panel3screws (4)321OM_Book.book Page 84 Tuesday, November...
-
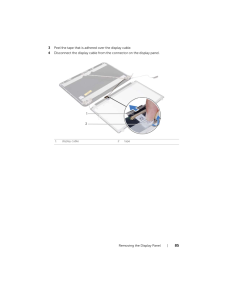
85 .Removing the Display Pane...Removing the Display Panel | 853Peel the tape that is adhered over the display cable.4Disconnect the display cable from t he connector on the display panel.1 display cable 2 tape21OM_Book.book Page 85 Tuesday, November 20, 2012 12:43 PM
-
86 .86 | Removing the Disp...86 | Removing the Display PanelOM_Book.book Page 86 Tuesday, November 20, 2012 12:43 PM
-
87 .Replacing the Display Pan...Replacing the Display Panel | 87Replacing the Display Panel WARNING: Before working inside your computer, read the safety information that shipped with your computer and follow the steps in "Before You Begin" on page 7. After working inside your comp...
-
88 .88 | Replacing the Dis...88 | Replacing the Display PanelOM_Book.book Page 88 Tuesday, November 20, 2012 12:43 PM
-
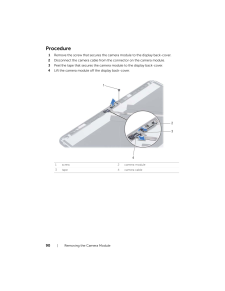
89 .Removing the Camera Modul...Removing the Camera Module | 89Removing the Camera Module WARNING: Before working inside your computer, read the safety information that shipped with your computer and follow the steps in "Before You Begin" on page 7. After working inside your comput...
-
90 .90 | Removing the Came...90 | Removing the Camera ModuleProcedure1Remove the screw that secures the camera module to the display back-cover.2Disconnect the camera cable from t he connector on the camera module.3Peel the tape that secures the camera module to the display back-co...
-
91 .Replacing the Camera Modu...Replacing the Camera Module | 91Replacing the Camera Module WARNING: Before working inside your computer, read the safety information that shipped with your computer and follow the steps in "Before You Begin" on page 7. After working inside your comp...
-
92 .92 | Replacing the Cam...92 | Replacing the Camera ModuleOM_Book.book Page 92 Tuesday, November 20, 2012 12:43 PM
-
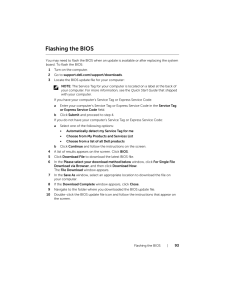
93 .Flashing the BIOS | 93...Flashing the BIOS | 93Flashing the BIOSYou may need to flash the BIOS when an update is available or after replacing the system board. To flash the BIOS:1Turn on the computer.2Go to support.dell.com/support/downloads .3Locate the BIOS update file for y...
-
94 .94 | Flashing the BIOS...94 | Flashing the BIOSOM_Book.book Page 94 Tuesday, November 20, 2012 12:43 PM
