Gizport

ヤマハ スピーカーの取扱説明書・マニュアル [全18ページ 1.28MB]

3
msp7studio_ja_om_b0.pdf
Gizbot 2013-10-03
http://www2.yamaha.co.jp/.../msp7studio_ja_om_b0.pdf - 1.28MB - キャッシュ
629view
18page / 1.28MB
Share (facebook)
2 / 18 ページ
 
2 / 18 ページ
ファイルを開く
現在のページURL
The above warning is located on the rear of the unit.Explanation of Graphical SymbolsThe lightning flash with arrowhead symbol within an equilateral triangle is intended to alert the user to the presence of uninsulated "dangerous voltage" within the product's enclosure that may be of sufficient magnitude to constitute a risk of electric shock to persons.The exclamation point within an equilateral triangle is intended to alert the user to the presence of important operating and maintenance (servicing) instructions in the literature accompanying the product.IMPORTANT SAFETY INSTRUCTIONS1Read these instructions.2Keep these instructions.3Heed all warnings.4Follow all instructions.5Do not use this apparatus near water.6Clean only with dry cloth.7Do not block any ventilation openings. Install in accordance with the manufacturer's instructions.8Do not install near any heat sources such as radiators, heat registers, stoves, or other apparatus (including amplifiers) that produce heat.9Do not defeat the safety purpose of the polarized or grounding-type plug. A polarized plug has two blades with one wider than the other. A grounding type plug has two blades and a third grounding prong. The wide blade or the third prong are provided for your safety. If the provided plug does not fit into your outlet, consult an electrician for replacement of the obsolete outlet.10 Protect the power cord from being walked on or pinched particularly at plugs, convenience receptacles, and the point where they exit from the apparatus.11 Only use attachments/accessories specified by the manufacturer.12 Use only with the cart, stand, tripod, bracket, or table specified by the manufacturer, or sold with the apparatus. When a cart is used, use caution when moving the cart/apparatus combination to avoid injury from tip-over.13 Unplug this apparatus during lightning storms or when unused for long periods of time.14 Refer all servicing to qualified service personnel. Servicing is required when the apparatus has been damaged in any way, such as power-supply cord or plug is damaged, liquid has been spilled or objects have fallen into the apparatus, the apparatus has been exposed to rain or moisture, does not operate normally, or has been dropped.(98-6500)(3 wires)CAUTION: TO REDUCE THE RISK OF ELECTRIC SHOCK, DO NOT REMOVE COVER (OR BACK). NO USER-SERVICEABLE PARTS INSIDE. REFER SERVICING TO QUALIFIED SERVICE PERSONNEL.CAUTIONRISK OF ELECTRIC SHOCKDO NOT OPENWARNINGTO REDUCE THE RISK OF FIRE OR ELECTRIC SHOCK, DO NOT EXPOSE THIS APPARATUS TO RAIN OR MOISTURE.IMPORTANTPlease record the serial number of this unit in the space below.Model:Serial No.:The serial number is located on the bottom or rear of the unit.Retain this Owner's Manual in a safe place for future reference.IMPORTANT NOTICE FOR THE UNITED KINGDOMConnecting the Plug and CordWARNING: THIS APPARATUS MUST BE EARTHEDIMPORTANT. The wires in this mains lead are coloured in accordance with the following code:GREEN-AND-YELLOW : EARTHBLUE : NEUTRALBROWN : LIVEAs the colours of the wires in the mains lead of this apparatus may not correspond with the coloured markings identifying the terminals in your plug proceed as follows:The wire which is coloured GREEN-and-YELLOW must be connected to the terminal in the plug which is marked by the letter E or by the safety earth symbol or colored GREEN or GREEN-and-YELLOW.The wire which is coloured BLUE must be connected to the terminal which is marked with the letter N or coloured BLACK.The wire which is coloured BROWN must be connected to the terminal which is marked with the letter L or coloured RED.

参考になったと評価
  42人が参考になったと評価しています。

このマニュアルの目次

  • 1 .
    ENDEFRESZHJAPowered Near-...
    ENDEFRESZHJAPowered Near-field Reference Monitors & SubwooferOWNERS MANUALBEDIENUNGSANLEITUNGMODE DEMPLOIMANUAL DE INSTRUCCIONES取扱説明書MSP seriesPowered Monitor SpeakerMSP7 STUDIOMSP5 STUDIOPowered SubwooferSW10 STUDIO
  • 2 .
    The above warning is loca...
    The above warning is located on the rear of the unit.Explanation of Graphical SymbolsThe lightning flash with arrowhead symbol within an equilateral triangle is intended to alert the user to the presence of uninsulated "dangerous voltage" within the produc...
  • 3 .
    FrancaisEspanol English D...
    FrancaisEspanol English DeutschContents4Precautions5Setting Up for Superior Monitor SoundControl and Functions11MSP7 STUDIO, MSP5 STUDIO12SW10 STUDIO65Specifications66Dimensions67Performance graph67Block DiagramInhalt14Vorsichtsmanahmen15Aufstellung fur de...
  • 4 .
    54 MSP7 STUDIO/MSP5 STUD...
    54 MSP7 STUDIO/MSP5 STUDIO/SW10 STUDIO 取扱説明書安全上のご注意ご使用の前に、必ずこの「安全上のご注意」をよくお読みください。ここに示した注意事項は、製品を安全に正しくご使用いただき、お客様や他の方々への危害や財産への損害を未然に防止するためのものです。必ずお守りください。お読みになったあとは、使用される方がいつでも見られる所に必ず保管してください。 ■記号表示についてこの製品や取扱説明書に表示されている記号には、次のような意味があります。 ■「警告」と「注意」に...
  • 5 .
    MSP7 STUDIO/MSP5 STUDIO/...
    MSP7 STUDIO/MSP5 STUDIO/SW10 STUDIO 取扱説明書 55注意長期間使用しないときや落雷のおそれがあるときは、必ずコンセントから電源プラグを抜く。感電や火災、故障の原因になることがあります。電源プラグを抜くときは、電源コードを持たずに、必ず電源プラグを持って引き抜く。電源コードが破損して、感電や火災の原因になることがあります。この機器を移動するときは、必ず電源コードなどの接続ケーブルをすべて外した上で行なう。コードをいためたり、お客様や他の方々が転倒したりするおそれがありま...
  • 6 .
    56 MSP7 STUDIO/MSP5 STUD...
    56 MSP7 STUDIO/MSP5 STUDIO/SW10 STUDIO 取扱説明書優れたモニター環境の構築 優れたモニター環境の構築他のオーディオ機器や音楽制作用機器と違って、スタジオモニターはセットアップの方法次第で最終的なサウンドが飛躍的に向上します。ここでモニター環境の基礎を学んで、ヤマハのMSPシリーズの優れた能力を十分に発揮させてみましょう。リスニングとモニタリングの違い家のリビングルームで音楽を聞くリスニングと、スタジオでミキシングやレコーディングをするためのモニタリングは、一般的に...
  • 7 .
    MSP7 STUDIO/MSP5 STUDIO/...
    MSP7 STUDIO/MSP5 STUDIO/SW10 STUDIO 取扱説明書 57 スピーカーの設置モニター環境を構築するとき、スピーカーの設置は最も重要なポイントの1つですが、モニター環境を改善するには費用や時間がかかってしまうと諦めがちです。特に、小さいスタジオでスピーカーを設置するとき、大きな障害物があるとやっかいです。スピーカーを設置するスペースが十分にあるなら問題ありませんが、スペースが限られている場合は、より良いパフォーマンスを引き出すためにちょっとした計測と調節で驚くほど改善され...
  • 8 .
    58 MSP7 STUDIO/MSP5 STUD...
    58 MSP7 STUDIO/MSP5 STUDIO/SW10 STUDIO 取扱説明書 スイートスポットステレオでもサラウンドのミキシングでも、メインフロントスピーカー 2台と自分の位置(リスニングポイント)3点で正三角形を作るようにします。(最も適したリスニングポイントは、スイートスポットと呼ばれます。)つまり、2台のスピーカーから自分の位置までの距離と、2台のスピーカー同士の距離を同じにします。また、60°の位置に設置した両方のスピーカーを自分の位置に直接向くように、内側に向けて設置してください。...
  • 9 .
    MSP7 STUDIO/MSP5 STUDIO/...
    MSP7 STUDIO/MSP5 STUDIO/SW10 STUDIO 取扱説明書 59 サブウーファーを追加サブウーファーを加えるとステレオのミキシングが見違えるほど良くなります。低音が十分に聞こえないと、良質なサウンドにすることができません。サブウーファーの優れた超低音再生は、ミックス全体の質を良くします。サブウーファーの位置は、メインスピーカーほど重要ではありません。なぜなら、サブウーファーは約200 Hz以下の周波帯域で再生するため、指向性が広いからです。別の言い方をすると、人間の耳では、その...
  • 10 .
    60 MSP7 STUDIO/MSP5 STUD...
    60 MSP7 STUDIO/MSP5 STUDIO/SW10 STUDIO 取扱説明書今まで説明したことをまとめると、メインフロント、センター、リアのスピーカーは、リスニングポイントを中心に円周上にすべて設置されます。リスニングポイントから同じ距離にすべてのスピーカーを設置するために、ひもを切ったりひもに印を付けたりして、左のメインフロントスピーカーから右のメインフロントスピーカーまでの正確な距離を最初に測るといいでしょう。マイクスタンドなどにそのひもを取り付けて、リスニングポイントに置きます。それぞ...
  • 11 .
    MSP7 STUDIO/MSP5 STUDIO/...
    MSP7 STUDIO/MSP5 STUDIO/SW10 STUDIO 取扱説明書 61 5.1chサラウンドのおすすめ設定(MSP7 STUDIO or MSP5 STUDIO x 5, SW10 STUDIO x 1) ●MSP7 STUDIOまたはMSP5 STUDIOのLEVELコントロールを12時に合わせて、ノミナル入力に合わせます。SW10STUDIOのLEVEL コントロールをMSP7 STUDIOを使用している場合は1時*ぐらいに、MSP5 STUDIOを使用してい る場合は11時*ぐら...
  • 12 .
    62 MSP7 STUDIO/MSP5 STUD...
    62 MSP7 STUDIO/MSP5 STUDIO/SW10 STUDIO 取扱説明書各部の名称と機能MSP7 STUDIO、MSP5 STUDIO1POWERスイッチこの機器の電源をON/OFFするスイッチです。このスイッチをONにすると、フロントパネルのPOWERインジケーター(8)が緑色に点灯します。2AC IN端子付属の電源コードを接続します。まずこの機器と電源コードを接続し、次に電源プラグをコンセントに差し込みます。3LOW TRIMスイッチ低域のレベルを調整します。MSP7 STUDIOの...
  • 13 .
    MSP7 STUDIO/MSP5 STUDIO/...
    MSP7 STUDIO/MSP5 STUDIO/SW10 STUDIO 取扱説明書 63SW10 STUDIO1POWERスイッチこの機器の電源をON/OFFするスイッチです。このスイッチをONにすると、フロントパネルのPOWERインジケーター(8)が緑色に点灯します。2AC IN端子付属の電源コードを接続します。まずこの機器と電源コードを接続し、次に電源プラグをコンセントに差し込みます。3PHASEスイッチこの機器から出力される音の位相を切り替えるスイッチです。通常は“NORM.”で使用します。ただし...
  • 14 .
    64 MSP7 STUDIO/MSP5 STUD...
    64 MSP7 STUDIO/MSP5 STUDIO/SW10 STUDIO 取扱説明書保証とアフターサービスサービスのご依頼、お問い合わせの必要がございましたら、お買い上げ店またはヤマハ修理ご相談センターまでご連絡ください。 ●保証書この製品には保証書が付属しています。販売店印、お買い上げ日などの記入をお確かめのうえ、大切に保管してください。 ●保証期間保証書は当社がお客様に保証期間内の無償サービスをお約束するもので、この製品の保証期間はお買い上げ日から1年間です。詳しくは保証書をご確認ください。 ●...
  • 15 .
    65 FrancaisEspanol Engli...
    65 FrancaisEspanol English Deutsch Specifications * These specifications apply to rated power supplies of 100, 120, 230 and 240 V. MODEL MSP7 STUDIO MSP5 STUDIO SW10 STUDIO GENERAL Type Biamp 2-way Powered Speaker Biamp 2-way Powered speaker Powered subwo...
  • 16 .
    EnglishDeutschFrancaisEs...
    EnglishDeutschFrancaisEspanol 66 Dimensions MSP5 STUDIO !" #$ %"& ' ' 'SW10 STUDIO MSP7 STUDIO ' !" #$ %"&
  • 17 .
    67 FrancaisEspanol Engli...
    67 FrancaisEspanol English Deutsch MSP5 STUDIOSW10 STUDIO MSP7 STUDIO MSP7 STUDIO MSP5 STUDIO SW10 STUDIO -10-20-30-40 -10-20-30-40 -10-20-30-40 ! ! " !"""#"! ! " !"""#"! ! " !"""#" $%&# Block Diagram Performance graph
  • 18 .
    For details of products,...
    For details of products, please contact your nearest Yamaha represen-tative or the authorized distributor listed below.Pour plus de details sur les produits, veuillez-vous adresser a Yamaha ou au distributeur le plus proche de vous figurant dans la liste ...

この取扱説明書が関連付けられている製品

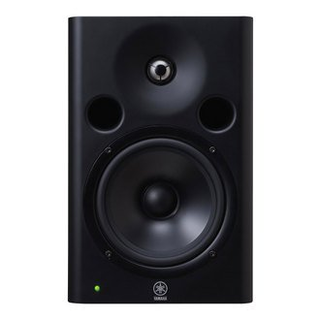
MSP5 STUDIOの取扱説明書・マニュアル
MSP7 STUDIOの取扱説明書・マニュアル