Q&A
取扱説明書・マニュアル (文書検索対応分のみ)
8 件の検索結果
290 - 300 件目を表示
全般
質問者が納得カメラ機能は2万円ほどのカメラと同じ
バッテリー保ちはもともと良くない(フルチャージで撮影可能コマ数140)
アンドロイド端末としていじくりまわしてると、熱くなるしすぐバッテリー切れになる。
もしアンドロイドスマホと同じように使おうと考えてるなら間違い
あくまでも主体はカメラであり、アンドロイドはおまけ。
撮ってすぐ写真をブログやSNSなんかにアップロードしたい人には向いてるとおもいます。(wi-fi接続)
4693日前view26
全般
質問者が納得自分ならS90ですね~
やはり性能面と画質を選びます
新品でこの価格ですよ
http://m.kakaku.com/itemview/itemview.asp?prd=K0000053612&guid=ON
4960日前view60
全般
質問者が納得下記URLにフリーソフトがありますので、それで画像読み込ませれば情報がかなり読め、編纂も出来ます。
(ダウンロード というところを押して下さい)
http://www.ryouto.jp/f6exif/
使い方もURL内にあります。
便利で私も使わせて貰ってます。
追記
複数枚の写真情報を一気に消す場合は下記が便利です。(消すだけですが‥)
http://www.vector.co.jp/soft/winnt/art/se475864.html
5108日前view72
全般
質問者が納得ニコンのL19は、L20が出たこともあって、1万円位まで値崩れして
いますね。余計なことを考えずにオートでばしゃばしゃ撮るということ
なら、クチコミを読む限りでは良いのではないかと思いますが。
そして、何よりも、電池の持ちが良いことがいいですね。
http://bbs.kakaku.com/bbs/K0000018905/#10291988
しかし、この機種はISO感度をマニュアル設定できないのが、私と
しては嫌です。
それと、ニコンは、間違いなくこの機種を台湾メーカーに設計段階から
丸投げして作っても...
5788日前view70
全般
質問者が納得500万画素で十分です。
A4くらいにプリントしなければ、違いなんてほとんどありません。
私は1000万画素のデジカメを買い、どうせならと思って無駄に最高画質で撮ってしまうので
メモリがすぐなくなって大変です。
6435日前view85
全般
質問者が納得2大メーカーですから同じクラスならどちらを選んでも後悔ないでしょう
後は総体的なこのみでしょうか。ニコンのスッキリデザインが個人的には
好きです。
6451日前view77
全般
質問者が納得finepix f40fd買いました。デジカメって撮影する目的によってまた違うんじゃないでしょうか?富士は室内撮りに強いとのこと(赤ちゃんを撮影するために購入しました)が評判とおりで満足してます。
あと1200万画素とあると、f50fdの事を言うんだと思いますがカカクコムをご覧になりましたか?読めば分かると思いますがあまり評判良くありません。f31fdからどんどん劣化してるとか色々書いてあります。
自分のは800万ですが、全く問題ないです。
6510日前view64
全般
質問者が納得Nikon COOLPIX 885 は一眼ではなく
コンパクトデジカメですね。
なので、キャノン IXY DIGITAL 800 IS
でも性能的には問題ないと思います。
ニコンの操作感に慣れている、
カメラはニコンが好きだ、というお父様の考えであれば
Nikon COOLPIX P4あたりが良いのではないでしょうか?
さらに、
機械好きのお父様ということで
今度(10月下旬)発売になる
いかにも本格的カメラというデザインで
しかも結構コンパクトな
キャノン PowerShot G7 などいかがでしょうか...
6901日前view81
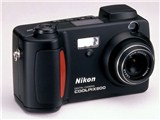
- 1 -Reference ManualDIGITAL CAMERACOOLPIX 800ContentsOverviewFirst StepsPutting Batteries in Your CameraInserting and Removing Memory CardsChoosing a Language for the MenusSetting the Time and DateTaking Your First PhotographUsing the Buttons (A-REC, M-REC)Flash SettingsFocus SettingsUsing the Self-TimerImage QualityUsing the Buttons (PLAY)
- 2 -ContentsThe Camera MenusThe A-REC MenuUsing Folders (A-REC, M-REC)LCD BrightnessAuto OffFormatting Memory CardsSEQ.XFERThe M-REC MenuVGALens Converter Settings (LENS)Black-and-White PhotographyMaking a Panorama-Tips (AE-LOCK)User SettingsRestoring Default SettingsLCD On/OffThe Controls MenuThe Playback MenuDeleting Multiple PhotographsUsing Folders (Playback)SlideshowProtecting Photographs from DeletionHiding Photographs During PlaybackPreparing Photographs for PrintingThe Controls Menu (PLAY)Connectio...
- 3 -Notes on illustrationsThe illustrations in this manual are composites. Photographs taken with theCOOLPIX 800 may differ from those shown here.The illustrations in this manual show the LCD monitor used in the NTSC-compatible model of the COOLPIX 800. Owing to differences in videostandards, the PAL-compatible model will display items in positions slightlydifferent from those shown here.OverviewOverviewThank you for buying a COOLPIX 800. This Reference Manualexplains how to use and care for your COOLP...
- 4 -Important! Before inserting batteries or handlingmemory cards, be sure to read the warnings andcautions in For Your Safety.Notes on batteriesThe camera's clock-calendar is powered by a separate rechargable capaci-tor. When you put batteries in your camera for the first time or after a longperiod of storage, wait a few hours for the capacitor to recharge beforeremoving the main batteries. The capacitor will remain charged for sometime after the main batteries have been removed.Photographs stored on t...
- 5 -Inserting and Removing Memory Cards1 Turn the camera offTurn the mode dial to OFF.2 Open the card slotTurn the camera upside down (if thecamera is on a tripod, detach it from thetripod first), then open the card slot cover.3 Insert the memory card, orチcInsert the card as shown at right, sliding itin until it is firmly in place at the back of theslot and the card-release button pops up.About memory cardsMemory cards can be removed from the camera without loss of data whenthe camera is off. Once removed...
- 6 -The clock batteryThe clock-calendar is powered by a separate, rechargeable capacitor,which is charged as necessary when the batteries are installed. If the camerahas been stored with the main batteries removed for a long period of time,the clock may need to be reset. Once the batteries have been reinserted,the capacitor will recharge in several hours, during which time the batteriesshould be left in the camera.Using the menusIf the menu does not appear when you press the MENU button, press theMONITOR...
- 7 -Sleep modeThe LCD monitor turns off automatically if no operations are performedfor a certain period of time (the length of time before the camera enterssleep mode can be set using the AUTO OFF item in the setup menu; see"The Camera Menus: The A-REC Menu," below). To turn the monitor onagain, half-press the shutter-release button.The MONITOR buttonThe MONITOR button controls the LCD monitor. Press the MONITORbutton once to hide settings, a second time to turn the monitor off, and athird time to turn ...
- 8 -First Steps: Taking Your First PhotographAUTONORMALImage quality (normal)Flash (auto)Step 3-Adjust camera settingsIn automatic mode, the user can adjust flash, focus, exposurecompensation, and image quality. The default settings, whichproduce the best results in most circumstances, are automatic flash,autofocus, no exposure compensation, an image quality of "nor-mal," and an image size of "full" (1,600 × 1,200 pixels).1/125F3.8These settings allow the camera to set focus automatically at anydistance ...
- 9 -NoteIf the LCD monitor is off, you will not be able to take photographs whenthe AF/Flash indicator blinks green. When the monitor is on, however,photographs can be taken even if the camera is not properly focused.Check focus in the LCD monitor before pressing the shutter-releasebutton all the way down.First Steps: Taking Your First PhotographNoteWhen using the viewfinder at ranges of less than 90cm (oneyard), frame your photographs using the smaller of the twoframes in the viewfinder display (the are...
- 10 -First Steps: Taking Your First Photograph AUTODELETE1 IMAGEDELETEYESNOSET➔SHUTTERBKNotesDo not remove the batteries while photos are being recorded to, ordeleted from, memory.The pause and delete functions described above are only available whenphotos are taken at an image size of "full" (1,600 × 1,200 pixels).The delete dialog disappears if no action is taken for ten seconds. In thiscase the image will be saved and the camera will return to shooting mode.NoteThe camera may become warm during use, b...
- 1


