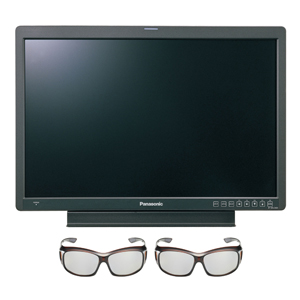
BT-3DL2550
x
Gizport

BT-3DL2550の取扱説明書・マニュアル [全64ページ 9.97MB]

3
BT-3DL2550-OI.pdf
Maruko H. - 2013-09-01
ftp://ftp.panasonic.com/.../BT-3DL2550-OI.pdf - 9.97MB - キャッシュ
13054view
64page / 9.97MB
Share (facebook)
29 / 64 ページ
 
29 / 64 ページ
ファイルを開く
現在のページURL
29Main Menu (continued)Underlined values indicate factory defaults.*1Changes are not reflected to a still image in the main window in the split-screen display of the "TWO WINDOW" function.*2 These functions are not available when "RGB-COMP." under "YP BP R/RGB" or "DVI-COMP." under "DVI-D" is selected in the "INPUT SELECT" menu (i page 40 ). The gamma curve is set to STANDARD when "RGB-COMP." or "DVI-COMP." is selected. Selecting WIDE1 to 3 for "COLOR SPACE" produces the gamma curve fixed to that "COLOR SPACE."*3 The following sharpness values are available and the settings for the selected input signal is displayed. Adjustment status during selection appears at the bottom right of the screen. 1) VIDEO system input (VIDEO) (the factory defaults are SHARPNESS MODE: LOW)2) HD for any other input (the factory defaults are SHARPNESS MODE: HIGH). 3) SD for any other input (the factory defaults are SHARPNESS MODE: LOW).*4 Selecting "VAR1", "VAR2" and "VAR3" engages the WB adjustment mode ( ipage 31). *5 Procedure for selecting USER 0 - 63:1) Press [ENTER] ("USER" changes to blue). 2) Use [ , ] to select 0 - 63 and press [ENTER]. *6 An asterisk (*) is displayed after the color temperature value in 3D mode. (Example display: D65*) This indicates that it is an adjusted value for when using 3D Polarized Eyewear.*7 Factory default setting: SMPTE-C (U.S.A. and Canada), EBU (other countries)*8 The SDI1 signal and SDI2 signal (displayed when "COMPARISON" is selected in SIMUL MODE) are set to the same color space.*9 As the red reproduction of this monitor is truer to the original than previous models (exc. BT-LH2550) red appears darker. Used when rendering colors that have a softer shade of red.VIDEO CONFIGSub menu Setting DescriptionGAMMA SELECT *1*2STANDARDSTDIO/PSTFILMSelects gamma curve. The gamma curve in the sub-window can be set in the split-screen display and sub-window display (single screen) of the "TWO WINDOW" function.<STANDARD>Standard mode<STDIO/PST>Color emphasis mode (a mode that approximates CRT display capability suitable for studio or postproduction application)<FILM> Film mode (For VARICAM use)The mark appears at the top left of the screen when "FILM" is selected. COLOR SPACE *7*8SMPTE-C (EX)EBU (EX)SMPTE-C EBUITU-709WIDE1WIDE2WIDE3Sets the color space. The color space in the sub-window can be set in the split-screen display and sub-window display (single screen) of the "TWO WINDOW" function. <SMPTE-C (EX)> Redness changed from <SMPTE-C> mode. *9<EBU (EX)> Redness changed from <EBU> mode. *9<SMPTE-C> SMPTE-C standard<EBU> EBU standard<ITU-709> ITU-R BT. 709 standard<WIDE1> Sets the gamma curve to 2.2 in wide color gamut (using Adobe color space) mode. <WIDE2> Sets the gamma curve to 1.8 in wide color gamut (using Adobe color space) mode. <WIDE3> Sets the gamma curve to 2.6 in wide color gamut (using D-Cinema color space) mode. COLOR TEMP.USER0 - 63 *5*6D93 *6D65 *6D56 *6VAR1VAR2VAR3Selects color temperature. Both the main window and sub-window can be set up in the split-screen display of the "TWO WINDOW" function. <USER 0 - 63> Adjustable settings 0 - 63 (equivalent to a color temperature range of 3,000 - 9,300K) <D93> Equivalent to a color temperature of 9,300K<D65> Equivalent to a color temperature of 6,500K<D56> Equivalent to a color temperature of 5,600K<VAR1> WB adjustment mode *4<VAR2> WB adjustment mode *4<VAR3> WB adjustment mode *4USER20 is approximately 5,000 K and USER33 is approximately 6,300 K.SHARPNESS MODE *2HIGH *3LOWSelects the width of outline correction edge. Both the main window and sub-window can be set up in the split-screen display of the "TWO WINDOW" function. <HIGH> Thin edge <LOW> Wide edgeBT-3DL2550PE(VQT2U10)_E.book 29 ページ 2010年7月8日 木曜日 午後2時12分

参考になったと評価
  5人が参考になったと評価しています。

その他の取扱説明書
303 view

このマニュアルの目次

  • 1 .
    Operating InstructionsLCD...
    Operating InstructionsLCD Video MonitorSS0710AT0 -FJ @Printed in JapanVQT2U10ENGLISHModel No. BT-3DL2550PModel No. BT-3DL2550EBefore operating this product, please read the instructions carefully and save this manual for future use.ESPANOLPara la e...
  • 2 .
    2indicates safety informa...
    2indicates safety information.WARNING:* To reduce the risk of fire or electric shock, do not expose this equipment to rain or moisture.* To reduce the risk of fire or electric shock, keep this equipment away from all liquids. Use and store only in location...
  • 3 .
    3Read this first! (for BT...
    3Read this first! (for BT-3DL2550P) (continued)FCC NOTICE (USA)IMPORTANT SAFETY INSTRUCTIONS1) Read these instructions. 2) Keep these instructions. 3) Heed all warnings. 4) Follow all instructions. 5) Do not use this apparatus near water. 6) Clean only wi...
  • 4 .
    4Read this first! (for BT...
    4Read this first! (for BT-3DL2550E)indicates safety information.AC AdapterThe rating plate is on the underside of the AC Adapter.Operating precautionOperation near any appliance which generates strong magnetic fields may give rise to noise in the video and...
  • 5 .
    5Read this first! (for BT...
    5Read this first! (for BT-3DL2550E) (continued)indicates safety information.Caution for AC Mains LeadFOR YOUR SAFETY PLEASE READ TH E FOLLOWING TEXT CAREFULLY.This product is equipped with 2 types of AC mains cable, Type C and Type BF.Appropriate mains ca...
  • 6 .
    6Read this first! (for BT...
    6Read this first! (for BT-3DL2550E) (continued)EMC NOTICE FOR THE PURCHASER/USER OF THE APPARATUS1. Applicable standards and operating environment (BT-3DL2550E)The apparatus is compliant with:* standards EN55103-1 and EN55103-2 1996.11, and* electromagnet...
  • 7 .
    7CautionsAbout 3D Polariz...
    7CautionsAbout 3D Polarized Eyewear*Do not drop, exert pressure on, or step on the 3D Polarized Eyewear.*Be careful not to trap a finger in the hinge section of the 3D Polarized Eyewear.*Always store the 3D Polarized Eyewear in the case provided when not i...
  • 8 .
    8Precautions for Use*The ...
    8Precautions for Use*The LCD screen is manufactured to precise specifications. Although over 99.99% of the pixels function normally, 0.01% of the pixels are either missing or constantly lit (red, blue or green). This is normal and not a cause for concern.*...
  • 9 .
    9OutlineThe BT-3DL2550P/E...
    9OutlineThe BT-3DL2550P/E LCD monitor is a 64.8 cm (25.5 inch) full HD LCD display panel designed especially for broadcasting service and business use._Compact 25.5 type full HD monitor*The monitor is equipped with a high-resolution (1920 x 1200) IPS LCD p...
  • 10 .
    10Outline (continued)SID...
    10Outline (continued)SIDE BY SIDEA signal split into video for left-eye and right-eye and arranged side by side is input from either SDI1 or SDI2 and converted into a 3D image and displayed by the monitor.Input through DVI-D is also supported.3D display a...
  • 11 .
    11DimensionsVideo monitor...
    11DimensionsVideo monitor unitAC Adaptor10-M4,L=10mm Max46 (1.8)215 (8.5)60 (2.4)100 (3.9)200 (7.9)169 (6.7)100 (3.9)100 (3.9)116.5 (4.6)220 (8.7)196 (7.7)12 (0.5)18 (0.7)370 (14.6)346 (13.6)440 (17.3)30 (1.2)410 (16.1)599 (23.6)343.8 (13.5)550.08 (21.7)*W...
  • 12 .
    12Controls and Their Func...
    12Controls and Their FunctionsTally lamp (ipage 39, 53)The color of the tally lamp Indicates monitor status. Red tally or green tally displayed according to GPI input.Front panel controls ( ipage 13)POWER switch ( / ) The POWER switch is located at the bot...
  • 13 .
    13Controls and Their Func...
    13Controls and Their Functions (continued)INPUT button ( )Selects the signal input line.Each press of the button changes the lines in the following order: VIDEO i SDI1 i SDI2 i YPBP R/RGB i DVI-D.VIDEO : VIDEO input (analog composite signal)SDI1 : Serial...
  • 14 .
    14Controls and Their Func...
    14Controls and Their Functions (continued)SDI terminal (BNC) *1*2IN1 : This is the SDI input terminal (compatible with HD/SD automatic switching).* In 3D mode with simultaneous double input (SIMUL), this is the L input terminal.IN2 : This is the SDI input...
  • 15 .
    15Controls and Their Func...
    15Controls and Their Functions (continued)GPI input terminal (D-SUB 9-pin) *1External control is possible by using a GPI signal.RS-232C terminal (D-SUB 9-pin)External control is possible by using an RS-232C signal.HEADPHONES output connector (stereo mini-...
  • 16 .
    16Power Supply1. Connect ...
    16Power Supply1. Connect the power cable to the AC inlet of the AC adapter.Use the supplied screw (for securing power cable)and the power cable hook to secure the power cableto the AC adapter.2. Slide the supplied DC cable into the DC OUT terminal on the A...
  • 17 .
    17How to Use the On Scree...
    17How to Use the On Screen MenuThe screen displays eight types of information: input signal status, picture/volume adjusting menu status, sharpness display, FUNCTION display, audio level meter display, menu display, TIME CODE display and CLOSED CAPTION dis...
  • 18 .
    18How to Use the On Scree...
    18How to Use the On Screen Menu (continued)*Press the ADJUST button ( i page 13, ) to open the picture/volume adjusting menu.*To clear the display, press the ADJUST button again, press the MENU button or leave it idle for 10 seconds.*Only adjustments tha...
  • 19 .
    19How to Use the On Scree...
    19How to Use the On Screen Menu (continued)*This is the menu display.*It disappears after 2 minutes of inaction.*You can change position of the display ( ipage 32, "MENU POSITION").*Options unavailable in 3D mode appear gray and cannot be selected.*Use th...
  • 20 .
    20How to Use the On Scree...
    20How to Use the On Screen Menu (continued)*Use the menu to display and set closed caption display for VIDEO (NTSC) signals. It also allows you to select display mode (CC1 to CC4) ( ipage 43, "CLOSED CAPTION" and "MODE SELECT" in the "DISPLAY SETUP" menu....
  • 21 .
    21How to Use the On Scree...
    21How to Use the On Screen Menu (continued)1. Press [ADJUST] to display the picture/volume adjusting menu.2. Press [ , ] to select item to adjust.The selected item changes to white.3. Press [ , ] to adjust.PHASE 0 - 60 (30)CHROMA 0, 10 - 60 (30)BRIGHT 0...
  • 22 .
    22User DataYou can save a...
    22User DataYou can save and load up to five combinations of menu settings and picture/volume adjustments as user data. You can also return settings and adjustments to their factory defaults.User data include the following settings. *Menu settings except "S...
  • 23 .
    23Main MenuMenu configura...
    23Main MenuMenu configurationMAIN MENUVIDEO CONFIG *1SYSTEM CONFIGFUNCTION *1INPUT SELECT *1GPI *1MARKERGAMMA SELECTCOLOR SPACE COLOR TEMP.SHARPNESS MODESHARPNESS HSHARPNESS VI-P MODEMONOANAMOSD ASPECTSCANCOLOR GAIN RCOLOR GAIN BB.LIGHT/CONT.BACKLIGHTMEN...
  • 24 .
    24Main Menu (continued)U...
    24Main Menu (continued)Underlined values indicate factory defaults.3DSub menu Setting DescriptionSYSTEM3D2DSwitches between 2D and 3D<2D> Sets monitor to work in 2D mode<3D> Sets monitor to work in 3D (spectroscopic) mode3D INPUT TYPE SIMULLINE BY LINESID...
  • 25 .
    25Main Menu (continued)N...
    25Main Menu (continued)Not available in the split-screen display of the "TWO WINDOW" function or COMPARISON in 3D mode. (CROSS HATCH is not affected.)Underlined values indicate factory defaults.*1 This setting is turned "ON" when receiving marker control ...
  • 26 .
    26Main Menu (continued)*...
    26Main Menu (continued)*1 Remote control via RS-232C ends in error (error response: ER001) when "GPI PRESET1" or "GPI PRESET2" is selected with the GPI function.*2 TYPE1 and TYPE2 area marker size depends on the "MARKER TYPE" setting.*3 Display size for S...
  • 27 .
    27Main Menu (continued)_...
    27Main Menu (continued)_16:9 marker(Displayed for HD input and SD input in 16:9 ratiomode.) This marker is only displayed as a vertical bar. The section becomes the "MARKER BACK". VISTA marker, CNSCO markerThis marker is displayed as a horizontal dotted ...
  • 28 .
    28Main Menu (continued)_...
    28Main Menu (continued)_"CROSS HATCH"The "CROSS HATCH" function enables display of markers at regular vertical and horizontal intervals to facilitate composition and other tasks. The width of marker lines is 1 dot, the markers consist of 1 line, and are s...
  • 29 .
    29Main Menu (continued)U...
    29Main Menu (continued)Underlined values indicate factory defaults.*1Changes are not reflected to a still image in the main window in the split-screen display of the "TWO WINDOW" function.*2 These functions are not available when "RGB-COMP." under "YP BP ...
  • 30 .
    30Main Menu (continued)*...
    30Main Menu (continued)*1 These functions are not available when "RGB-COMP." under "YP BP R/RGB" or "DVI-COMP." under "DVI-D" is selected in the "INPUT SELECT" menu ( ipage 40).*2 To use the "TWO WINDOW" ( i page 44) function,1) Change settings after exit...
  • 31 .
    31Main Menu (continued)_...
    31Main Menu (continued)_ WB adjustment modeSelect "VAR1" to "VAR3" for "COLOR TEMP." in the "VIDEO CONFIG" menu to make "WHITE BALANCE VAR1" to "WHITE BALANCE VAR3" (WB) adjustments. Underlined values indicate factory defaults.*1 Selecting "COLOR TEMP." a...
  • 32 .
    32Main Menu (continued)U...
    32Main Menu (continued)Underlined values indicate factory defaults.*1 When the monitor is shipped, settings for "USER1" - "USER5" are identical to "FACTORY." *2 "H SHIFT" (ipage 24), "H POSITION", "V POSITION", "PHASE" and "CLOCK" ( ipage 41) cannot be sa...
  • 33 .
    33Main Menu (continued)_...
    33Main Menu (continued)_CALIBRATIONThe CALIBRATION function in this unit measures LCD panel characteristics from low to high brightness values and internal monitor processing handles CALIBRATION. CALIBRATION does not rely on image quality settings since i...
  • 34 .
    34Main Menu (continued)_...
    34Main Menu (continued)_CALIBRATIONSelect CALIBRATION in the "SYSTEM CONFIG" menu to open the following menus.*1 "EXECUTING" is displayed during "AUTO CALIBRATION" and "COMPLETE" appears when calibration ends. "INCOMPLETE" appears if calibration could not...
  • 35 .
    35Main Menu (continued)U...
    35Main Menu (continued)Underlined values indicate factory defaults.*1 Changes in settings change menu settings. FUNCTIONSub menu Settings DescriptionFUNCTION 1 - FUNCTION 5HV DELAYAUTOSETUPBLUE ONLYGAMMA SELECTCOLOR SPACESD ASPECTSCANTWO WINDOWSUB INPUT S...
  • 36 .
    36Main Menu (continued)S...
    36Main Menu (continued)Sub menu Settings DescriptionFUNCTION 1 - FUNCTION 5<3D INPUT TYPE > Selects the input type in 3D mode.SIMUL i LINE BY LINE i SIDE BY SIDE Selects the display method in "SIMUL" mode.LINE BY LINE i OVERLAY i SDI1(L) i SD...
  • 37 .
    37Main Menu (continued)_...
    37Main Menu (continued)_FUNCTION setting restrictionsSettings are not available under the following conditions. SettingConditions that disable operationHV DELAY In TWO WINDOW mode, "INVALID FUNCTION" appears to indicate that operation is disabled.When "RG...
  • 38 .
    38Main Menu (continued)_...
    38Main Menu (continued)_Functions and operating status displayed on screen when FUNCTION buttons are pressedPressing any of the [FUNCTION1] to [FUNCTION5] buttons displays the operations assigned to each button as shown below. HV DELAYDELAY OFF, H DELAY...
  • 39 .
    39Main Menu (continued)"...
    39Main Menu (continued)"GPI CONTROL" is used to enable and disable GPI functions and assign functions to each of the GPI terminal pins (i page 53). Underlined values indicate factory defaults.Note: This function is not available when, "SD ASPECT" operatio...
  • 40 .
    40Main Menu (continued)U...
    40Main Menu (continued)Underlined values indicate factory defaults.*1 All five input lines (VIDEO, SDI1, SDI2, YPBP R/RGB, DVI-D) cannot be turned off. An attempt to turn off all inputs ends when the fourth input line is turned off since it will not be po...
  • 41 .
    41Main Menu (continued)_...
    41Main Menu (continued)_COMP. Set "RGB-COMP" under "YP BP R/RGB" in the "INPUT SELECT" menu and select the "RGB-COMP." input line to enable the "COMP" menu. Underlined values indicate factory defaults. *1 Run "AUTOSETUP" when video is displayed across th...
  • 42 .
    42Main Menu (continued)U...
    42Main Menu (continued)Use the following submenus to set headphone output and audio level meters. Underlined values indicate factory defaults.*1 When ANALOG is selected in the "INPUT SELECT" menu, the LEVEL METER does not indicate the audio level meter ev...
  • 43 .
    43Main Menu (continued)U...
    43Main Menu (continued)Underlined values indicate factory defaults.*1 Available during HD-SDI input signals. Displays the signal input from SDI1 (L) when 3D mode is set to SIMUL.*2 Available during VIDEO (NTSC) input. Closed captions appear as bright line...
  • 44 .
    44Main Menu (continued)_...
    44Main Menu (continued)_TWO WINDOW function The "TWO WINDOW" function displays two inputs selected from VIDEO, SDI1/2, YPBP R/RGB or DVI-D in two windows.Each press of the button ([ FUNCTION1] to [FUNCTION5]) ( ipage 35) to which the "TWO WINDOW" function...
  • 45 .
    45Main Menu (continued)_...
    45Main Menu (continued)_TWO WINDOW sizeThe "TWO WINDOW SIZE" setting in the "DISPLAY SETUP" menu determines the size of the main window and sub-window.*Main window (SD) and sub-window (SD)*Main window (HD) and sub-window (HD)19201280 640 1280 640 960 960"...
  • 46 .
    46Main Menu (continued)*...
    46Main Menu (continued)*Main window (HD) and sub-window (SD)*Main window (SD) and sub-window (HD)*When the main window and sub-window display video from the same input line, TWO WINDOW SIZE is M/M.19201280 640 1280 640 960 960"TWO WINDOW SIZE" setting: L/...
  • 47 .
    47Main Menu (continued)_...
    47Main Menu (continued)_TWO WINDOW screen syncIn single screen display, the TWO WINDOW screen is synchronized to the frame rate frequency of the input signal format. In split screen display, the screen used as a reference for synchronization changes with ...
  • 48 .
    48Main Menu (continued)U...
    48Main Menu (continued)Underlined values indicate factory defaults.*1 The menu can be displayed when the lock is engaged. Only "CONTROL/LOCAL ENABLE" menu items are available when the lock is engaged. The picture/volume adjusting menu does not accept chan...
  • 49 .
    49Main Menu (continued)_...
    49Main Menu (continued)_ Setting limitations in 2D mode ( : available, : can be set, but function is disabled, -: not available)*1 This function is not available in the split-screen display of the "TWO WINDOW" function. *2 Settings are reflected to the s...
  • 50 .
    50Main Menu (continued)I...
    50Main Menu (continued)Input CHVIDEOSDI 1/2 YP BP R RGB-VIDEORGB-COMP .DVI-VIDEODVI-COMP.Setting item SD HD SD HD SD HD SD HDAUDIOINPUT SELECTEMBEDED SELECT LEMBEDED SELECT RLEVEL METERCH SELECT0dB POINTCH INFO.DISPLAYSETUPTWO WINDOW SIZE-SUB INPUT SEL. -...
  • 51 .
    51Main Menu (continued)_...
    51Main Menu (continued)_ Setting limitations in 3D mode ( : available, : can be set, but function is disabled, -: not available)*1 This function can only be set when SIMUL is selected for the "3D INPUT TYPE" option.Input CH SDI 1/2 DVI-VIDEODVI-COMP.Set...
  • 52 .
    52Main Menu (continued)I...
    52Main Menu (continued)Input CH SDI 1/2 DVI-VIDEODVI-COMP.Setting item HD HDDISPLAYSETUPTWO WINDOW SIZE---SUB INPUT SEL. - --TIME CODEPOSITION FONT SIZE MODE SELECTCLOSED CAPTION---MODE SELECT - --Picture adjustmentPHASE -CHROMA -BRIGHTCONTRASTBACKLIGHTBT...
  • 53 .
    53REMOTE Specifications T...
    53REMOTE Specifications This monitor permits remote operation via GPI/RS-232C terminal. GPI screen items correspond to the following terminals. Use the GPI menu to assign functions to each terminal ( i page 39). Functions assigned to terminals are executed...
  • 54 .
    54REMOTE Specifications ...
    54REMOTE Specifications (continued)_Priority of assigned functions*When both "MARKER1" and "MARKER2" are activated at the same time, "MARKER1" has priority. However, when the display aspect ratio is 4:3, the "MARKER1" aspect ratio is 16:9 and the "MARKER2...
  • 55 .
    55REMOTE Specifications ...
    55REMOTE Specifications (continued)_Setting command*1 This command is enabled in single screen display in "TWO WINDOW" mode and in the main window in split-screen display. *2 This command is enabled in single screen display in "TWO WINDOW" mode and in the...
  • 56 .
    56REMOTE Specifications ...
    56REMOTE Specifications (continued)*2 This command is enabled in single screen display in "TWO WINDOW" mode and in the main window and sub-window in split-screen display. *3 This command is enabled in the sub-window in single screen display in "TWO WINDOW...
  • 57 .
    57REMOTE Specifications ...
    57REMOTE Specifications (continued)Maintenance inspectionsMaintenance inspections through periodic and appropriate maintenance are essential to keep the monitor in optimum condition and ensure safe operation. Be sure to conduct the following maintenance i...
  • 58 .
    58Care and cleaning of th...
    58Care and cleaning of the monitor*Clean the cabinet and protection panel by gently wiping it with a soft cloth. To remove stubborn soiling, use a cloth dampened in a weak neutral detergent solution and thoroughly wrung out. Then wipe with a dry cloth. Any...
  • 59 .
    59Specifications_Generali...
    59Specifications_Generalindicates safety information.Dimensions (W * H * D):599 mm * 440 mm * 220 mm(23-5/8 inches * 17-5/16 inches * 8-11/16 inches) (Including stand)599 mm * 410 mm * 100 mm(23-5/8 inches * 16-1/8 inches * 3-15/16 inches) (Not including s...
  • 60 .
    60Specifications (contin...
    60Specifications (continued)_ Signal formats supported in 2D mode ( : Compatible, : Limited compatibility, -: Not compatible)*1 When 1035/59.94i signal is input, displayed as 1080/59.94i. Other various marker displays will use the 1080/59.94i marker.*2 ...
  • 61 .
    61Specifications (contin...
    61Specifications (continued)_ Signal formats supported in 3D mode ( : Compatible, : Limited compatibility, -: Not compatible)*1When 1035/59.94i signal is input, displayed as 1080/59.94i. Other various marker displays will use the 1080/59.94i marker. At ...
  • 62 .
    MEMO62BT-3DL2550PE(VQT2U1
    MEMO62BT-3DL2550PE(VQT2U10)_E.book 62 ページ 2010年7月8日 木曜日 午後2時12分
  • 63 .
    63MEMOBT-3DL2550PE(VQT2U1
    63MEMOBT-3DL2550PE(VQT2U10)_E.book 63 ページ 2010年7月8日 木曜日 午後2時12分
  • 64 .
    EPanasonic CorporationWeb...
    EPanasonic CorporationWeb Site: http://panasonic.netPanasonic Solutions Company3 Panasonic Way, Secaucus, NJ 07094 Tel: 877-803-8492www.panasonic.com/broadcast e-mail: MediaProServices.PSC@us.panasonic.comPanasonic Canada Inc.5770 Ambler Drive, Miss...