ルンバ577の取扱説明書・マニュアル [全36ページ 4.66MB]
00152.0210.v1.ALLRoomba.Manual.EN.pdf
http://www.irobot.com/.../00152.0210.v1.ALLRoomba.Manual.EN.pdf - 4.66MB
- キャッシュ
34410view
36page / 4.66MB
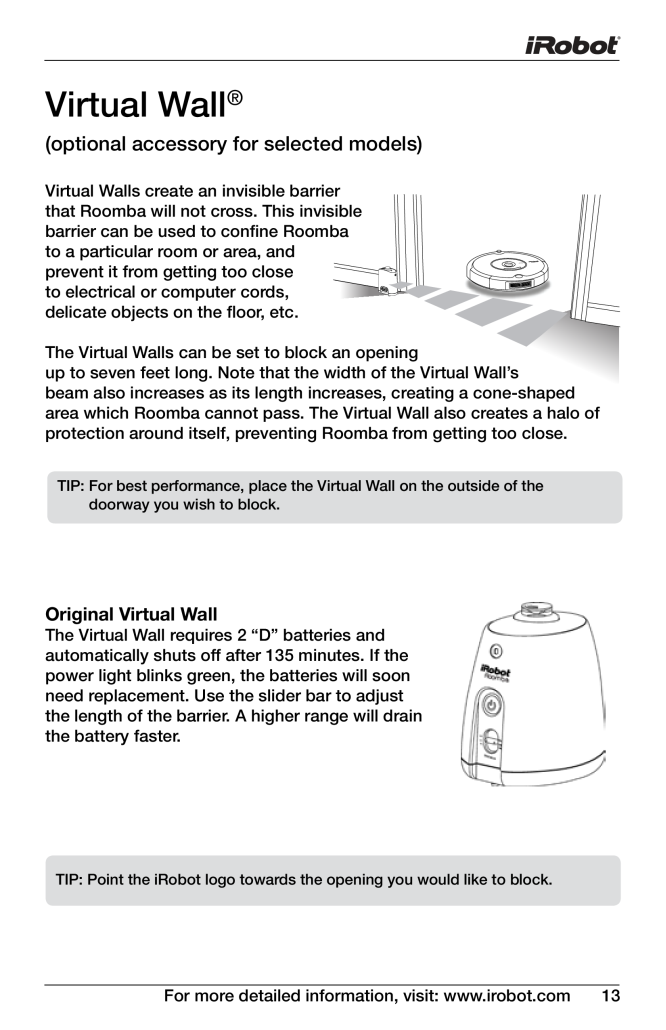
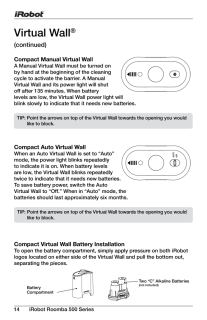
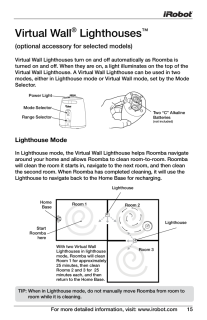
For more detailed information, visit: www.irobot.com 13 Virtual Wall® (optional accessory for selected models)Virtual Walls create an invisible barrier that Roomba will not cross. This invisible barrier can be used to conine Roomba to a particular room or area, and prevent it from getting too close to electrical or computer cords, delicate objects on the loor, etc. The Virtual Walls can be set to block an opening up to seven feet long. Note that the width of the Virtual Wall’s beam also increases as its length increases, creating a cone-shaped area which Roomba cannot pass. The Virtual Wall also creates a halo of protection around itself, preventing Roomba from getting too close. Original Virtual WallThe Virtual Wall requires 2 “D” batteries and automatically shuts off after 135 minutes. If the power light blinks green, the batteries will soon need replacement. Use the slider bar to adjust the length of the barrier. A higher range will drain the battery faster. TIP: For best performance, place the Virtual Wall on the outside of the doorway you wish to block. TIP: Point the iRobot logo towards the opening you would like to block.
参考になったと評価
 70人が参考になったと評価しています。
この取扱説明書が関連付けられている製品