
W2253V-PFの取扱説明書・マニュアル [全28ページ 5.44MB]


4


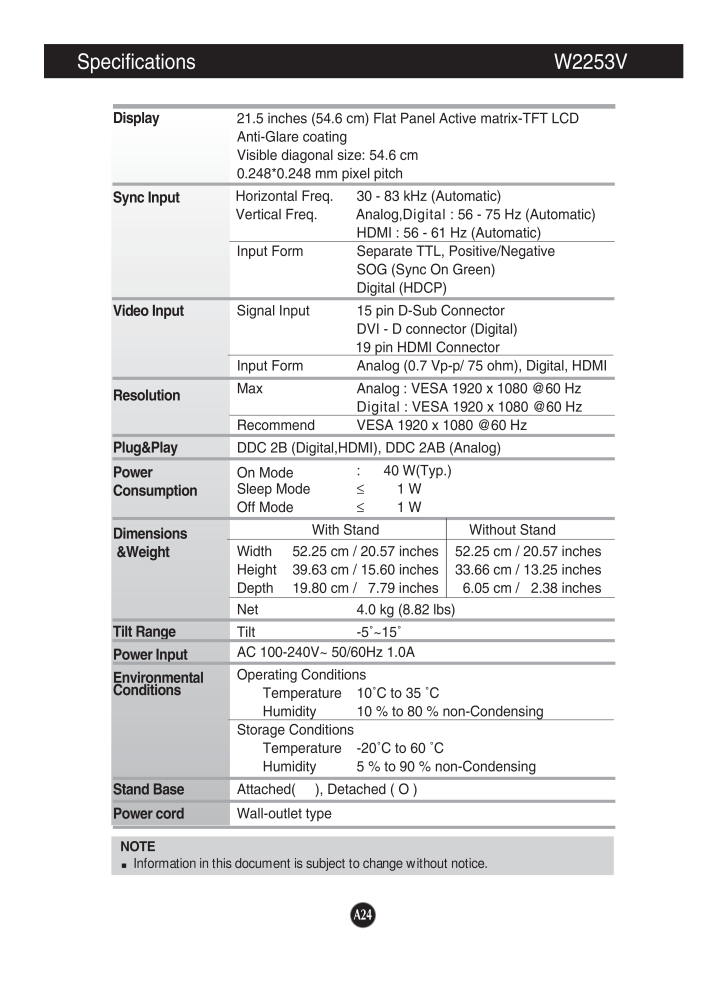

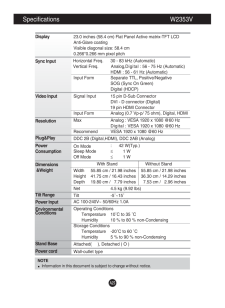

A24Specifications W2253VNOTEInformation in this document is subject to change without notice.DisplaySync InputVideo InputResolutionPlug&PlayPowerConsumptionDimensions&WeightTilt RangePower InputEnvironmentalConditionsStand BasePower cord 21.5 inches (54.6 cm) Flat Panel Active matrix-TFT LCD Anti-Glare coatingVisible diagonal size: 54.6 cm0.248*0.248 mm pixel pitchHorizontal Freq. 30 - 83 kHz (Automatic)Vertical Freq. Analog, Digital : 56 - 75 Hz (Automatic)HDMI : 56 - 61 Hz (Automatic)Input Form Separate TTL, Positive/NegativeSOG (Sync On Green) Digital (HDCP)Signal Input 15 pin D-Sub ConnectorDVI - D connector (Digital)19 pin HDMI ConnectorInput Form Analog (0.7 Vp-p/ 75 ohm), Digital, HDMIMax Analog : VESA 1920 x 1080 @60 HzDigital : VESA 1920 x 1080 @60 HzRecommend VESA 1920 x 1080 @60 HzDDC 2B (Digital,HDMI), DDC 2AB (Analog)On Mode: 40 W(Typ.)Sleep Mode≤1 WOff Mode≤1 WWith Stand Without StandWidth 52.25 cm / 20.57 inches 52.25 cm / 20.57 inchesHeight 39.63 cm / 15.60 inches 33.66 cm / 13.25 inchesDepth 19.80 cm / 7.79 inches 6.05 cm / 2.38 inchesNet 4.0 kg (8.82 lbs)Tilt -5~15AC 100-240V~ 50/60Hz 1.0A Operating ConditionsTemperature 10C to 35 CHumidity 10 % to 80 % non-CondensingStorage ConditionsTemperature -20C to 60 CHumidity 5 % to 90 % non-CondensingAttached( ), Detached ( O )Wall-outlet type

