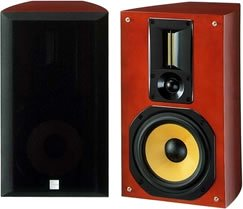
9警告・付属の台座を使用して設置する場合は、しっかりと安定した場所に設置してください。・不安定な場所に設置すると、転倒や落下によるけがなど重大な事故になる恐れがあります。■スピーカーシステム(SC-T77XG)・スピーカーシステム(SC-T77XG) を設置する場合には、お好みにより付属のすべり止め(コルク)、または付属のスパイクを底面の 6ヵ所に取り付けることができます。(下図参照)・すべり止め(コルク)の取り付け方法(上図参照)・底面のねじ部(6ヵ所)の上に付属のすべり止め(コルク)を取り付けてください。・スパイクの取り付け方法(上図参照)・底面のねじ穴部(6ヵ所)に付属のスパイクのねじ部を締め付けてください。・設置の際にがたつきが生じたときには、スパイクのナットを回し、調節してください。かたくて回しづらいときは、お手持ちのペンチやスパナをご使用ください。・床や置台に傷を付けないため、スパイク部に付属のスパイク受皿を設置することもできます。ご注意・取り付けの際に、スパイクの先端等でけがなどしないように注意してください。・本体(SC-T77XG)を設置する際には、誤って落としてけがなどしないように、取り扱いには十分注意してください。付属のすべり止め(コルク)付属のスパイク付属のナットCAUTION Use the included base and set in a firm stable place. If the speaker system is set in an unstable place, it couldtip over or fall, possibly resulting in serious accidents.■Speaker system (SC-T77XG) When installing a speaker syst em (SC-T77XG), mount theincluded anti-slip pads (cork) or the included spikes to sixpoints on the bottom of the un it. (Refer to diagram below.) * Mounting anti-slip pads (cork) (Refer to diagramabove.) Mount the included anti-slip pa ds (cork) over the six screwholes on the bottom of the unit. Mounting the spikes (Ref er to diagram above.) Fasten the included spikes into the six screw holes on thebottom of the unit. Please adjust NUTs for fixing firmly.A spanner or the like may help you in case of difficulty. You can use SPIKE SAUCERs included to preventcatches on the floor.WARNING Be careful not iniured (at the tio of a spike etc.) in the caseof attachment. Please handle the main unit (SC-T77XG) with care not toharm yourself by dropping.Anti-slip pads (cork) includedNuts includedSpikes included ページ 2005年6月6日 月曜日 午後4時25分


![前ページ カーソルキー[←]でも移動](http://gizport.jp/static/images/arrow_left2.png)


