X3の取扱説明書・マニュアル [全146ページ 4.87MB]


5


71 / 146 ページ
71 / 146 ページ


現在のページURL
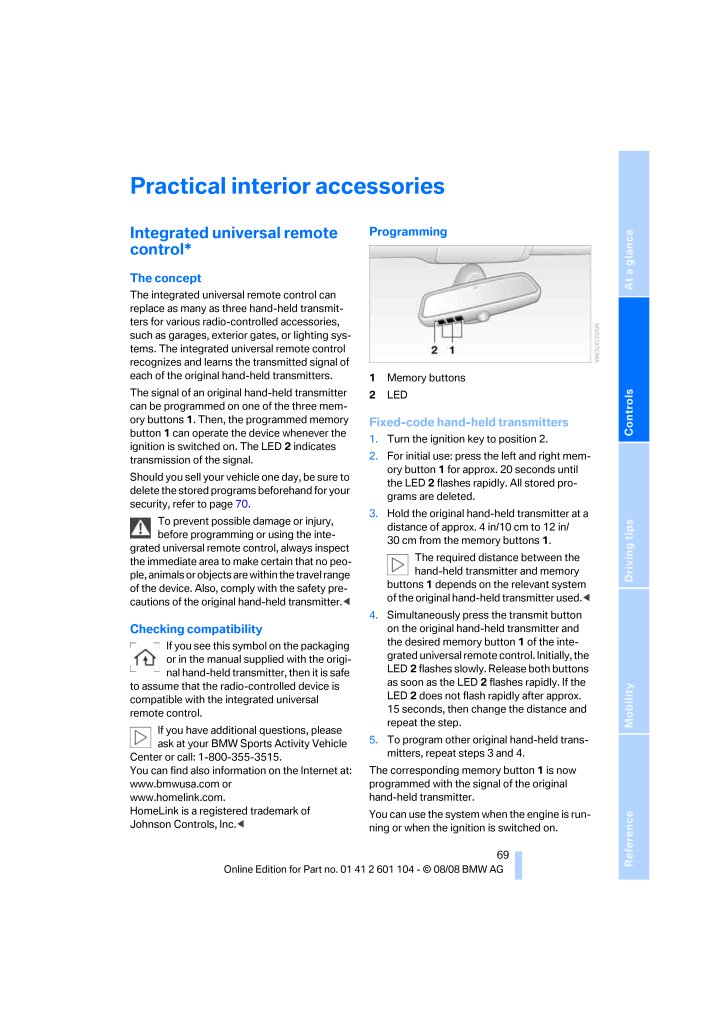
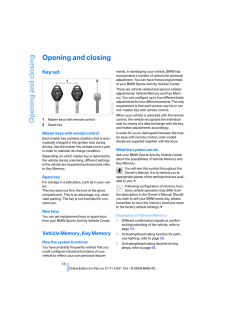
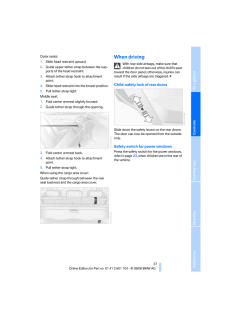
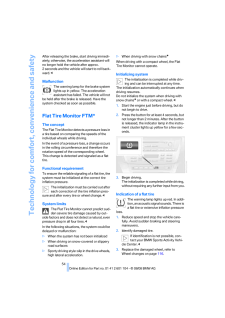
ReferenceAt a glanceControlsDriving tipsMobility 69Practical interior accessoriesIntegrated universal remote control*The conceptThe integrated universa l remote control can replace as many as three hand-held transmit-ters for various radio-controlled accessories, such as garages, exterior gates, or lighting sys-tems. The integrated universal remote control recognizes and learns th e transmitted signal of each of the original hand-held transmitters.The signal of an original hand-held transmitter can be programmed on one of the three mem-ory buttons1. Then, the programmed memory button1 can operate the device whenever the ignition is switched on. The LED 2 indicates transmission of the signal.Should you sell your vehicl e one day, be sure to delete the stored progra ms beforehand for your security, refer to page 70.To prevent possible damage or injury, before programming or using the inte-grated universal remote control, always inspect the immediate area to make certain that no peo-ple, animals or objects ar e within the travel range of the device. Also, comply with the safety pre-cautions of the original hand-held transmitter. <Checking compatibilityIf you see this symbol on the packaging or in the manual supplied with the origi-nal hand-held transmitter, then it is safe to assume that the radi o-controlled device is compatible with the integrated universal remote control.If you have additional questions, please ask at your BMW Sports Activity Vehicle Center or call: 1-800-355-3515.You can find also information on the Internet at:www.bmwusa.com or www.homelink.com. HomeLink is a registered trademark of Johnson Controls, Inc. <Programming1Memory buttons2LEDFixed-code hand-held transmitters1.Turn the ignition key to position 2.2.For initial use: press the left and right mem-ory button1 for approx. 20 seconds until the LED2 flashes rapidly. All stored pro-grams are deleted.3.Hold the original hand-held transmitter at a distance of approx. 4 in/10 cm to 12 in/30 cm from the memory buttons 1.The required distance between the hand-held transmitter and memory buttons1 depends on the relevant system of the original hand-held transmitter used. <4.Simultaneously press the transmit button on the original hand-held transmitter and the desired memory button 1 of the inte-grated universal remote control. Initially, the LED2 flashes slowly. Re lease both buttons as soon as the LED 2 flashes rapidly. If the LED2 does not flash rapidly after approx. 15 seconds, then change the distance and repeat the step.5.To program other original hand-held trans-mitters, repeat steps 3 and 4.The corresponding memory button 1 is now programmed with the signal of the original hand-held transmitter.You can use the system when the engine is run-ning or when the ignition is switched on.
参考になったと評価  5人が参考になったと評価しています。


このマニュアルの目次
-
2 .2 ページ目のマニュアル
-
3 .X3 xDrive28iX3 xDrive30iO...X3 xDrive28iX3 xDrive30iOwner's Manual for VehicleCongratulations, and than k you for choosing a BMW.Thorough familiarity with your vehicle will provide you with enhanced control and security when you drive it. We therefore have this request:Please take t...
-
4 .(C) 2008 Bayerische Motor...(C) 2008 Bayerische Motoren WerkeAktiengesellschaftMunich, GermanyReprinting, including excerpts,only with the written consent ofBMW AG, Munich.US English VIII/08Printed on environmentally friendly paper,bleached without chlorine, suitable for recycling.
-
5 .ReferenceAt a glanceContr...ReferenceAt a glanceControlsDriving tipsMobilityContentsThe fastest way to find specific topics is to use the index, refer to page 132.Using this Owner's Manual4Notes7Reporting safety defectsAt a glance10CockpitControls18Opening and closing27Adjustments35T...
-
6 .Notes4NotesAbout this Own...Notes4NotesAbout this Owner's ManualWe have made every effort to ensure that you are easily able to find what you need in this Owner's Manual. The fastest way to find certain topics is by using the de tailed index at the end. For a brief initial overview ...
-
7 .ReferenceAt a glanceContr...ReferenceAt a glanceControlsDriving tipsMobility 5Your individual vehicleIn purchasing your BMW, you have decided in favor of a model with individualized equipment and features. This Owner's Manual describes all models and equipment that BMW offers within ...
-
8 .Notes6Parts and accessori...Notes6Parts and accessoriesFor your own safety, use genuine parts and accessories approved by BMW.When you purchase accessories tested and approved by BMW and Genuine BMW Parts, you simultaneously acquire the assurance that they have been thorough ly teste...
-
9 .ReferenceAt a glanceContr...ReferenceAt a glanceControlsDriving tipsMobility 7Reporting safety defectsFor US customersThe following only applies to vehicles owned and operated in the US.If you believe that your vehicle has a defect that could cause a crash or could cause injury or de...
-
10 .10 ページ目のマニュアル
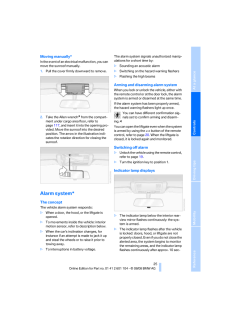
-
11 .At a glanceThis overview ...At a glanceThis overview of buttons , switches and displaysis intended to familiarize you with your vehicle'soperating environment. The section will alsoassist you in becoming acquainted with thecontrol concepts and options availablefor operating the vari...
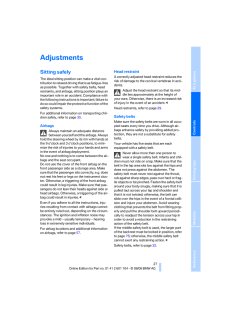
-
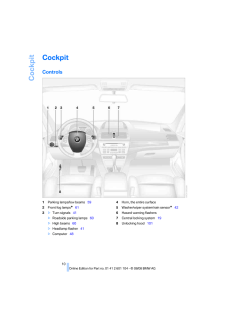
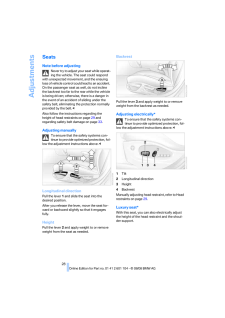
12 .Cockpit10CockpitControls1...Cockpit10CockpitControls1Parking lamps/low beams 592Front fog lamps* 613>Turn signals41>Roadside parking lamps 60>High beams60>Headlamp flasher 41>Computer484Horn, the entire surface5Washer/wiper system/rain sensor* 426Hazard warning flashers7Central locki...
-
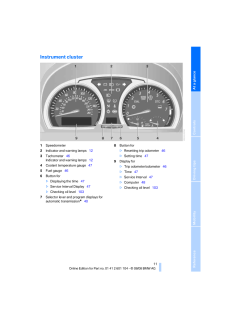
13 .At a glanceControlsDrivin...At a glanceControlsDriving tipsMobility Reference 11Instrument cluster1Speedometer2Indicator and warning lamps 123Tachometer46Indicator and warning lamps 124Coolant temperature gauge 475Fuel gauge466Button for>Displaying the time 47>Service Interval Displa...
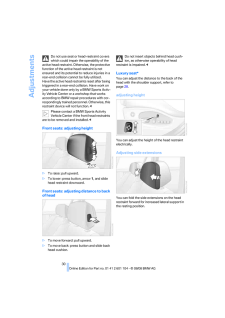
-
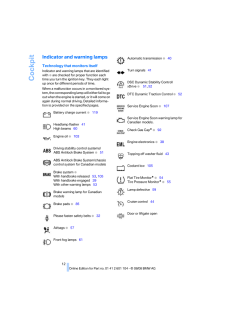
14 .Cockpit12Indicator and wa...Cockpit12Indicator and warning lampsTechnology that monitors itselfIndicator and warning lamps that are identified with + are checked for proper function each time you turn the ignition key. They each light up once for different periods of time.When a mal...
-
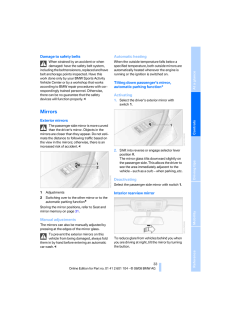
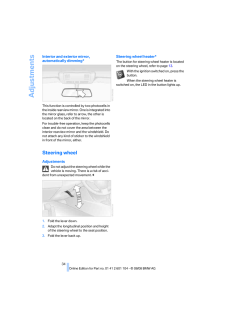
15 .At a glanceControlsDrivin...At a glanceControlsDriving tipsMobility Reference 13ColorsThe indicator and warning lamps can light up in different colors and combinations.The following section explains the significance of the individual colo rs as well as how you should respond when the...
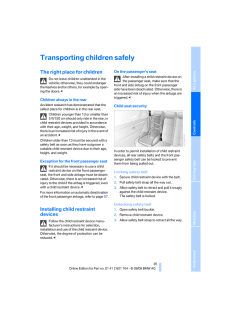
-
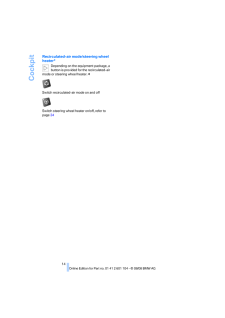
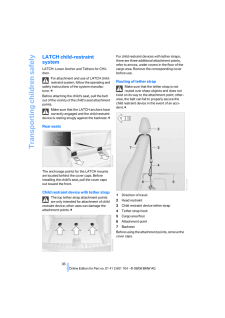
16 .Cockpit14Recirculated-air...Cockpit14Recirculated-air mode/steering wheel heater*Depending on the equipment package, a button is provided for the recirculated-air mode or steering wheel heater.18 .18 ページ目のマニュアル19 .ControlsThis chapter is i...ControlsThis chapter is intend ed to provide you withinformation for complete control of your vehicleand describes its extensive array of featuresand accessories, both for driving and for yourown safety, comfort and convenience.Controls20 .Opening and closing18Open...Opening and closing18Opening and closingKey set1Master keys with remote control2Spare keyMaster keys with remote controlEach master key contains a battery that is auto-matically charged in the ignition lock during driving. Use the master ke y at least twi...21 .ReferenceAt a glanceContr...ReferenceAt a glanceControlsDriving tipsMobility 19>Active PDC Park Distance Control is acous-tically indicated by a signal tone when you shift into reverse or mo ve the selector lever into position R, refer to page 50.>Different confirmation signals to c...22 .Opening and closing20If y...Opening and closing20If you wish, you can have this special fea-ture deactivated on vehicles without an alarm system.23 .ReferenceAt a glanceContr...ReferenceAt a glanceControlsDriving tipsMobility 21Opening and closing:Using door lockDo not lock the vehicle from the outside when people are in it since they will be unable to unlock it from the inside if they do not know the special procedure. <1.Turn...24 .Opening and closing22you ...Opening and closing22you will always be able to unlock the vehicle from outside.25 .ReferenceAt a glanceContr...ReferenceAt a glanceControlsDriving tipsMobility 23In the back, separate switches are provided in the armrests.For convenience operation using the remote control or the door lock, refer to pages 19, 21.After switching off ignitionYou can operate the window...26 .Opening and closing24Do n...Opening and closing24Do not use force to close the sliding visor when the sunroof is in its raised position, as this could damage the mechanism.27 .ReferenceAt a glanceContr...ReferenceAt a glanceControlsDriving tipsMobility 25Moving manually*In the event of an electrical malfunction, you can move the sunroof manually.1.Pull the cover firmly downward to remove.2.Take the Allen wrench* from the compart-ment under cargo area floor...28 .Opening and closing26onds...Opening and closing26onds. However, the interior motion sensor is not activated.>The indicator lamp goes out after unlocking: no manipulation or attempted intrusions have been detected in the period since the system was armed.>The indicator lamp flashes ...29 .ReferenceAt a glanceContr...ReferenceAt a glanceControlsDriving tipsMobility 27AdjustmentsSitting safelyThe ideal sitting position can make a vital con-tribution to relaxed driving that is as fatigue-free as possible. Together wi th safety belts, head restraints, and airbags, sitti...30 .Adjustments28SeatsNote be...Adjustments28SeatsNote before adjustingNever try to adjust yo ur seat while operat-ing the vehicle. The seat could respond with unexpected movement, and the ensuing loss of vehicle control coul d lead to an accident. On the passenger seat as well, do not ...31 .ReferenceAt a glanceContr...ReferenceAt a glanceControlsDriving tipsMobility 291Head restraint height2Shoulder supportHead restraint height>To raise: move switch upward.>To lower: move switch downward.Shoulder supportMove switch forward or back.You can use the adjustable upper backre...32 .Adjustments30Do not use s...Adjustments30Do not use seat or head-restraint covers which could impair the operability of the active head restraint. Ot herwise, the protective function of the active head restraint is not ensured and its potential to reduce injuries in a rear-end coll...33 .ReferenceAt a glanceContr...ReferenceAt a glanceControlsDriving tipsMobility 31Rear seats: adjusting height>To raise: pull upward.>To lower: press button, arrow 1, and slide head restraint downward.The center head restrain t is not height-adjust-able.Removal1.Pull the head restraint...34 .Adjustments32Requesting a...Adjustments32Requesting a stored settingDo not request a position from the mem-ory while the vehicle is moving; otherwise, there is a risk of accident from unexpected seat movement.35 .ReferenceAt a glanceContr...ReferenceAt a glanceControlsDriving tipsMobility 33Damage to safety beltsWhen strained by an accident or when damaged: have the safety belt system, including the belt tensio ners, replaced and have belt anchorage points inspected. Have this work done only...36 .Adjustments34Interior and...Adjustments34Interior and exterior mirror, automatically dimming*This function is controlle d by two photocells in the inside rearview mirror. One is integrated into the mirror glass, refer to arrow, the other is located on the back of the mirror.For trou...37 .ReferenceAt a glanceContr...ReferenceAt a glanceControlsDriving tipsMobility 35Transporting children safelyThe right place for childrenDo not leave children unattended in the vehicle; otherwise, they could endanger themselves and/or others, for example by open-ing the doors.38 .Transporting children saf...Transporting children safely36LATCH child-restraint systemLATCH: Lower Anchor and Tethers for CHil-dren.For attachment and use of LATCH child-restraint system, follow the operating and safety instructions of the system manufac-turer.39 .ReferenceAt a glanceContr...ReferenceAt a glanceControlsDriving tipsMobility 37Outer seats:1.Slide head restraint upward.2.Guide upper tether strap between the sup-ports of the head restraint.3.Attach tether strap hook to attachment point.4.Slide head restraint into the lowest posi...40 .Driving38DrivingIgnition ...Driving38DrivingIgnition lock0Steering locked1Steering unlocked2Ignition switched on3Starting engineSteering lockedThe key can be inserted or removed in this posi-tion only.After removing the key, turn the steering wheel slightly to the left or right unti...41 .ReferenceAt a glanceContr...ReferenceAt a glanceControlsDriving tipsMobility 39output or speed. Have the system checked immediately.Manual transmission1.Step on the brake.2.Depress the clutch pedal and shift into neu-tral.If the clutch pedal is not depressed, the engine will not star...42 .Driving40engage it too fo...Driving40engage it too forcefully. In doing so, continu-ously press the button of the handbrake lever. Otherwise, excessively forceful engagement of the handbrake can cause the rear wheels to lock and cause the rear of the vehicle to fishtail.43 .ReferenceAt a glanceContr...ReferenceAt a glanceControlsDriving tipsMobility 41P ParkSelect only when the ve hicle is stationary. The transmission locks to prevent the rear wheels from turning.R ReverseSelect only when the vehicle is stationary.N NeutralYou can shift into neutral, f...44 .Driving42Atypically rapid...Driving42Atypically rapid flashing of the indicator lamp indicates that a turn signal bulb has gone out.45 .ReferenceAt a glanceContr...ReferenceAt a glanceControlsDriving tipsMobility 43Fast wipeThe wipers operate at normal speed when the vehicle is stationary, not on vehicles with rain sensor.Cleaning windshield , rear window and headlamps*0Wipers retracted1Cleaning windshield and headla...46 .Driving44Cruise control*T...Driving44Cruise control*The vehicle maintains and stores the speed that you set at speeds greater than approx. 20 mph/30 km/h.You can use cruise control whenever the sys-tem is active while the engine is running.Do not use the cruise control under unfa-vor...47 .ReferenceAt a glanceContr...ReferenceAt a glanceControlsDriving tipsMobility 45In addition, the system is automatically inter-rupted in response to the following conditions:>When you apply pressure to the brake pedal>When you apply pressu re to the clutch pedal or when you move th...48 .Everything under control4...Everything under control46Everything under controlOdometer1Odometer2Trip odometerOdometerYou can activate the displays shown in the illus-tration in ignition key position 0 or with the igni-tion key removed by pressing the button in the instrument cluster....49 .ReferenceAt a glanceContr...ReferenceAt a glanceControlsDriving tipsMobility 47Coolant temperature gaugeBlueThe engine is still cold. Drive at moderate engine and vehicle speeds.Between blue and red fieldsNormal operating range. It is permissible for the dial to drift up to the red f...50 .Everything under control4...Everything under control48The set time is transferre d to the display of the radio or displayed in the instrument cluster.Display modeIgnition key in position 0 or removed:Press button1.The time and display of the miles/kilometers appear for a few seconds...51 .ReferenceAt a glanceContr...ReferenceAt a glanceControlsDriving tipsMobility 49During the display, hold down the computer button in the turn signal lever until the display changes.Average fuel consumptionThe average fuel consumption is calculated for the time during which the engine...52 .Technology for comfort, c...Technology for comfort, convenience and safety50Technology for comfort, convenience and safetyPDC Park Distance Control*The conceptPDC provides extra safety and convenience during parking maneuvers. Audible signals indi-cate that you are approaching an obj...53 .ReferenceAt a glanceContr...ReferenceAt a glanceControlsDriving tipsMobility 51MalfunctionThe LED in the button flashes and a short con-tinuous tone sounds. PDC is malfunctioning. Switch off PDC. Have the system checked.To prevent this problem, keep the sensors clean and free of ice ...54 .Technology for comfort, c...Technology for comfort, convenience and safety52jointly. These systems do not take their cus-tomary stabilizing actions.To increase vehicle stab ility, reactivate DSC as soon as possible.Activating DSCPress the button again; th e indicator lamp in the ins...55 .ReferenceAt a glanceContr...ReferenceAt a glanceControlsDriving tipsMobility 53Activating HDCPress the button; the LED lights up.The LED flashes when the brakes are applied automatically.Deactivating HDCPress the button again; the LED goes out.HDC is deactivated immediately above app...56 .Technology for comfort, c...Technology for comfort, convenience and safety54After releasing the brake, start driving immedi-ately; otherwise, the a cceleration assistant will no longer hold the vehicle after approx. 2 seconds and the vehicle will start to roll back-ward.57 .ReferenceAt a glanceContr...ReferenceAt a glanceControlsDriving tipsMobility 55MalfunctionThe warning lamp lights up yellow. The Flat Tire Monitor is malfunctioning or out of order. Have the system checked as soon as possible.TPM Tire Pressure Monitor*The conceptTPM controls the tire...58 .Technology for comfort, c...Technology for comfort, convenience and safety56Have the damaged tire replaced by your BMW Sports Activity Vehicle Center or a workshop that is familiar with TPM and works in accor-dance with BMW repair procedures, using appropriately trained personnel....59 .ReferenceAt a glanceContr...ReferenceAt a glanceControlsDriving tipsMobility 57AirbagsThe following airbags are located beneath the marked covers:1Front airbags2Head airbags3Side airbags in front and rear*Protective actionTo ensure that the safety systems con-tinue to provide optimum...60 .Technology for comfort, c...Technology for comfort, convenience and safety58in the back. Do not attach seat covers, seat cushion padding, ball mats or other items to the passenger seat unless they are specifically rec-ommended by BMW. Do not place any items under the seat which coul...61 .ReferenceAt a glanceContr...ReferenceAt a glanceControlsDriving tipsMobility 59LampsParking lamps/low beams0Lights off and daytime driving lamps *1Parking lamps and daytime driving lamps *2Low beams and welcome lamps3Automatic headlamp control*, daytime driving lamps*, welcome lamps ...62 .Lamps60Automatic headlamp...Lamps60Automatic headlamp control*In switch position 3, the low beams are switched on or off automatically, for example in tunnels, at dawn and dusk, and in the event of precipitation. The Adaptive Head Light* is acti-vated.When you enter a tunnel with bri...63 .ReferenceAt a glanceContr...ReferenceAt a glanceControlsDriving tipsMobility 61Front fog lamps*Briefly press the button to switch on/off.The parking lamps or low beams must be switched on for the fog lamps to operate. The green indicator lamp lights up when the fog lamps are on.If th...64 .Lamps62Rear reading lamps...Lamps62Rear reading lampsSwitch on and off with the button.To avoid discharging the battery, all of the vehicle's interior lamps are automatically extinguished approx. 15 minutes after the igni-tion is switched off. <65 .ReferenceAt a glanceContr...ReferenceAt a glanceControlsDriving tipsMobility 63Air conditionerAir conditioner1Airflow directed toward windshield and side windows2Airflow toward upper body 653Airflow to footwell 654Air volume645Recirculated-air mode 646Temperature647Air distribution64...66 .Air conditioner64Air volu...Air conditioner64Air volumeYou can vary the air volume in steps 1 through 4. The heating or cooling output is more effective with a higher air volume.Switching system on/offTurn air volume rotary switch to 0. This com-pletely shuts off the blower and air c...67 .ReferenceAt a glanceContr...ReferenceAt a glanceControlsDriving tipsMobility 65Ventilation1Serrated dials for opening and closing the air vents through an infinitely variable range2Levers for changing airflow direction3Serrated dial for more or less cool air from the air vents for th...68 .Air conditioner66Automati...Air conditioner66Automatic climate control*1Airflow directed toward windshield and side windows2Airflow toward upper body 683Airflow to footwell 684Manually varying air distribution 675Adjusting temperature 676Temperature display 67,Air volume677Manually v...69 .ReferenceAt a glanceContr...ReferenceAt a glanceControlsDriving tipsMobility 67A congenial climateFor almost all conditions, the AUTO pro-gram12 offers the optimum air distribution and air volume, refer to AUTO program below. You need only select an interior temperature 5 that you f...70 .Air conditioner68AUC Auto...Air conditioner68AUC Automatic Recirculated-air Control/recirculated air modeYou can set the desired operating mode by pressing the button repeatedly:>LEDs off: outside air continuously flows into the vehicle.>Left LED on, AUC mode: a sensor detects pollut...71 .ReferenceAt a glanceContr...ReferenceAt a glanceControlsDriving tipsMobility 69Practical interior accessoriesIntegrated universal remote control*The conceptThe integrated universa l remote control can replace as many as three hand-held transmit-ters for various radio-controlled acces...72 .Practical interior access...Practical interior accessories70If the system cannot be operated after repeated programming, check whether the original hand-held transmitter uses an alter-nating-code system. To do so, either read the instructions of the original hand-held transmit-ter or...73 .ReferenceAt a glanceContr...ReferenceAt a glanceControlsDriving tipsMobility 71Basic operationYou can call up a number of functions by press-ing the adjusting button with a sharp object such as a ball-point pen or the like. The follow-ing possible adjustments are displayed one after ...74 .Practical interior access...Practical interior accessories723.Press the adjusting button for approx. 6-7 seconds in order to call up C. Then drive in at least one complete circle at a maximum speed of 4 mph/7 km/h. If the calibration was successful, then the display C is replaced wit...75 .ReferenceAt a glanceContr...ReferenceAt a glanceControlsDriving tipsMobility 73ClosingFold the cover up.To prevent injury in the event of an acci-dent while the vehicle is being driven, close the glove compartment immediately after use.76 .Practical interior access...Practical interior accessories74Clothes hooksWhen hanging clothing from the hooks ensure that it will not obstruct the driver's vision. Do not hang heavy objects on the hooks. If you do so, they co uld endanger passengers during braking or evasive maneuve...77 .ReferenceAt a glanceContr...ReferenceAt a glanceControlsDriving tipsMobility 75For audio playback via the vehicle's speakers, connect the headset or line out connection of the device to the connection.Depending on your vehicle's equipment pack-age, the location of th e connection ma...78 .Practical interior access...Practical interior accessories76Securing loadAfter loading, secure the ski bag and its con-tents. Tension the retaining strap on the ten-sioning buckle for this purpose.Always secure the ski bag in this way. If you fail to do so, it can endanger occu-pants...79 .ReferenceAt a glanceContr...ReferenceAt a glanceControlsDriving tipsMobility 77Reach into the opening and pull forward, refer to arrow.Before folding down the rear backrests, remove the cover caps for the LATCH child-restraint system. Otherwise, impressions can be left in the seat c...80 .Practical interior access...Practical interior accessories78You can pull out the partition net and insert it into the holders in the roof area above.Partition net*Do not allow the partit ion net to snap back into place; otherwise, there is a danger of injury and the partition net cou...81 .ReferenceAt a glanceContr...ReferenceAt a glanceControlsDriving tipsMobility 79the openings in the rails . To slide the lashing eyes, press the button.Read and follow instructions accompany-ing the heavy-duty cargo straps.82 .82 ページ目のマニュアル83 .Driving tipsThis section ...Driving tipsThis section is designed to provide youwith extra support by supplying informationuseful in dealing with specific drivingand operating conditions.Driving tips84 .Things to remember when d...Things to remember when driving82Things to remember when drivingBreaking-inMoving parts should be a llowed to adjust to one another. To ensure that your vehicle provides maximum economy throughout a long service life, we request that yo u comply with the ...85 .ReferenceAt a glanceContr...ReferenceAt a glanceControlsDriving tipsMobility 83Saving fuelThe fuel consumption of your vehicle is depen-dent on various factors. You can improve your vehicle's fuel consumption and reduce the strain on the environm ent with several mea-sures, your driv...86 .Things to remember when d...Things to remember when driving84General driving notesClosing liftgateOperate the vehicle only when the liftgate is completely closed ; otherwise, exhaust fumes could enter the interior of the vehicle.87 .ReferenceAt a glanceContr...ReferenceAt a glanceControlsDriving tipsMobility 85HillsTo prevent overheating and reduced effi-ciency of the brake system, drive long or steep downhill grades in the gear in which the least braking is required . Otherwise, even light but continuous pressu...88 .Things to remember when d...Things to remember when driving86safely exceed the av ailable cargo and lug-gage load capacity calculated in step 4.6.If your vehicle will be to wing a trailer, part of the load from your tra iler will be transferred to your vehicle. Co nsult the manual fo...89 .ReferenceAt a glanceContr...ReferenceAt a glanceControlsDriving tipsMobility 87Roof-mounted luggage rack*A special rack system is available as an optional accessory for your BMW. Please familiarize yourself with the information contained in the installation instructions.Loading lugga...90 .Things to remember when d...Things to remember when driving88tribute the drive torque to the individual wheels.Please bear the following points in mind after driving on poor roads, in order to preserve the road safety of your BMW:>Clean the heavy dirt from the body.>Clean mud, snow,...92 .92 ページ目のマニュアル93 .MobilityThis section help...MobilityThis section helps you maintain your mobilityby supplying important information onvital topics including fuels and lubricants,wheels and tires, se rvice, maintenanceand roadside assistance.Mobility94 .Refueling92RefuelingFuel ...Refueling92RefuelingFuel filler capOpeningAlways switch off the engine before refu-eling. Otherwise, no fuel can be dis-pensed into the tank and the Service Engine Soon lamp lights up. <1.Open fuel filler door. To do so, briefly press it at the rear edge...95 .ReferenceAt a glanceContr...ReferenceAt a glanceControlsDriving tipsMobility 93Fuel tank capacityApprox. 17.7 US gal./67 liters, including the reserve capacity of approx. 2 US gal./8 liters.Never attempt to continue driving until the tank is complete ly empty; this can negatively aff...96 .Wheels and tires94Wheels ...Wheels and tires94Wheels and tiresTire inflation pressureInformation for your safetyThe condition of the tires and the maintenance of the specified tire pre ssure are crucial not only to the tire's service life, but also to driving com-fort and most import...97 .ReferenceAt a glanceContr...ReferenceAt a glanceControlsDriving tipsMobility 95Observe all national an d local maximum speed limits; failure to do so could put you in violation of the law.98 .Wheels and tires96X3 xDri...Wheels and tires96X3 xDrive28iX3 xDrive30iTire size Pressure specifications in psi/kPaTraveling speeds of up to max. 100 mph/160 km/hTraveling speeds including those above 100 mph/160 km/hAll pressure specifications in the table are indicated in psi/kilopa...99 .ReferenceAt a glanceContr...ReferenceAt a glanceControlsDriving tipsMobility 97Tire identification marksKnowledge of the labeling on the side of the tire makes it easier to identify and choose the right tires.Tire sizeSpeed code letterQ = up to 105 mph/160 km/hT = up to 118 mph/190...100 .Wheels and tires98Tempera...Wheels and tires98TemperatureThe temperature grades are A, the highest, B and C representing the tire's resistance to the generation of heat and its ability to dissipate heat when tested unde r controlled conditions on a specified indoor laboratory test w...ログイン

 ファイルをアップロードしています。
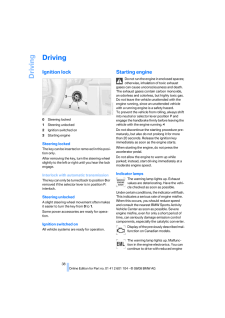
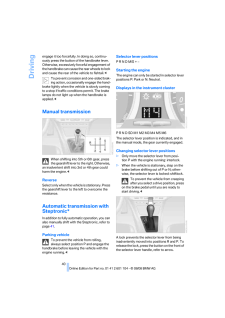
しばらくお待ちください。