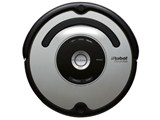
ルンバ577
x
Gizport

ルンバ577の取扱説明書・マニュアル [全36ページ 4.66MB]

5
00152.0210.v1.ALLRoomba.Manual.EN.pdf
moreau1996 - 2013-08-15
http://www.irobot.com/.../00152.0210.v1.ALLRoomba.Manual.EN.pdf - 4.66MB - キャッシュ
32987view
36page / 4.66MB
Share (facebook)
23 / 36 ページ
 
23 / 36 ページ
ファイルを開く
現在のページURL
For more detailed information, visit: www.irobot.com 23 TIP: When maintaining Roomba, look for the yellow parts. These parts are designed to be removed and cleaned every time you empty Roomba’s bin.3 Clean Roomba’s brushesB. Remove and clean Roomba’s brushes.A. Remove brush guard by lifting both yellow tabs.D. Remove and clean Roomba’s brush caps.C. Remove and clean hair and dirt from Roomba’s yellow brush bearings. Do not attempt to run Roomba without the bearings. If you misplace Roomba’s brush bearings, contact iRobot Customer Care for replacement bearings. Excessive build up of hair can permanently damage Roomba. Remove brushes and inspect brush bearings regularly.BearingsBrush Bearings Brush CapsE. Use the included cleaning tool to easily remove hair from Roomba’s bristle brush by pulling it over the brush. Alignment Feature

参考になったと評価
  70人が参考になったと評価しています。

その他の取扱説明書
18536 view

このマニュアルの目次

  • 1 .
    500/600 Series Owner's Ma...
    500/600 Series Owner's Manual
  • 2 .
    P.S. Don’t miss out on yo...
    P.S. Don’t miss out on your exclusive beneits! Register your Roomba online right now at www.irobot.com/register.
  • 3 .
    Dear iRobot Roomba Owner,...
    Dear iRobot Roomba Owner,Thank you for purchasing an iRobot Roomba vacuum cleaning robot. You’ve joined the millions of people who clean with robots - the smarter way to get it done. Please take a few moments to read this manual and get acquainted with yo...
  • 4 .
    4 iRobot Roomba 500 Serie...
    4 iRobot Roomba 500 Series Important Tips Roomba contains electronic parts. DO NOT submerge Roomba or spray it with water. Clean with a dry cloth only. Before using Roomba the irst time, you need to activate Roomba by removing the battery pull tab. Charge...
  • 5 .
    For more detailed informa...
    For more detailed information, visit: www.irobot.com 5Table of ContentsiRobot Roomba Anatomy ............................................. 6Cleaning Pattern ........................................................... 7Cleaning Modes .........................
  • 6 .
    6 iRobot Roomba 500 Serie...
    6 iRobot Roomba 500 Series iRobot Roomba AnatomyInfrared SensorBin Release ButtonPower Supply SocketFlexible BrushCliff Sensor OpeningsEdge-Cleaning Side BrushDirt Detect™ SensorLeft Wheel ModuleRight Wheel ModuleContact Points for Home Base (selected mode...
  • 7 .
    For more detailed informa...
    For more detailed information, visit: www.irobot.com 7 Cleaning PatternRoomba is a robot that cleans loors differently than the way most people clean their loors. Roomba uses its robot intelligence to eficiently clean the whole loor, under and around furni...
  • 8 .
    8 iRobot Roomba 500 Serie...
    8 iRobot Roomba 500 Series Cleaning ModesRoomba will clean based on the cleaning mode you select. Roomba has three cleaning modes.Clean Mode (all models)Roomba automatically calculates the room size and adjusts its cleaning time appropriately. Spot Mode ...
  • 9 .
    For more detailed informa...
    For more detailed information, visit: www.irobot.com 9 Cleaning SystemRoomba features a patented three-stage cleaning system. Floor SurfacesRoomba works on wood, carpet, tile, vinyl, and linoleum, and adjusts automatically to different loor types.Roomba a...
  • 10 .
    10 iRobot Roomba 500 Seri...
    10 iRobot Roomba 500 Series Cleaning BinsRoomba is compatible with three interchangeable cleaning bins. Aero-VacTM or Original Vacuum Cleaning BinThe Aero-Vac or Original vacuum cleaning bin should be used for everyday cleaning. The dual action, counter-ro...
  • 11 .
    For more detailed informa...
    For more detailed information, visit: www.irobot.com 11 Battery Storage and ChargingTIP: For best performance, charge Roomba’s battery overnight before using Roomba for the irst time. Roomba is powered by a rechargeable battery. Roomba’s battery can last...
  • 12 .
    12 iRobot Roomba 500 Seri...
    12 iRobot Roomba 500 Series CLEAN button light Battery statusSolid red Battery emptyAmber pulse ChargingSolid green Fully chargedQuick amber pulse 16-hour refresh chargeTIP: When Roomba is on the Home Base, always make sure that the Home Base power light...
  • 13 .
    For more detailed informa...
    For more detailed information, visit: www.irobot.com 13 Virtual Wall® (optional accessory for selected models)Virtual Walls create an invisible barrier that Roomba will not cross. This invisible barrier can be used to conine Roomba to a particular room or...
  • 14 .
    14 iRobot Roomba 500 Seri...
    14 iRobot Roomba 500 Series Compact Virtual Wall Battery InstallationTo open the battery compartment, simply apply pressure on both iRobot logos located on either side of the Virtual Wall and pull the bottom out, separating the pieces.Two “C” Alkaline Batt...
  • 15 .
    For more detailed informa...
    For more detailed information, visit: www.irobot.com 15 Virtual Wall® Lighthouses™ (optional accessory for selected models)Virtual Wall Lighthouses turn on and off automatically as Roomba is turned on and off. When they are on, a light illuminates on the ...
  • 16 .
    16 iRobot Roomba 500 Seri...
    16 iRobot Roomba 500 Series TIP: To conserve battery life, remove the batteries if you are not planning to use the Virtual Wall Lighthouse when cleaning. When battery levels are low, the Virtual Wall Lighthouse power light will lash repeatedly.Virtual Wal...
  • 17 .
    For more detailed informa...
    For more detailed information, visit: www.irobot.com 17 Home Base® (optional accessory for selected models)Always keep the Home base plugged in.Original Home BaseWhen Roomba is on the Home Base, the power and docked lights are green to indicate Roomba is c...
  • 18 .
    18 iRobot Roomba 500 Seri...
    18 iRobot Roomba 500 Series Wireless Command Center (optional accessory for selected models)The Wireless Command Center lets you conveniently control Roomba’s functions. You can use it to turn Roomba on and off, schedule Roomba to clean, and steer Roomba a...
  • 19 .
    For more detailed informa...
    For more detailed information, visit: www.irobot.com 19 TIP: Check that there is a direct line of sight from the Remote Control to Roomba and that the remote is pointed at Roomba. The Remote Control, Virtual Walls and Home Base operate using an invisible ...
  • 20 .
    20 iRobot Roomba 500 Seri...
    20 iRobot Roomba 500 Series Scheduling Roomba (Models 550 and above)Setting the TimeYou must set the time before scheduling Roomba to clean.1 Press and hold CLOCK.2 While holding CLOCK, use the DAY, HOUR, and MINUTE buttons to set the correct time.3 R...
  • 21 .
    For more detailed informa...
    For more detailed information, visit: www.irobot.com 21 To Delete a Schedule1 Press and hold SCHEDULE.2 While holding SCHEDULE, press the DAY button to cycle through Roomba’s scheduled cleaning times.3 When Roomba is displaying the scheduled cleaning t...
  • 22 .
    22 iRobot Roomba 500 Seri...
    22 iRobot Roomba 500 Series Regular MaintenanceTo keep Roomba running at peak performance, it is recommended that you perform the following maintenance regularly: TIP: Bin emptying and brush cleaning should be done after every cleaning cycle. Regularly pul...
  • 23 .
    For more detailed informa...
    For more detailed information, visit: www.irobot.com 23 TIP: When maintaining Roomba, look for the yellow parts. These parts are designed to be removed and cleaned every time you empty Roomba’s bin.3 Clean Roomba’s brushesB. Remove and clean Roomba’s b...
  • 24 .
    24 iRobot Roomba 500 Seri...
    24 iRobot Roomba 500 Series Clean Roomba’s front wheel1 Pull irmly on Roomba’s front wheel to remove it from the robot. 2 Remove debris from inside the front wheel cavity. 3 Remove the front wheel from its housing and clear any hair wrapped around the a...
  • 25 .
    For more detailed informa...
    For more detailed information, visit: www.irobot.com 25 Language Selection ModeRoomba 500 Series can provide troubleshooting messages in English, French, German, Spanish, Italian, Dutch, Danish, Swedish, Norwegian, Finnish, Polish, Russian, Portuguese, Jap...
  • 26 .
    26 iRobot Roomba 500 Seri...
    26 iRobot Roomba 500 Series TroubleshootingRoomba will tell you something is wrong with a two-tone “uh-oh” sound followed by a series of beeps or a narrated voice. The troubleshooting light will also blink. Refer to the chart below to resolve Roomba’s prob...
  • 27 .
    For more detailed informa...
    For more detailed information, visit: www.irobot.com 27 TIP: To reset Roomba’s software, simultaneously hold down the two buttons above and below CLEAN for 10 seconds. This will clear all scheduled cleaning times, reset the clock and may resolve some softw...
  • 28 .
    28 iRobot Roomba 500 Seri...
    28 iRobot Roomba 500 Series Replaceable ModulesRoomba has a number of modules that can be replaced, including its drive wheels, side brush, main cleaning head, vacuum bin, caster wheel, and battery.To access Roomba’s replaceable modules, remove the bottom ...
  • 29 .
    For more detailed informa...
    For more detailed information, visit: www.irobot.com 29 Faceplate Removal (models 500 and above)Follow these instructions to remove and install Roomba’s faceplate.1 Remove Roomba’s bin. 2 Remove Roomba’s faceplate by pulling up from the bin. The face...
  • 30 .
    30 iRobot Roomba 500 Seri...
    30 iRobot Roomba 500 Series 3 Install Roomba’s faceplate by inserting the tabs into the appropriate slots, and then pushing down irmly on the inside and outsides edges of the faceplate. 4 Reinsert Roomba’s bin.
  • 31 .
    For more detailed informa...
    For more detailed information, visit: www.irobot.com 31 Battery Removal (models 500 and above)Follow these instructions to remove and reinstall Roomba’s battery.1 Remove Roomba’s side brush screw. 2 Remove Roomba’s side brush.
  • 32 .
    32 iRobot Roomba 500 Seri...
    32 iRobot Roomba 500 Series 3 Unscrew the four screws shown below and remove Roomba’s bottom cover. 4 Remove Roomba’s battery.5 Reinstall Roomba’s battery with the iRobot logo facing up.6 Replace Roomba’s bottom cover and the four screws.7 Repl...
  • 33 .
    For more detailed informa...
    For more detailed information, visit: www.irobot.com 33 Frequently Asked QuestionsWhy does Roomba’s Side Brush occasionally spin backwards? When caught on items such as carpet tassels or wires, the Side Brush may spin slowly or briely spin backwards to fre...
  • 34 .
    34 iRobot Roomba 500 Seri...
    34 iRobot Roomba 500 Series Always exercise caution when operating your Roomba. To reduce the risk of injury or damage, keep these safety precautions in mind when setting up, using and maintaining Roomba:GENERAL SAFETY INSTRUCTIONS• Read all safety and ope...
  • 35 .
    For more detailed informa...
    For more detailed information, visit: www.irobot.com 35 iRobot Customer Care USA If you have questions or comments about Roomba, please contact iRobot before contacting a retailer. Please visit our web site at www.irobot.com for support tips, frequently ...
  • 36 .
    © 2009-2010 iRobot Corpor...
    © 2009-2010 iRobot Corporation, 8 Crosby Drive, Bedford, MA 01730. All rights reserved.iRobot, Roomba, Virtual Wall and Home Base are registered trademarks of iRobot Corporation. Dirt Detect and Lighthouse are trademarks of iRobot Corporation. [00152.0110....