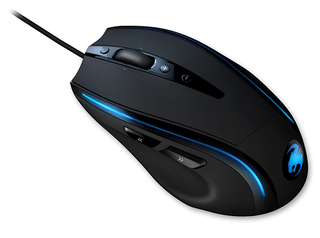
8Button Assignment Click: mouse button.Menu: mouse button. The context menu will open when you point to a document or folder using the mouse.Universal scrolling: Mousewheel function to scroll by moving the mouse.Double-click: Left mouse button double click.Assign a key: A single keyboard command can be assigned to one of the mouse buttons here.Button off: the button function off.OSD XY Prescaling: the current X-Y sensitivity value of the mouse above the right-hand side of the Taskbar. It’s possible to increase or decrease the value using the mousewheel.OSD DPI-Switch: the currently selected DPI value above the right-hand side of the Taskbar. It’s possible to increase or decrease the value using the mousewheel.OSD Proile-Switch: Displays the currently selected proile above the right-hand side of the Taskbar. It’s possible to scroll forward and backward through the proiles using the mousewheel. Note: The OSD (on screen display) is also displayed during a game. The duration and intensity of the display may vary according to the respective game and version of DirectX.IE Forward: the next previously selected program or internet site.IE Backward: the previous program or websiteDPI up: the preselected DPI resolution.DPI down: the preselected DPI resolution.Tilt Left: Scroll horizontally to the left (only under Windows Vista™).Tilt Right: horizontally to the right (only under Windows Vista™).Proile up: Jump to the next proile.Proile down: to the previous proile. Note: If you use this function to switch proiles by pressing a button, the same button should be assigned this function in the other proile(s).Left Windows Button: This function calls up the Windows Start menu.note: As soon as you’ve conigured a setting you should assign the function to the mouse by clicking the ‘Apply’ button without exiting the ROCCAT menu. It may take a few seconds until the information is transferred to the mouse. You’ll be able to tell the transfer process is taking place as the light on the mouse will light up several times.Along with the left and right mouse buttons the mouse has 8 additional buttons which can be freely assigned with the functions available in the driver menu. You’ll see the list of functions that can be assigned when you click on the dropdown menu to the side of the particular button.note: In addition to the pre-deined functions you can also assign a unique key combination (macro) to eight of the mouse buttons. This can consist of a keyboard modiier key plus one or more standard keys. You can use the Macro Manager to do that; this is located at the start of the dropdown menu. As soon as you’ve programmed a macro you can select one using ‘Assign Macro’ and assign it to one of the buttons on the mouse.MAIn COnTROL


![前ページ カーソルキー[←]でも移動](http://gizport.jp/static/images/arrow_left2.png)


