
G530の取扱説明書・マニュアル [全162ページ 6.18MB]


4


1 / 162 ページ
1 / 162 ページ


現在のページURL
Lenovo G530 UG V1.0 cover_en_1-4LenovoG530User Guide(C) Copyright Lenovo 2009. All rights reserved.P/N: 43N8878Printed in ChinaNew World. New Thinking.TMww w.lenovo.com
参考になったと評価  17人が参考になったと評価しています。
このマニュアルの目次
-
1 .Lenovo G530 UG V1.0 cover...Lenovo G530 UG V1.0 cover_en_1-4LenovoG530User Guide(C) Copyright Lenovo 2009. All rights reserved.P/N: 43N8878Printed in ChinaNew World. New Thinking.TMww w.lenovo.com
-
2 .2 ページ目のマニュアルLenovo G530 UG V1.0 cover_en_2-3First Edition (February 2009)Before using this information and the prod uct it supp orts, be sure to read the foll owing :* Chapter 7. Safety, use, and care information on page 81.* Appen dix D. Notices on pag e131...
-
3 .ENERGY STAR model informa...ENERGY STAR model informationENERGY STAR(R) is a joint program of the U.S. Environmental ProtectionAgency and the U.S. Department of Energy aimed at saving money and protecting the environment through en ergy efficient products and practices.Lenovo is pro...
-
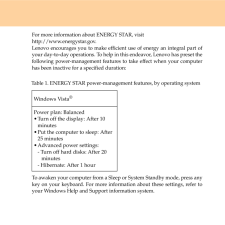
4 .For more information abou...For more information about ENERGY STAR, visithttp://www.energystar.gov.Lenovo encourages you to make effici ent use of energy an integral part ofyour day-to-day operations. To help in this endeavor, Lenovo has preset thefollowing power-management features...
-
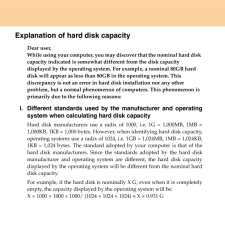
5 .Explanation of hard disk ...Explanation of hard disk capacityDear user,While using your computer, you may discover that the nominal hard disk capacity indicated is somewhat different from the disk capacity displayed by the operating system. For example, a nominal 80GB hard disk will ...
-
6 .If a portion of the hard ...If a portion of the hard disk space ha s been used for some specific purpose,then the capacity indicated by the op erating system will be even less thanX * 0.931 G.II. A portion of the hard disk sp ace is used for specific purposesLenovo computers come wit...
-
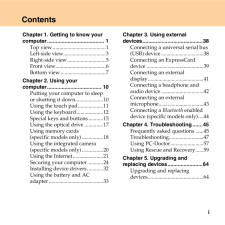
7 .iChapter 1. Getting to kn...iChapter 1. Getting to know your computer....................................... 1Top view........................................1Left-side view................................3Right-side view.............................5Front view..........................
-
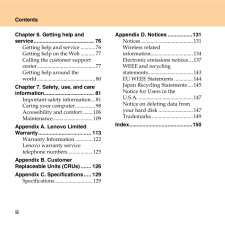
8 .iiContentsChapter 6. Gett...iiContentsChapter 6. Getting help and service......................................... 76Getting help and service...........76Getting help on the Web...........77Calling the customer support center............................................77Getting help ...
-
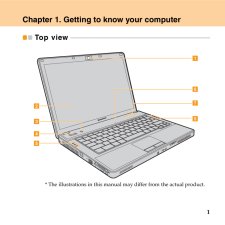
9 .1Chapter 1. Getting to kn...1Chapter 1. Getting to know your computerTop view - - - - - - - - - - - - - - - - - - - - - - - - - - - - - - - - - - - - - - - - - - - - - - - - - - - - - - - - - - - - - - - - - - - - - - - - - - - - - - - - - - - - - - - - - - - * The illustrations in...
-
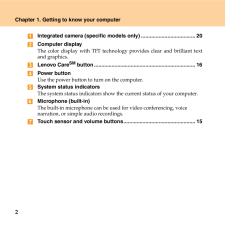
10 .2Chapter 1. Getting to kn...2Chapter 1. Getting to know your computerIntegrated camera (specific models only).....................................20Computer displayThe color display with TFT technology provides clear and brilliant textand graphics.Lenovo CareSM button...................
-
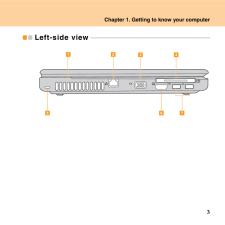
11 .Chapter 1. Getting to kno...Chapter 1. Getting to know your computer3Left-side view - - - - - - - - - - - - - - - - - - - - - - - - - - - - - - - - - - - - - - - - - - - - - - - - - - - - - - - - - - - - - - - - - - - - - - - - - - - - - - gf edabc
-
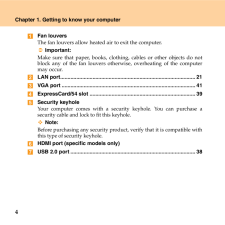
12 .4Chapter 1. Getting to kn...4Chapter 1. Getting to know your computerFan louversThe fan louvers allow heated air to exit the computer.Important:Make sure that paper, books, clothing, cables or other objects do notblock any of the fan louvers otherwise, overheating of the computermay ...
-
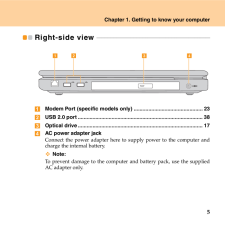
13 .Chapter 1. Getting to kno...Chapter 1. Getting to know your computer5Right-side view - - - - - - - - - - - - - - - - - - - - - - - - - - - - - - - - - - - - - - - - - - - - - - - - - - - - - - - - - - - - - - - - - - - - - - - - - - Modem Port (specific models only) ..................
-
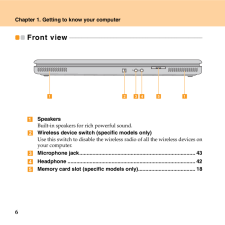
14 .6Chapter 1. Getting to kn...6Chapter 1. Getting to know your computerFront view - - - - - - - - - - - - - - - - - - - - - - - - - - - - - - - - - - - - - - - - - - - - - - - - - - - - - - - - - - - - - - - - - - - - - - - - - - - - - - - - - - - - - - - SpeakersBuilt-in speakers for...
-
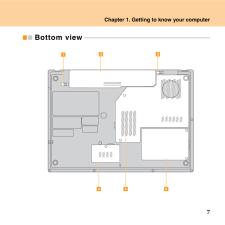
15 .Chapter 1. Getting to kno...Chapter 1. Getting to know your computer7Bottom view - - - - - - - - - - - - - - - - - - - - - - - - - - - - - - - - - - - - - - - - - - - - - - - - - - - - - - - - - - - - - - - - - - - - - - - - - - - - - - - - - - ac be df
-
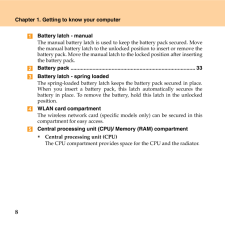
16 .8Chapter 1. Getting to kn...8Chapter 1. Getting to know your computerBattery latch - manualThe manual battery latch is used to keep the battery pack secured. Movethe manual battery latch to the unlocked position to insert or remove thebattery pack. Move the manual latch to the lock...
-
17 .Chapter 1. Getting to kno...Chapter 1. Getting to know your computer9Important: Do not replace the CPU! Visit an authorized service center or retailerfor replacement.̇Memory (RAM) compartmentThe memory compartment provides expansion capabilities foradditional memory. The BIOS auto m...
-
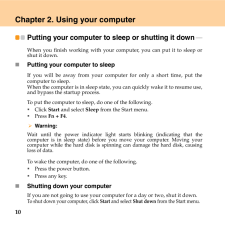
18 .10Chapter 2. Using your c...10Chapter 2. Using your computerPutting your computer to sleep or shutting it down - - - - When you finish working with your computer, you can put it to sleep orshut it down.̈Putting your computer to sleepIf you will be away from your computer for only ...
-
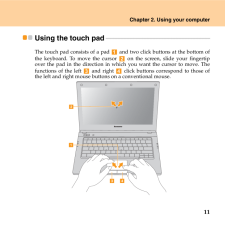
19 .Chapter 2. Using your com...Chapter 2. Using your computer11Using the touch pad - - - - - - - - - - - - - - - - - - - - - - - - - - - - - - - - - - - - - - - - - - - - - - - - - - - - - - - - - - - - - - - - - - - - The touch pad consists of a pad and two click buttons at the bott...
-
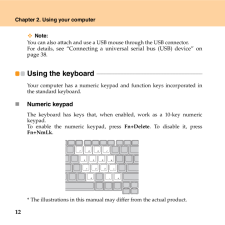
20 .12Chapter 2. Using your c...12Chapter 2. Using your computerNote:You can also attach and use a USB mouse through the USB connector.For details, see "Connecting a universal serial bus (USB) device" onpage 38.Using the keyboard - - - - - - - - - - - - - - - - - - - - - - - - - - - - -...
-
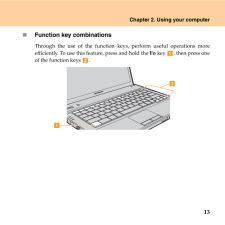
21 .Chapter 2. Using your com...Chapter 2. Using your computer13̈Function key combinationsThrough the use of the function ke ys, perform useful operations moreefficiently. To use this feature, press and hold the Fn key , then press oneof the function keys . !ab
-
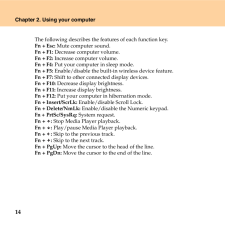
22 .14Chapter 2. Using your c...14Chapter 2. Using your computerThe following describes the features of each function key.Fn +Esc: Mute computer sound.Fn +F1: Decrease computer volume.Fn +F2: Increase computer volume.Fn +F4: Put your computer in sleep mode.Fn +F5: Enable/disable the buil...
-
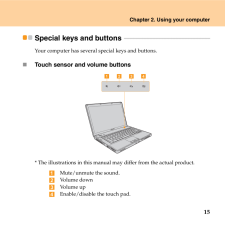
23 .Chapter 2. Using your com...Chapter 2. Using your computer15Special keys and buttons - - - - - - - - - - - - - - - - - - - - - - - - - - - - - - - - - - - - - - - - - - - - - - - - - - - - - - - - Your computer has several special keys and buttons.̈Touch sensor and volume buttons* ...
-
24 .16Chapter 2. Using your c...16Chapter 2. Using your computer̈Lenovo CareSM buttonPress the Lenovo Care button to enter the main interface of Rescue andRecovery while the power is off.Attention: When you press Lenovo Care button to turn on the computer, ensure thatyour computer is not...
-
25 .Chapter 2. Using your com...Chapter 2. Using your computer17Using the optical drive - - - - - - - - - - - - - - - - - - - - - - - - - - - - - - - - - - - - - - - - - - - - - - - - - - - - - - - - - - - - - - ̈Playing CDs/DVDs disc media You can play your CDs/DVDs with va rious appl...
-
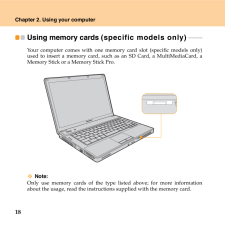
26 .18Chapter 2. Using your c...18Chapter 2. Using your computerUsing memory cards (specific models only) - - - - - - - - - Your computer comes with one memory card slot (specific models only)used to insert a memory card, such as an SD Card, a MultiMediaCard, aMemory Stick or a Memory ...
-
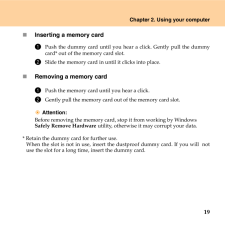
27 .Chapter 2. Using your com...Chapter 2. Using your computer19̈Inserting a memory card1 Push the dummy card until you hear a click. Gently pull the dummycard* out of the memory card slot.2 Slide the memory card in until it clicks into place.̈Removing a memory card1 Push the memory car...
-
28 .20Chapter 2. Using your c...20Chapter 2. Using your computerUsing the integrated camera (specific models only) With the built-in camera, you can take photos or movies and use with various applications, such as EasyCapture, Windows Live Messenger or Yahoo! Messenger, and so on.Note:I...
-
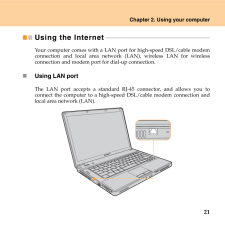
29 .Chapter 2. Using your com...Chapter 2. Using your computer21Using the Internet - - - - - - - - - - - - - - - - - - - - - - - - - - - - - - - - - - - - - - - - - - - - - - - - - - - - - - - - - - - - - - - - - - - - Your computer comes with a LAN port for high-speed DSL/cable modemco...
-
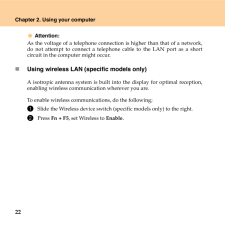
30 .22Chapter 2. Using your c...22Chapter 2. Using your computerAttention:As the voltage of a telephone connection is higher than that of a network,do not attempt to connect a telephone cable to the LAN port as a shortcircuit in the computer might occur.̈Using wireless LAN (specific mode...
-
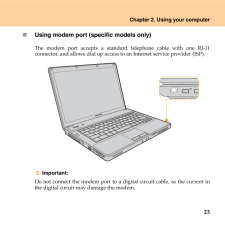
31 .Chapter 2. Using your com...Chapter 2. Using your computer23̈Using modem port (specific models only)The modem port accepts a standard telephone cable with one RJ-11connector, and allows dial up access to an Internet service provider (ISP).Important:Do not connect the modem port to a ...
-
32 .24Chapter 2. Using your c...24Chapter 2. Using your computerSecuring your computer - - - - - - - - - - - - - - - - - - - - - - - - - - - - - - - - - - - - - - - - - - - - - - - - - - - - - - - - - - This section provides informatio n about how to help protect yourcomputer from thef...
-
33 .Chapter 2. Using your com...Chapter 2. Using your computer25̈Using passwordsUsing passwords helps prevent your computer from being used by others.Once you set a password and enable it, a prompt appears on the screeneach time you power on the computer. Enter your password at the prom...
-
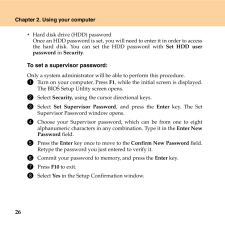
34 .26Chapter 2. Using your c...26Chapter 2. Using your computeṙHard disk drive (HDD) passwordOnce an HDD password is set, you will need to enter it in order to accessthe hard disk. You can set the HDD password with Set HDD userpassword in Security.To set a supervisor password:Only a s...
-
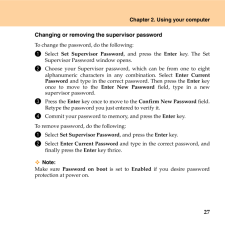
35 .Chapter 2. Using your com...Chapter 2. Using your computer27Changing or removing the supervisor passwordTo change the password, do the following:1 Select Set Supervisor Password , and press the Enter key. The SetSupervisor Password window opens.2 Choose your Supervisor password, whi...
-
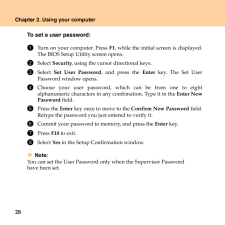
36 .28Chapter 2. Using your c...28Chapter 2. Using your computerTo set a user password:1 Turn on your computer. Press F1, while the initial screen is displayed.The BIOS Setup Utility screen opens.2 Select Security, using the cursor directional keys.3 Select Set User Password , and press...
-
37 .Chapter 2. Using your com...Chapter 2. Using your computer29Changing or removing the user passwordTo change the password, do the following:1 Select Set User Password , and press the Enter key. The Set UserPassword window opens.2 Choose your user password, which can be from one to ei...
-
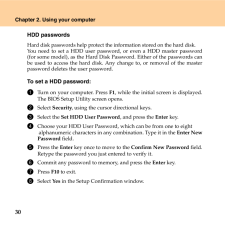
38 .30Chapter 2. Using your c...30Chapter 2. Using your computerHDD passwordsHard disk passwords help protect the information stored on the hard disk.You need to set a HDD user password, or even a HDD master password(for some model), as the Hard Disk Password. Either of the passwords c...
-
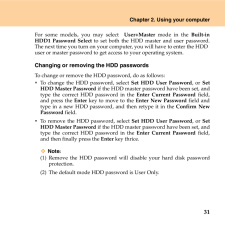
39 .Chapter 2. Using your com...Chapter 2. Using your computer31For some models, you may select User+Master mode in the Built-inHDD1 Password Select to set both the HDD master and user password.The next time you turn on your computer, you will have to enter the HDDuser or master passw...
-
40 .32Chapter 2. Using your c...32Chapter 2. Using your computerInstalling device drivers - - - - - - - - - - - - - - - - - - - - - - - - - - - - - - - - - - - - - - - - - - - - - - - - - - - - - - - - - - - A compatible device driver is a requirement to ensure correct operationand per...
-
41 .Chapter 2. Using your com...Chapter 2. Using your computer33Using the battery and AC adapter - - - - - - - - - - - - - - - - - - - - - - - - - - - - - - - - - - - - - - When using a computer away from electrical outlets, battery power isrequired to keep your computer ru nning. Diff...
-
42 .34Chapter 2. Using your c...34Chapter 2. Using your computerThe amount of battery power you use determines how long you can useyour computer between charges. As computer users' habits and needs willvary, it is difficult to predict how long a battery charge will last. There aretwo mai...
-
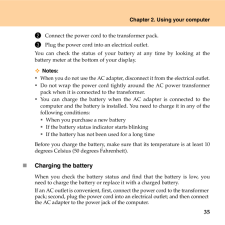
43 .Chapter 2. Using your com...Chapter 2. Using your computer352 Connect the power cord to the transformer pack.3 Plug the power cord into an electrical outlet.You can check the status of your battery at any time by looking at thebattery meter at the bottom of your display.Notes:̇When...
-
44 .36Chapter 2. Using your c...36Chapter 2. Using your computerThe charging time is affected by the physical environment.Note: To increase the life of the battery, the computer does not start rechargingthe battery if the remaining power is no less than 95 percent.̈Handling the batteryD...
-
45 .Chapter 2. Using your com...Chapter 2. Using your computer37Danger: Do not put the battery pack in trash th at is disposed of in landfills. Whendisposing of the battery, comply with local ordinances or regulations andyour company's safety standards.Danger: There is a danger of an exp...
-
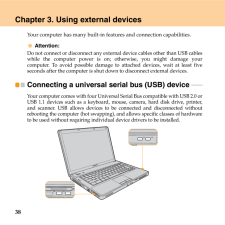
46 .38Chapter 3. Using extern...38Chapter 3. Using external devicesYour computer has many built-in features and connection capabilities.Attention: Do not connect or disconnect any external device cables other than USB cableswhile the computer power is on; otherwise, you might damage yo...
-
47 .Chapter 3. Using external...Chapter 3. Using external devices39Attention: When using a high power consumption USB device such as USB ODD, use an external device power adapter to avoid possible system shut down.Connecting an ExpressCard device - - - - - - - - - - - - - - - - - - -...
-
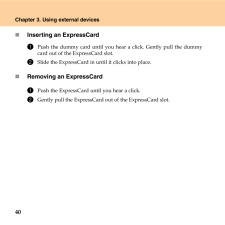
48 .40Chapter 3. Using extern...40Chapter 3. Using external devices̈Inserting an ExpressCard1 Push the dummy card until you hear a click. Gently pull the dummycard out of the ExpressCard slot.2 Slide the ExpressCard in un til it clicks into place.̈Removing an ExpressCard1 Push the Expres...
-
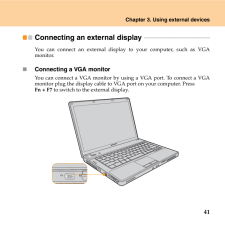
49 .Chapter 3. Using external...Chapter 3. Using external devices41Connecting an external display - - - - - - - - - - - - - - - - - - - - - - - - - - - - - - - - - - - - - - - - - - - You can connect an external displa y to your computer, such as VGAmonitor.̈Connecting a VGA monitorYou...
-
50 .42Chapter 3. Using extern...42Chapter 3. Using external devicesConnecting a headphone and audio device - - - - - - - - - - - - - - - - - Your computer comes with one headphone jack used for connectingheadphones, speakers, and audio devices.
-
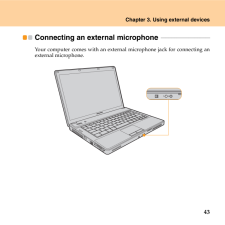
51 .Chapter 3. Using external...Chapter 3. Using external devices43Connecting an external microphone - - - - - - - - - - - - - - - - - - - - - - - - - - - - - - - - Your computer comes with an external microphone jack for connecting anexternal microphone.
-
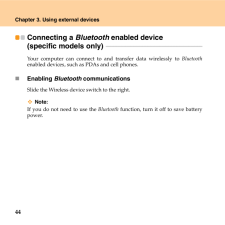
52 .44Chapter 3. Using extern...44Chapter 3. Using external devicesConnecting a Bluetooth enabled device (specific models only) - - - - - - - - - - - - - - - - - - - - - - - - - - - - - - - - - - - - - - - - - - - - - - - - - - - - - - - - - - - - - - - Your computer can connect to and...
-
53 .45Chapter 4. Troubleshoot...45Chapter 4. TroubleshootingFrequently asked questions - - - - - - - - - - - - - - - - - - - - - - - - - - - - - - - - - - - - - - - - - - - - - - - - - - This section lists frequently asked questions and tells where you can find detailed answers.What sa...
-
54 .46Chapter 4. Troubleshoot...46Chapter 4. TroubleshootingHow can I contact the Customer Support Center?See "Chapter 6. Getting help and serv ice" on page 76 of this Guide. For the phone numbers of the Customer Support Center nearest to you, See "Lenovo warranty service telephone numbe...
-
55 .Chapter 4. Troubleshootin...Chapter 4. Troubleshooting47Troubleshooting - - - - - - - - - - - - - - - - - - - - - - - - - - - - - - - - - - - - - - - - - - - - - - - - - - - - - - - - - - - - - - - - - - - - - - - - - - - - If you do not find your problem here, see Chapter 2. The f...
-
56 .48Chapter 4. Troubleshoot...48Chapter 4. TroubleshootingWhen I turn on the computer, only a white cursor appears on ablank screen. Restore backed-up files to your Windows environment or the entirecontents of your hard disk to the original factory contents using LenovoCare. If you sti...
-
57 .Chapter 4. Troubleshootin...Chapter 4. Troubleshooting49̈A password problemI forgot my password.̇If you forgot your user password, you may clear it by removing thesupervisor password. See "Changing or removing the supervisorpassword" on page 27.̇If you forget your HDD password, Len...
-
58 .50Chapter 4. Troubleshoot...50Chapter 4. Troubleshooting̈Sleep or hibernation problemsThe computer enters sleep mode unexpectedly.If the processor overheats, the computer automatically enters sleep modeto allow the computer to cool and to protect the processor and otherinternal compo...
-
59 .Chapter 4. Troubleshootin...Chapter 4. Troubleshooting51̇If the sleep indicator is on, your computer is in sleep mode. Connectthe AC adapter to the computer, then press any key or the powerbutton.̇If the sleep indicator is off, your computer is in sleep/hibernationmode or power-off ...
-
60 .52Chapter 4. Troubleshoot...52Chapter 4. TroubleshootingThe screen is unreadable or distorted. Make sure that: ̇The display device driver is installed correctly.̇The screen resolution and color quality are correctly set. ̇The monitor type is correct.To check these settings, do as fol...
-
61 .Chapter 4. Troubleshootin...Chapter 4. Troubleshooting53Incorrect characters appear on the screen.Did you install the operating system or application program correctly? Ifthey are installed and configured correctly, have the computer serviced.Missing, discolored, or bright dots appea...
-
62 .54Chapter 4. Troubleshoot...54Chapter 4. Troubleshooting̈Sound problemsNo sound can be heard from the speaker even when the volume isturned up.Make sure that:̇The mute function is off.̇The headphone jack is not used.̇Speakers is selected as a playback device.̈Battery problemsThe bat...
-
63 .Chapter 4. Troubleshootin...Chapter 4. Troubleshooting55The computer does not operate with a fully charged battery.The surge protector in the battery might be active. Turn off the computerfor one minute to reset the protector; then turn on the computer again.The battery does not char...
-
64 .56Chapter 4. Troubleshoot...56Chapter 4. TroubleshootinġYour computer might lock when it enters sleep mode during acommunication operation. Disable the sleep timer when you areworking on the network.The computer does not start from a device you want. See the Boot menu of the BIOS S...
-
65 .Chapter 4. Troubleshootin...Chapter 4. Troubleshooting57Using PC-Doctor - - - - - - - - - - - - - - - - - - - - - - - - - - - - - - - - - - - - - - - - - - - - - - - - - - - - - - - - - - - - - - - - - - - - - - - - - - - - - ̈Diagnosing problemsIf you have a problem with your com...
-
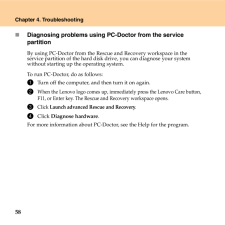
66 .58Chapter 4. Troubleshoot...58Chapter 4. Troubleshooting̈Diagnosing problems using PC-Doctor from the service partitionBy using PC-Doctor from the Rescue and Recovery workspace in the service partition of the hard disk dr ive, you can diagnose your system without starting up the oper...
-
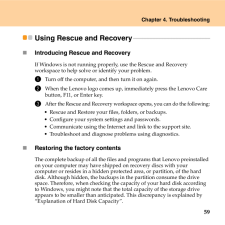
67 .Chapter 4. Troubleshootin...Chapter 4. Troubleshooting59Using Rescue and Recovery - - - - - - - - - - - - - - - - - - - - - - - - - - - - - - - - - - - - - - - - - - - - - - - - - - ̈Introducing Rescue and RecoveryIf Windows is not running properly, use the Rescue and Recovery works...
-
68 .60Chapter 4. Troubleshoot...60Chapter 4. TroubleshootingThe Product Recovery Program contained within this area enables you to restore the complete contents of yo ur hard disk to the same state as it was when originally shipped from the factory.If you are using the recovery discs th ...
-
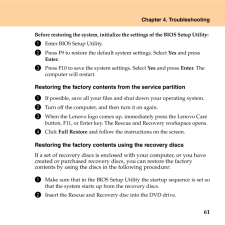
69 .Chapter 4. Troubleshootin...Chapter 4. Troubleshooting61Before restoring the system, initialize the settings of the BIOS Setup Utility: 1 Enter BIOS Setup Utility. 2 Press F9 to restore the default system settings. Select Yes and press Enter. 3 Press F10 to save the system settings....
-
70 .62Chapter 4. Troubleshoot...62Chapter 4. Troubleshooting3 Restart the computer. After a short wait, the Rescue and Recovery workspace opens. 4 Click Full Restore and follow the instructions on the screen. Notes:̇To boot from the recovery disk, select Boot menu from the BIOS SetupUtil...
-
71 .Chapter 4. Troubleshootin...Chapter 4. Troubleshooting63You can use either the Rescue and Recovery program or the Rescue and Recovery workspace to restore the contents of the hard disk to an earlier state using any of the stored backups. The Rescue and Recovery workspace runs indep...
-
72 .64Chapter 5. Upgrading an...64Chapter 5. Upgrading and replacing devicesUpgrading and replacing devices - - - - - - - - - - - - - - - - - - - - - - - - - - - - - - - - - - - - - - - - - - ̈Replacing the batteryDanger: Use only the battery specified in the pa rts list for your comput...
-
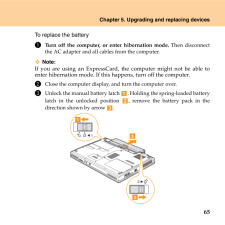
73 .Chapter 5. Upgrading and ...Chapter 5. Upgrading and replacing devices65To replace the battery1 Turn off the computer, or enter hibernation mode. Then disconnectthe AC adapter and all cables from the computer.Note:If you are using an ExpressCard, the computer might not be able toen...
-
74 .66Chapter 5. Upgrading an...66Chapter 5. Upgrading and replacing devices4 Install a fully charged battery.5 Slide the manual battery latch to the locked position.6 Turn the computer over again. Connect the AC adapter and the cablesto the computer again.̈Upgrading the hard disk driveY...
-
75 .Chapter 5. Upgrading and ...Chapter 5. Upgrading and replacing devices67The drive is very sensitive. Inco rrect handling can cause damage andpermanent loss of data on the hard disk. Before removing the harddisk drive, make a backup copy of al l the information on the hard disk,and th...
-
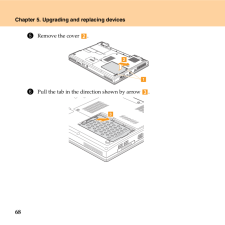
76 .68Chapter 5. Upgrading an...68Chapter 5. Upgrading and replacing devices5 Remove the cover . 6 Pull the tab in the direction shown by arrow .!12"3
-
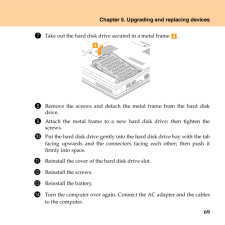
77 .Chapter 5. Upgrading and ...Chapter 5. Upgrading and replacing devices697 Take out the hard disk drive secured in a metal frame .8 Remove the screws and detach the metal frame from the hard diskdrive.9 Attach the metal frame to a new hard disk drive; then tighten thescrews.0 Put the...
-
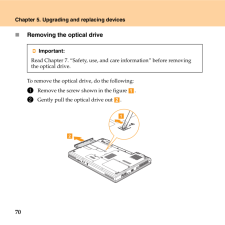
78 .70Chapter 5. Upgrading an...70Chapter 5. Upgrading and replacing devices̈Removing the optical driveTo remove the optical drive, do the following:1 Remove the screw shown in the figure . 2 Gently pull the optical drive out . Important:Read Chapter 7. "Safety, use, and care informati...
-
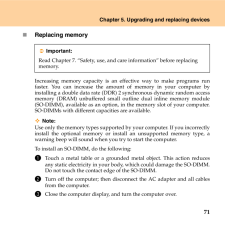
79 .Chapter 5. Upgrading and ...Chapter 5. Upgrading and replacing devices71̈Replacing memoryIncreasing memory capacity is an effective way to make programs runfaster. You can increase the amount of memory in your computer byinstalling a double data rate (DDR) 2 synchronous dynamic rand...
-
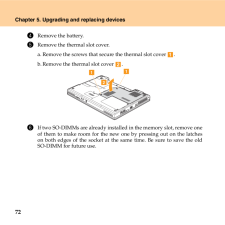
80 .72Chapter 5. Upgrading an...72Chapter 5. Upgrading and replacing devices4 Remove the battery. 5 Remove the thermal slot cover.a.Remove the screws that secure the thermal slot cover .b.Remove the thermal slot cover .6 If two SO-DIMMs are already installed in the memory slot, remove...
-
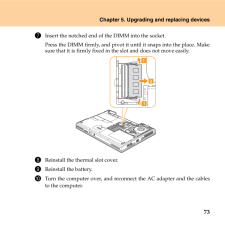
81 .Chapter 5. Upgrading and ...Chapter 5. Upgrading and replacing devices737 Insert the notched end of the DIMM into the socket.Press the DIMM firmly, and pivot it until it snaps into the place. Makesure that it is firmly fixed in the slot and does not move easily.8 Reinstall the therma...
-
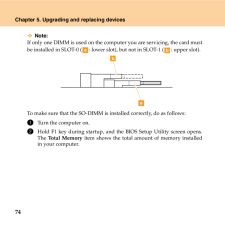
82 .74Chapter 5. Upgrading an...74Chapter 5. Upgrading and replacing devicesNote:If only one DIMM is used on the computer you are servicing, the card mustbe installed in SLOT-0 ( : lower slot ), but not in SLOT-1 ( : upper slot).To make sure that the SO-DIMM is in stalled correctly, do a...
-
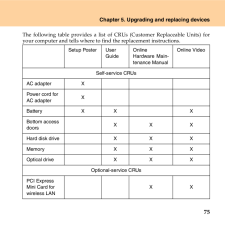
83 .Chapter 5. Upgrading and ...Chapter 5. Upgrading and replacing devices75The following table provides a list of CRUs (Customer Replaceable Units) foryour computer and tells where to find the replacement instructions.Setup Poster UserGuideOnline Hardware Main-tenance ManualOnline Video...
-
84 .76Chapter 6. Getting help...76Chapter 6. Getting help and serviceGetting help and service - - - - - - - - - - - - - - - - - - - - - - - - - - - - - - - - - - - - - - - - - - - - - - - - - - - - - - - - - - If you need help, service, techni cal assistance, or just want moreinformatio...
-
85 .Chapter 6. Getting help a...Chapter 6. Getting help and service77Getting help on the Web - - - - - - - - - - - - - - - - - - - - - - - - - - - - - - - - - - - - - - - - - - - - - - - - - - - - - - - - - - - The Lenovo Web site on the World Wide Web has up-to-date informationabout Le...
-
86 .78Chapter 6. Getting help...78Chapter 6. Getting help and servicėEngineering change management - O ccasionally, there might be changesthat are required after a product has been sold. Lenovo or your reseller, ifauthorized by Lenovo, will make se lected Engineering Changes (ECs)availa...
-
87 .Chapter 6. Getting help a...Chapter 6. Getting help and service79̇Machine type and model̇Serial numbers of your computer, monitor, and other components, oryour proof of purchasėDescription of the probleṁHardware and software configurat ion information for your systemNote:Telephone ...
-
88 .80Chapter 6. Getting help...80Chapter 6. Getting help and serviceGetting help around the world - - - - - - - - - - - - - - - - - - - - - - - - - - - - - - - - - - - - - - - - - - - - - - If you travel with your computer or relocate it to a country where yourLenovo machine type is so...
-
89 .81Chapter 7. Safety, use,...81Chapter 7. Safety, use, and care informationImportant safety information - - - - - - - - - - - - - - - - - - - - - - - - - - - - - - - - - - - - - - - - - This information can help you safely use your notebook personalcomputer. Follow and retain all inf...
-
90 .82Chapter 7. Safety, use,...82Chapter 7. Safety, use, and care information̈Conditions that requi re immediate actionProducts can become damaged due to misuse or neglect. Some productdamage is serious enough that the prod uct should not be used again until ithas been inspected and, if...
-
91 .Chapter 7. Safety, use, a...Chapter 7. Safety, use, and care information83̇Damage to a battery (such as cracks, dents, or creases), discharge from abattery, or a buildup of foreign substances on the battery.̇A cracking, hissing, or popping soun d, or strong odor that comes fromthe p...
-
92 .84Chapter 7. Safety, use,...84Chapter 7. Safety, use, and care information̈Service and upgradesAlways observe the following precauti ons to reduce the risk of injuryand property damage.Attention: Do not attempt to service a product yourself unless instructed to do soby the Customer S...
-
93 .Chapter 7. Safety, use, a...Chapter 7. Safety, use, and care information85Danger: Hazardous moving parts. Keep fingers and other body parts away.Attention: Before replacing any CRUs, turn of f the computer and wait three tofive minutes to let the computer cool before opening the cove...
-
94 .86Chapter 7. Safety, use,...86Chapter 7. Safety, use, and care informationProtect power cords and power adapte rs from liquids. For instance, donot leave your power cord or power ad apter near sinks, tubs, toilets, oron floors that are cleaned with liquid cleansers. Liquids can cause...
-
95 .Chapter 7. Safety, use, a...Chapter 7. Safety, use, and care information87̈ Extension cords and related devicesDanger: Ensure that extension cords, surge protectors, uninterruptible powersupplies, and power strips that you use are rated to handle theelectrical requirements of the pro...
-
96 .88Chapter 7. Safety, use,...88Chapter 7. Safety, use, and care informationoutlet. If you cannot insert the plug into the outlet, contact anelectrician for an approved outlet ad apter or to replace the outlet withone that enables this safety feature. Never overload an electrical outl...
-
97 .Chapter 7. Safety, use, a...Chapter 7. Safety, use, and care information89Hazardous voltage, current, and ener gy levels are present inside anycomponent that has this label attach ed. There are no serviceable partsinside these components. If you su spect a problem with one of thesepa...
-
98 .90Chapter 7. Safety, use,...90Chapter 7. Safety, use, and care informationProducts containing CR (manganese dioxide) lithium coin cellbatteries may contain perchlorate.Perchlorate Material - special handling may apply.See http://www.dtsc.ca.gov/hazardouswaste/perchlorate.̈Heat and pr...
-
99 .Chapter 7. Safety, use, a...Chapter 7. Safety, use, and care information91̇Ventilation slots, fans and/or heat sinks are provided with the productfor safety, comfort, and reliable operation. These features mightinadvertently become blocked by placing the product on a bed, sofa,carpe...
-
100 .92Chapter 7. Safety, use,...92Chapter 7. Safety, use, and care information̈CD and DVD drive safetyDanger: CD and DVD drives spin discs at a high speed. If a CD or DVD iscracked or otherwise physically damag ed, it is possible for the disc tobreak apart or even shatter when the CD dri...
