Q&A
取扱説明書・マニュアル (文書検索対応分のみ)
"DELL"27 件の検索結果
"DELL"10 件の検索結果
全般
質問者が納得ドライバの順序は間違えてませんか、Intel Mobile Chipset から順を追ったのでしたら悪しからず。
http://www.dell.com/support/troubleshooting/jp/ja/jpdhs1/KCS/KcsArticles/ArticleView?c=jp&l=ja&s=dhs&docid=232716_ja
4219日前view57
全般
質問者が納得予想ですが…
1:バッテリーエラーの表示では?
物によって違うとは思いますが、緑:動作中、橙:充電中、赤:バッテリーモードといったように、表示で電源状態を示していると思います。
2:バッテリーエラーによりコンセントからの直接電源しか出来ていないと思います。
一度、バッテリーを外して、付け直してみてはどうでしょうか。
3:多分、HDDの音と思います。
光学ドライブのすぐ手前にHDDがあるみたいなので、そのディスク回転音か、シーク音と思われます。
ものすごく高温になっていたと言う事は熱によるダメージで故障して...
5543日前view117
全般
質問者が納得まず、画像はレイヤーにしておいてください。
バックが「白」なら、「自動選択ツール」で「許容値」を[ 50~80 ]くらいに設定してバックの白いところをクリックして、「レイヤー」メニュー→「レイヤーマスクの追加」→「選択範囲をマスク」とクリックすれば、ロゴの部分だけに切り抜くことが出来ます(添付画像上)。
また、バックが「白」の場合、切り抜きをしなくても、レイヤーモードを「乗算」(添付画像上から2番目)、「比較(暗)」(添付画像上から 3番目)、「焼き込みカラー」(添付画像下)などに設定すると、「白」の部分...
5672日前view28
全般
質問者が納得XPS-M1330は、Windows7互換(そのまま7が使える)機種ではなく、Windows7の基本機能が使えるというDELLが検証している機種となっています。
http://supportapj.dell.com/support/topics/global.aspx/support/kcs/document?c=jp&l=ja&s=dhs&docid=DSN_360683&isLegacy=true
↑
このページの下の方にXPS M1330が載ってます。
基本的には、...
5161日前view201
全般
質問者が納得今やってみたところM1330用のタッチパッドドライバは普通にダウンロードできるようですが?
その時たまたまサーバかファイルが一時的におかしかったとかあなたの環境になにか問題があるとかじゃないでしょうか?
ちゃんとサポートトップからサービスタグか機種を指定してダウンロードしなおしてみてください。
それでもダメならブラウザを変えてみるとか環境を変えてみましょう。
その機種にタッチパッドON/OFF切り替えのハードウエアスイッチはないと思います。タッチパッドドライバをインストールしてください。
5205日前view200
全般
質問者が納得Firefoxの表示の乱れは、ホワイト・タイガー・ウッズさんの下記回答を参照して下さい。
http://detail.chiebukuro.yahoo.co.jp/qa/question_detail/q1462545474
履歴の削除は、CCleanerが便利です。
http://japanese.trailsframework.org/lv/group/view/kl25623/CCleaner.htm
Firefoxのデータベース(SQlight)の最適化はSpeedyfoxが最強です。CClea...
5278日前view63
全般
質問者が納得Firefoxで3.6.*から4.0.*は
大きく変化しており、
場合によってはプロファイルを作成しなおさないと
不具合が発生するかたも少なくないようです。
また通常、
ブラウザでの表示が崩れた時には、
まずキャッシュやクッキーの削除を
試すことが必要です。
5278日前view52
全般
質問者が納得パーテーション復元ソフトを使えば復元できます。
フリーソフト(Testdisk-6.8.Win)もありますが海外にある英語版で日本語パッチもなくDOSでフロッピーに展開しフロッピー起動で使うソフトなので解釈が難しいと思うなら市販の日本語版のパーテーション復元ソフトを探して買った方が良いかもしれません。
英語力とパーテーション論理に関する知識があればフリーソフトで既存と同じ状態にデータ共に復元可能です。
また別のパソコンに外したHDDを外付し削除データ復元ソフトでファイルやフォルダを復元し、パーテーショ...
5296日前view169
全般
質問者が納得起動ドライブをSSDに交換すれば早いけれど
割高(64ギガで1万2千円程度)なので
ハイブリッドSSDと言うSSDが組み込まれたハードディスクが
250ギガで1万円程度です。
追伸
近所のパソコンに詳しい人にBIOSを設定変更してもらい
エラーチェックを停止してもらうだけでも早くなります。
5303日前view139
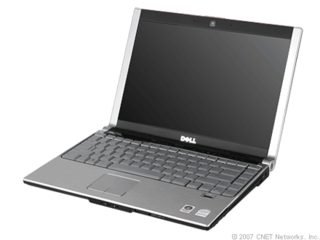
Dell™ XPS™ M1330 Service Manual Before You BeginInternal Card With Bluetooth® Wireless TechnologyHard DriveMemoryCoin-Cell BatteryHinge Covers and Center Control CoverKeyboardCommunication CardsDisplay AssemblyLCD Camera (optional)Palm RestWireless Sniffer BoardOptical DriveExpressCard ReaderProcessor Thermal-Cooling AssemblyProcessorSpeakerSystem BoardFlashing the BIOSPin Assignments for I/O Connectors Notes, Notices, and CautionsNOTE: A NOTE indicates important information that helps you make better use ...
Back to Contents Page Before You BeginDell™ XPS™ M1330 Service Manual Recommended Tools Turning Off Your Computer Before Working Inside Your ComputerThis section provides procedures for removing and installing the components in your computer. Unless otherwise noted, each procedure assumes that thefollowing conditions exist:l You have performed the steps in Turning Off Your Computer and Before Working Inside Your Computer.l You have read the safety information in the Dell™ Product Information Guide.l A ...
Back to Contents Page Flashing the BIOSDell™ XPS™ M1330 Service Manual Flashing the BIOS From a CD Flashing the BIOS From the Hard DriveIf a BIOS-update program CD is provided with the new system board, flash the BIOS from the CD. If you do not have a BIOS-update program CD, flash theBIOS from the hard drive. Flashing the BIOS From a CD1. Ensure that the AC adapter is plugged in and that the main battery is installed properly.NOTE: If you use a BIOS-update program CD to flash the BIOS, set up the comput...
Back to Contents Page LCD Camera (optional)Dell™ XPS™ M1330 Service Manual Removing the LCD Camera Replacing the LCD Camera Removing the LCD Camera CAUTION: Before working inside your computer, follow the safety instructions in the Product Information Guide.NOTICE: To avoid electrostatic discharge, ground yourself by using a wrist grounding strap or by periodically touching an unpainted metal surface (suchas a connector on the back of the computer).1. Follow the instructions in Before You Begin.2. Remov...
Back to Contents Page Hard DriveDell™ XPS™ M1330 Service Manual Removing the Hard Drive CAUTION: If you remove the hard drive from the computer when the drive is hot, do not touch the metal housing of the hard drive. CAUTION: Before you begin any of the procedures in this section, follow the safety instructions in the Product Information Guide.NOTICE: To prevent data loss, turn off your computer (see Turning Off Your Computer) before removing the hard drive. Do not remove the hard drivewhile the computer...
Back to Contents Page MemoryDell™ XPS™ M1330 Service Manual Removing the DIMM 1 Memory Module Replacing the DIMM 1 Memory Module Removing the DIMM 2 Memory Module Replacing the DIMM 2 Memory Module CAUTION: Before you begin any of the procedures in this section, follow the safety instructions in the Product Information Guide.You can increase your computer memory by installing memory modules on the system board. See "Specifications" in your Owner's Manual for information on thememory supported by your ...
Returning a Hard Drive to DellReturn your old hard drive to Dell in its original, or comparable, foam packaging. Otherwise, the hard drive may be damaged in transit.1foam packagingBack to Contents Page 2hard drive
1tab2notchNOTICE: If the cover is difficult to close, remove the module and reinstall it. Forcing the cover to close may damage your computer.3. Replace the module cover.4. Insert the battery into the battery bay, or connect the AC adapter to your computer and an electrical outlet.5. Turn on the computer.As the computer boots, it detects the additional memory and automatically updates the system configuration information.To confirm the amount of memory installed in the computer, click StartBack to Contents ...
1upper memory module connector2securing clips (2)3memory module (DIMM 1) Replacing the DIMM 1 Memory ModuleNOTICE: To avoid electrostatic discharge, ground yourself by using a wrist grounding strap or by periodically touching an unpainted metal surface (suchas a connector on the back of the computer).1.2. Align the notch in the module edge connector with the tab in the connector slot. Slide the module firmly into the slot at a 45-degree angle, and rotate the module down until it clicks into place. If you ...
Back to Contents PageDell™ XPS™ M1330 Service Manual NOTE: A NOTE indicates important information that helps you make better use of your computer.NOTICE: A NOTICE indicates either potential damage to hardware or loss of data and tells you how to avoid the problem.CAUTION: A CAUTION indicates a potential for property damage, personal injury, or death.Information in this document is subject to change without notice.© 2007 Dell Inc. All rights reserved.Reproduction in any manner whatsoever without the written ...
- 1


