X3の取扱説明書・マニュアル [全211ページ 8.62MB]


4


201 / 211 ページ

201 / 211 ページ


現在のページURL
Seite 201Short commands of the voice act. system Reference201Online Edition for Part no. 01 40 2 903 813 - 07 12 490
参考になったと評価  8人が参考になったと評価しています。


このマニュアルの目次
-
1 .Owner's Manual forVehicle...Owner's Manual forVehicleTHE BMW X3.OWNER'S MANUAL.The Ultimate DrivingMachineTHE BMW X3.OWNER'S MANUAL.ContentsA-ZOnline Edition for Part no. 01 40 2 903 813 - 07 12 490
-
2 .2 ページ目のマニュアル
-
3 .X3Owner's Manual for Vehi...X3Owner's Manual for VehicleThank you for choosing a BMW.The more familiar you are with your vehicle, the better control youwill have on the road. We therefore strongly suggest:Read this Owner's Manual before starting off in your new BMW.Also use the Integ...
-
4 .© 2012 Bayerische Motoren...© 2012 Bayerische Motoren WerkeAktiengesellschaftMunich, GermanyReprinting, including excerpts, only with the writtenconsent of BMW AG, Munich.US English VI/12, 07 12 490Printed on environmentally friendly paper, bleachedwithout chlorine, suitable for recy...
-
5 .ContentsThe fastest way t...ContentsThe fastest way to find information on a partic‐ular topic or item is by using the index, refer topage 202 .6 NotesAt a glance12 Cockpit16 iDrive23 Voice activation system26 Integrated Owner's Manual in the vehicleControls30 Opening and closing46 ...
-
6 .NotesUsing this Owner's M...NotesUsing this Owner's ManualThe fastest way to find information on a partic‐ular topic is by using the index.An initial overview of the vehicle is provided inthe first chapter.Updates made after the editorialdeadlineAny updates made after the editorial d...
-
7 .Updates made after the ed...Updates made after the editorialdeadlineAny updates made after the editorial deadline forthe Owner's Manuals are located in the appen‐dix of the printed quick reference for the vehicle.For your own safetyMaintenance and repairsAdvanced technology, e.g., th...
-
8 .▷California Emission Cont...▷California Emission Control System LimitedWarranty.Detailed information about these warranties islisted in the Service and Warranty InformationBooklet for US models or in the Warranty andService Guide Booklet for Canadian models.Your vehicle has been spec...
-
9 .Seite 9Notes9Online Editi...Seite 9Notes9Online Edition for Part no. 01 40 2 903 813 - 07 12 490
-
11 .At a glanceThese overview...At a glanceThese overviews of buttons, switches anddisplays are intended to familiarize you with yourvehicle. You will also become quickly acquaintedwith the available control concepts and options.Online Edition for Part no. 01 40 2 903 813 - 07 12 490
-
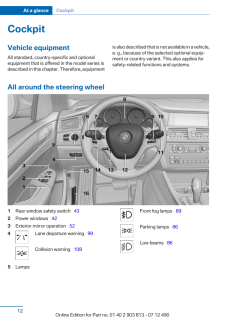
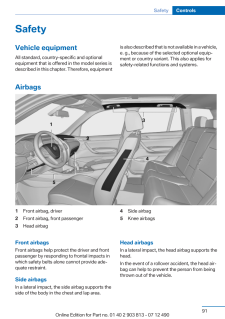
12 .CockpitVehicle equipmentA...CockpitVehicle equipmentAll standard, country-specific and optionalequipment that is offered in the model series isdescribed in this chapter. Therefore, equipmentis also described that is not available in a vehicle,e. g., because of the selected optional e...
-
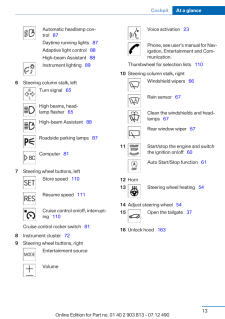
13 .Automatic headlamp con‐tr...Automatic headlamp con‐trol 87Daytime running lights 87Adaptive light control 88High-beam Assistant 88Instrument lighting 896 Steering column stalk, leftTurn signal 65High beams, head‐lamp flasher 65High-beam Assistant 88Roadside parking la...
-
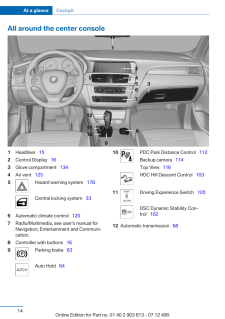
14 .All around the center con...All around the center console1 Headliner 152 Control Display 163 Glove compartment 1344 Air vent 1255 Hazard warning system 178Central locking system 336 Automatic climate control 1207 Radio/Multimedia, see user's manual forNavigation, Entert...
-
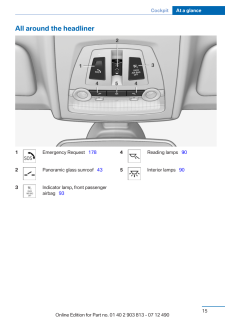
15 .All around the headliner1...All around the headliner1 Emergency Request 1782 Panoramic glass sunroof 433 Indicator lamp, front passengerairbag 934 Reading lamps 905 Interior lamps 90Seite 15Cockpit At a glance15Online Edition for Part no. 01 40 2 903 813 - 07 12 490
-
16 .iDriveVehicle equipmentAl...iDriveVehicle equipmentAll standard, country-specific and optionalequipment that is offered in the model series isdescribed in this chapter. Therefore, equipmentis also described that is not available in a vehicle,e. g., because of the selected optional eq...
-
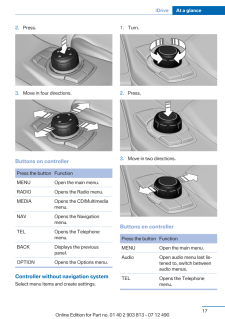
17 .2. Press.3. Move in four ...2. Press.3. Move in four directions.Buttons on controllerPress the button FunctionMENU Open the main menu.RADIO Opens the Radio menu.MEDIA Opens the CD/Multimediamenu.NAV Opens the Navigationmenu.TEL Opens the Telephonemenu.BACK Displays the previouspanel....
-
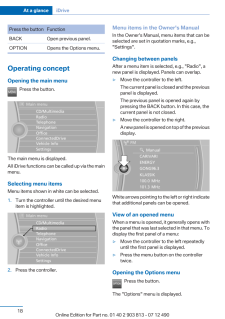
18 .Press the button Function...Press the button FunctionBACK Open previous panel.OPTION Opens the Options menu.Operating conceptOpening the main menuPress the button.The main menu is displayed.All iDrive functions can be called up via the mainmenu.Selecting menu itemsMenu items shown in...
-
19 .Additional options: move ...Additional options: move the controller to theright repeatedly until the "Options" menu is dis‐played.Options menuThe "Options" menu consists of various areas:▷Screen settings, e.g., "Split screen".This area remains unchanged.▷Control options for the sel...
-
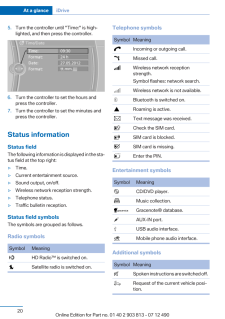
20 .5. Turn the controller un...5. Turn the controller until "Time:" is high‐lighted, and then press the controller.6. Turn the controller to set the hours andpress the controller.7. Turn the controller to set the minutes andpress the controller.Status informationStatus fieldThe followin...
-
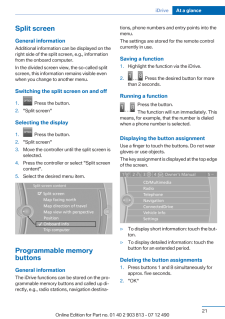
21 .Split screenGeneral infor...Split screenGeneral informationAdditional information can be displayed on theright side of the split screen, e.g., informationfrom the onboard computer.In the divided screen view, the so-called splitscreen, this information remains visible evenwhen you cha...
-
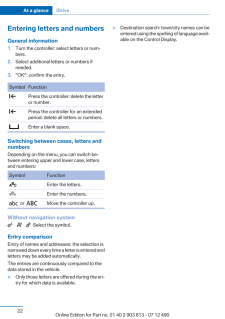
22 .Entering letters and numb...Entering letters and numbersGeneral information1. Turn the controller: select letters or num‐bers.2. Select additional letters or numbers ifneeded.3. "OK": confirm the entry.Symbol Function Press the controller: delete the letteror number. Press the cont...
-
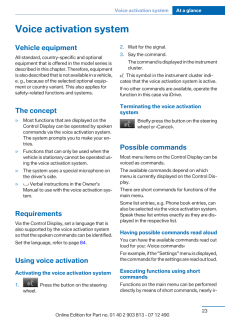
23 .Voice activation systemVe...Voice activation systemVehicle equipmentAll standard, country-specific and optionalequipment that is offered in the model series isdescribed in this chapter. Therefore, equipmentis also described that is not available in a vehicle,e. g., because of the sel...
-
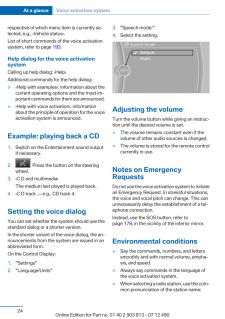
24 .respective of which menu ...respective of which menu item is currently se‐lected, e.g., ›Vehicle status‹.List of short commands of the voice activationsystem, refer to page 193 .Help dialog for the voice activationsystemCalling up help dialog: ›Help‹Additional commands for the help ...
-
25 .›Station ...‹ e. g. Class...›Station ...‹ e. g. Classic Radio station▷Keep the doors, windows, and glass sunroofclosed to prevent noise interference.▷Avoid making other noise in the vehiclewhile speaking.Seite 25Voice activation system At a glance25Online Edition for Part no. 01 40 2...
-
26 .Integrated Owner's Manual...Integrated Owner's Manual in the vehicleVehicle equipmentAll standard, country-specific and optionalequipment that is offered in the model series isdescribed in this chapter. Therefore, equipmentis also described that is not available in a vehicle,e. g., b...
-
27 .Opening via the iDriveTo ...Opening via the iDriveTo move directly from the application on theControl Display to the options menu:1. Press the button or move the controllerto the right repeatedly until the "Options"menu is displayed.2. "Display Owner's Manual"Opening when a Check C...
-
29 .ControlsThis chapter is i...ControlsThis chapter is intended to provide you withinformation that will give you complete control ofyour vehicle. All features and accessories that areuseful for driving and your safety, comfort andconvenience are described here.Online Edition for Part n...
-
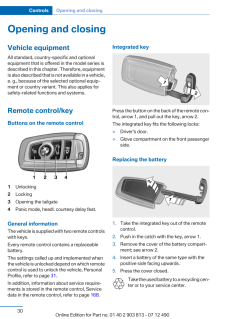
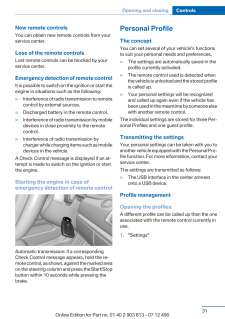
30 .Opening and closingVehicl...Opening and closingVehicle equipmentAll standard, country-specific and optionalequipment that is offered in the model series isdescribed in this chapter. Therefore, equipmentis also described that is not available in a vehicle,e. g., because of the selecte...
-
31 .New remote controlsYou ca...New remote controlsYou can obtain new remote controls from yourservice center.Loss of the remote controlsLost remote controls can be blocked by yourservice center.Emergency detection of remote controlIt is possible to switch on the ignition or start theeng...
-
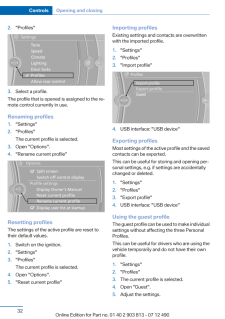
32 .2. "Profiles"3. Select a ...2. "Profiles"3. Select a profile.The profile that is opened is assigned to the re‐mote control currently in use.Renaming profiles1. "Settings"2. "Profiles"The current profile is selected.3. Open "Options".4. "Rename current profile"Resetting profilesThe se...
-
33 .Note: the guest profile c...Note: the guest profile cannot be renamed.Display profile list during startThe profile list can be displayed during eachstart for selecting the desired profile.1. "Settings"2. "Profiles"3. Open "Options".4. "Display user list at startup"Personal Profile se...
-
34 .Operating from the inside...Operating from the insideVia the button for the central locking system.If the vehicle has been locked from inside, thefuel filler flap remains unlocked.If an accident of a certain severity occurs, thecentral locking system unlocks automatically.The hazard ...
-
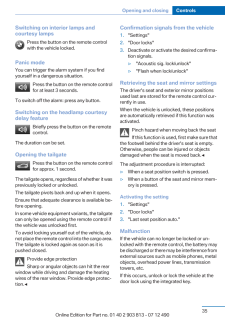
35 .Switching on interior lam...Switching on interior lamps andcourtesy lampsPress the button on the remote controlwith the vehicle locked.Panic modeYou can trigger the alarm system if you findyourself in a dangerous situation.Press the button on the remote controlfor at least 3 seconds....
-
36 .For US owners onlyThe tra...For US owners onlyThe transmitter and receiver units comply withpart 15 of the FCC/Federal CommunicationCommission regulations. Operation is governedby the following:FCC ID:▷LX8766S.▷LX8766E.▷LX8CAS.▷LX8CAS2.▷MYTCAS4.Compliance statement:This device compli...
-
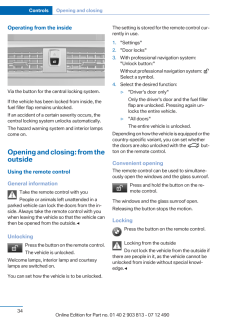
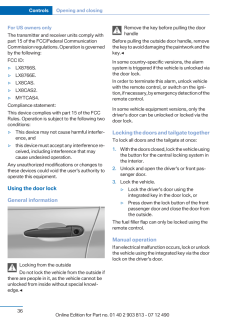
37 .Opening and closing: from...Opening and closing: from theinsideLocking and unlockingPressing the buttons locks and unlocks thedoors and the tailgate when the front doors areclosed, but they are not secured against theft.The fuel filler flap remains unlocked.Unlocking and opening▷Eith...
-
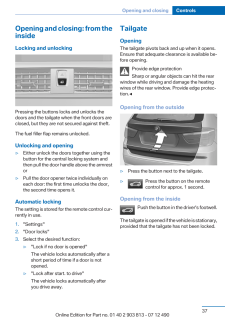
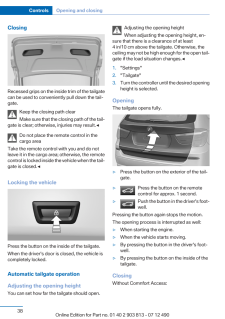
38 .ClosingRecessed grips on ...ClosingRecessed grips on the inside trim of the tailgatecan be used to conveniently pull down the tail‐gate.Keep the closing path clearMake sure that the closing path of the tail‐gate is clear; otherwise, injuries may result.◀Do not place the remote contro...
-
39 .▷Press the button on the ...▷Press the button on the inside of the tailgate.The tailgate closes automatically.Pressing again stops the motion.With Comfort Access:▷Press the button, arrow 1, on the inside ofthe tailgate.The tailgate closes automatically.Pressing again stops the motion...
-
40 .Functional requirements▷T...Functional requirements▷There are no external sources of interfer‐ence nearby.▷To lock the vehicle, the remote control mustbe located outside of the vehicle.▷The next unlocking and locking cycle is notpossible until after approx. 2 seconds.▷The engine can ...
-
41 .▷Opening of a door, the h...▷Opening of a door, the hood or the tailgate.▷Movements in the vehicle.▷Changes in the vehicle tilt, e.g., during at‐tempts to steal a wheel or when towing thecar.▷Interruptions in battery voltage.The alarm system briefly indicates tampering:▷By sounding a...
-
42 .The alarm system responds...The alarm system responds in situations suchas attempts to steal a wheel or when the car istowed.Interior motion sensorThe windows and glass sunroof must be closedfor the system to function properly.Avoiding unintentional alarmsThe tilt alarm sensor and in...
-
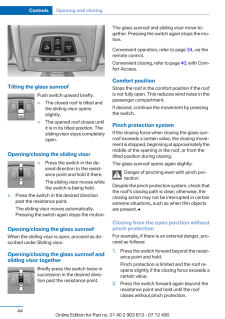
43 .Pinch protection systemIf...Pinch protection systemIf the closing force exceeds a specific value as awindow closes, the closing action is interrupted.The window reopens slightly.Danger of pinching even with pinch pro‐tectionEven with the pinch protection system, checkthat the window'...
-
44 .Tilting the glass sunroof...Tilting the glass sunroofPush switch upward briefly.▷The closed roof is tilted andthe sliding visor opensslightly.▷The opened roof closes untilit is in its tilted position. Thesliding visor stays completelyopen.Opening/closing the sliding visor▷Press the s...
-
45 .Closing from the raised p...Closing from the raised positionwithout pinch protectionIf there is an external danger, push the switchforward past the resistance point and hold it.The roof closes without pinch protection.Initializing after a power failureAfter a power failure during the...
-
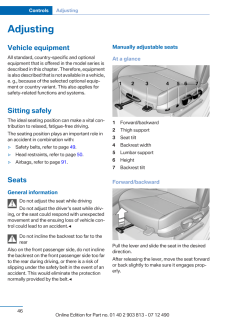
46 .AdjustingVehicle equipmen...AdjustingVehicle equipmentAll standard, country-specific and optionalequipment that is offered in the model series isdescribed in this chapter. Therefore, equipmentis also described that is not available in a vehicle,e. g., because of the selected optional...
-
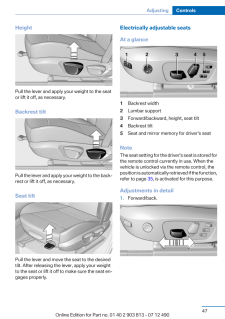
47 .HeightPull the lever and ...HeightPull the lever and apply your weight to the seator lift it off, as necessary.Backrest tiltPull the lever and apply your weight to the back‐rest or lift it off, as necessary.Seat tiltPull the lever and move the seat to the desiredtilt. After releasing...
-
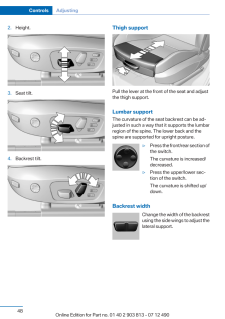
48 .2. Height.3. Seat tilt.4....2. Height.3. Seat tilt.4. Backrest tilt.Thigh supportPull the lever at the front of the seat and adjustthe thigh support.Lumbar supportThe curvature of the seat backrest can be ad‐justed in such a way that it supports the lumbarregion of the spine. The low...
-
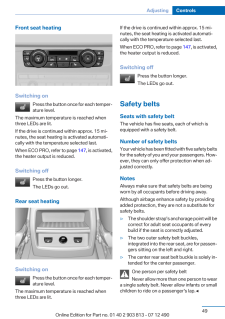
49 .Front seat heatingSwitchi...Front seat heatingSwitching onPress the button once for each temper‐ature level.The maximum temperature is reached whenthree LEDs are lit.If the drive is continued within approx. 15 mi‐nutes, the seat heating is activated automati‐cally with the temperatur...
-
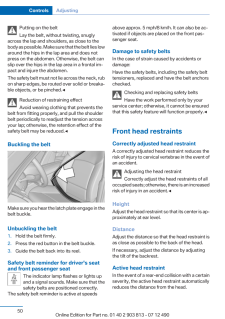
50 .Putting on the beltLay th...Putting on the beltLay the belt, without twisting, snuglyacross the lap and shoulders, as close to thebody as possible. Make sure that the belt lies lowaround the hips in the lap area and does notpress on the abdomen. Otherwise, the belt canslip over the h...
-
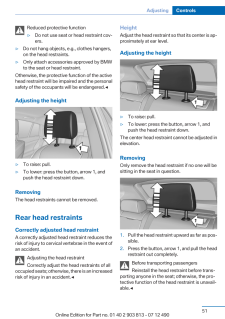
51 .Reduced protective functi...Reduced protective function▷Do not use seat or head restraint cov‐ers.▷Do not hang objects, e.g., clothes hangers,on the head restraints.▷Only attach accessories approved by BMWto the seat or head restraint.Otherwise, the protective function of the activeh...
-
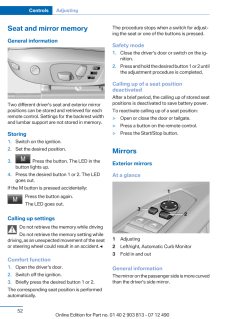
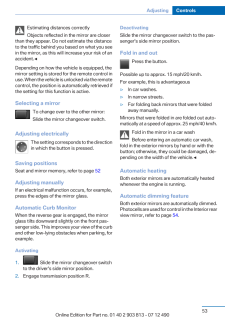
52 .Seat and mirror memoryGen...Seat and mirror memoryGeneral informationTwo different driver's seat and exterior mirrorpositions can be stored and retrieved for eachremote control. Settings for the backrest widthand lumbar support are not stored in memory.Storing1. Switch on the ignitio...
-
53 .Estimating distances corr...Estimating distances correctlyObjects reflected in the mirror are closerthan they appear. Do not estimate the distanceto the traffic behind you based on what you seein the mirror, as this will increase your risk of anaccident.◀Depending on how the vehicle ...
-
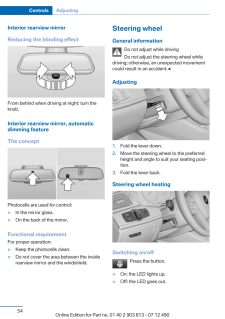
54 .Interior rearview mirrorR...Interior rearview mirrorReducing the blinding effectFrom behind when driving at night: turn theknob.Interior rearview mirror, automaticdimming featureThe conceptPhotocells are used for control:▷In the mirror glass.▷On the back of the mirror.Functional requ...
-
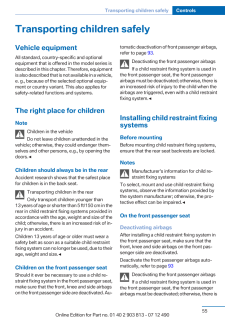
55 .Transporting children saf...Transporting children safelyVehicle equipmentAll standard, country-specific and optionalequipment that is offered in the model series isdescribed in this chapter. Therefore, equipmentis also described that is not available in a vehicle,e. g., because of th...
-
56 .an increased risk of inju...an increased risk of injury to the child when theairbags are triggered, even with a child restraintfixing system.◀Seat position and heightBefore installing a child restraint fixing system,move the front passenger seat as far back aspossible and adjust its ...
-
57 .Mounts for the lower LATC...Mounts for the lower LATCH anchors are lo‐cated in the gap between the seat and backrest.Mounting LATCH child restraint fixingsystems1. Mount the child restraint fixing system; referto the operating instructions of the system.2. Ensure that both LATCH anch...
-
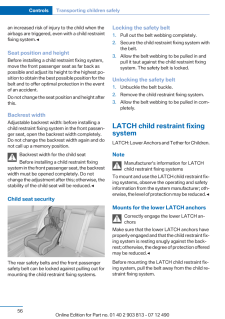
58 .Locking the doors andwind...Locking the doors andwindowsRear doorsPush the locking lever on the rear doors down.The door can now be opened from the outsideonly.Safety switch for the rearPress the button on the driver's door ifchildren are being transported in therear.This locks vario...
-
59 .DrivingVehicle equipmentA...DrivingVehicle equipmentAll standard, country-specific and optionalequipment that is offered in the model series isdescribed in this chapter. Therefore, equipmentis also described that is not available in a vehicle,e. g., because of the selected optional e...
-
60 .▷When the ignition is swi...▷When the ignition is switched off: press ON/OFF button on the radio.▷When the engine is running: press the Start/Stop button.Some electronic systems/power consumers re‐main ready for operation.Radio ready state switches off automatically:▷After approx. 8 ...
-
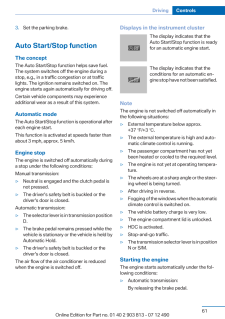
61 .3. Set the parking brake....3. Set the parking brake.Auto Start/Stop functionThe conceptThe Auto Start/Stop function helps save fuel.The system switches off the engine during astop, e.g., in a traffic congestion or at trafficlights. The ignition remains switched on. Theengine starts ...
-
62 .When Automatic Hold is ac...When Automatic Hold is activated: press theaccelerator.After the engine starts, accelerate as usual.Safety modeAfter the engine switches off automatically, itwill not start again automatically if any one of thefollowing conditions are met.▷The driver's saf...
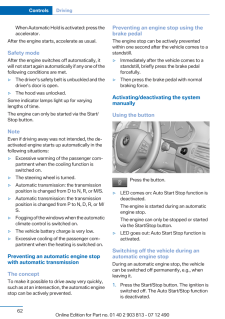
-
63 .Automatic transmission: t...Automatic transmission: the transmissionposition P is engaged automatically.2. Set the parking brake.Engine start as usual via Start/Stop button.Automatic deactivationIn certain situations, the Auto Start/Stop func‐tion is deactivated automatically for saf...
-
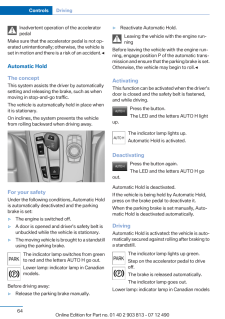
64 .Inadvertent operation of ...Inadvertent operation of the acceleratorpedalMake sure that the accelerator pedal is not op‐erated unintentionally; otherwise, the vehicle isset in motion and there is a risk of an accident. ◀Automatic HoldThe conceptThis system assists the driver by autom...
-
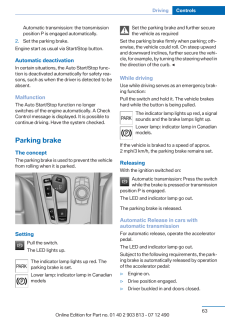
65 .Before driving into a car...Before driving into a car washDeactivate Automatic Hold; otherwise, theparking brake will be set when the vehicle is sta‐tionary and the vehicle will no longer be able toroll.◀ParkingThe parking brake is automatically set if the en‐gine is switched off whi...
-
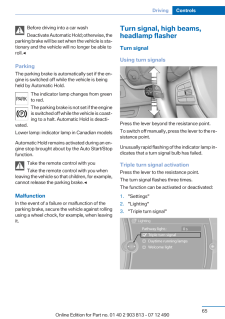
66 .Signaling brieflyPress th...Signaling brieflyPress the lever to the resistance point and holdit there for as long as you want the turn signal toflash.High beams, headlamp flasher▷High beams, arrow 1.▷Headlamp flasher, arrow 2.Washer/wiper systemSwitching the wipers on/off and briefwi...
-
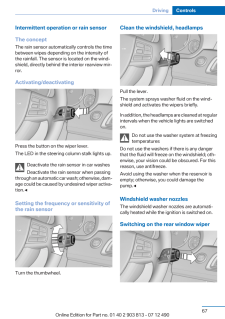
67 .Intermittent operation or...Intermittent operation or rain sensorThe conceptThe rain sensor automatically controls the timebetween wipes depending on the intensity ofthe rainfall. The sensor is located on the wind‐shield, directly behind the interior rearview mir‐ror.Activating/deact...
-
68 .Press the lever forward: ...Press the lever forward: intermittent wipe. Whenreverse gear is engaged, the system switches tocontinuous operation.To clean the rear window, press the lever furtherforward.Fold-out position of the wipersRequired when changing the wiper blades orunder fros...
-
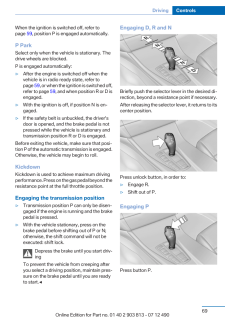
69 .When the ignition is swit...When the ignition is switched off, refer topage 59, position P is engaged automatically.P ParkSelect only when the vehicle is stationary. Thedrive wheels are blocked.P is engaged automatically:▷After the engine is switched off when thevehicle is in radio ...
-
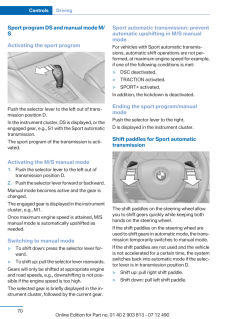
70 .Sport program DS and manu...Sport program DS and manual mode M/SActivating the sport programPush the selector lever to the left out of trans‐mission position D.In the instrument cluster, DS is displayed, or theengaged gear, e.g., S1 with the Sport automatictransmission.The sport prog...
-
71 .The vehicle only shifts u...The vehicle only shifts up or down at appropriateengine and road speeds, e.g., it does not shiftdown if the engine speed is too high.The selected gear is briefly displayed in the in‐strument cluster, followed by the current gear.Displays in the instrument ...
-
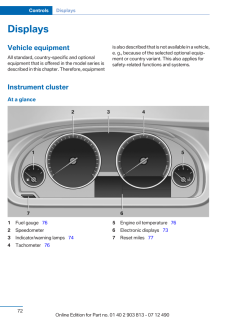
72 .DisplaysVehicle equipment...DisplaysVehicle equipmentAll standard, country-specific and optionalequipment that is offered in the model series isdescribed in this chapter. Therefore, equipmentis also described that is not available in a vehicle,e. g., because of the selected optional ...
-
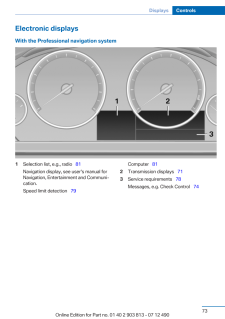
73 .Electronic displaysWith t...Electronic displaysWith the Professional navigation system1 Selection list, e.g., radio 81Navigation display, see user's manual forNavigation, Entertainment and Communi‐cation.Speed limit detection 79Computer 812 Transmission displays 713 Service r...
-
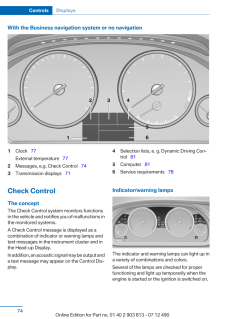
74 .With the Business navigat...With the Business navigation system or no navigation1 Clock 77External temperature 772 Messages, e.g. Check Control 743 Transmission displays 714 Selection lists, e. g. Dynamic Driving Con‐trol 815 Computer 816 Service requirements 78Check Co...
-
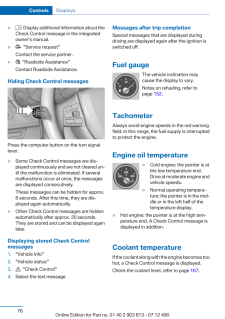
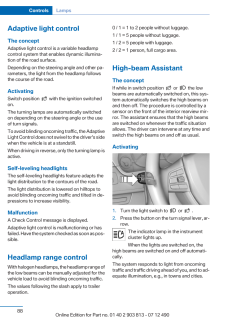
75 .Overview: indicator/warni...Overview: indicator/warning lampsSymbol Function or systemTurn signalParking brakeParking brake in Canadian modelsAutomatic HoldFront fog lampsHigh beamsHigh-beam AssistantParking lamps, headlamp controlLane departure warningDSC Dynamic Stability ControlDS...
-
76 .▷ Display additional in...▷ Display additional information about theCheck Control message in the integratedowner's manual.▷ "Service request"Contact the service partner.▷ "Roadside Assistance"Contact Roadside Assistance.Hiding Check Control messagesPress the computer button o...
-
77 .Odometer and trip odomete...Odometer and trip odometer▷Odometer, arrow 1.▷Trip odometer, arrow 2.Resetting the trip odometerPress the knob.▷The odometer is displayedwhen the ignition is switchedoff.▷When the ignition is switchedon, the trip odometer is reset.External temperatureExter...
-
78 .Current fuel consumptionD...Current fuel consumptionDisplays the current fuel con‐sumption. You can checkwhether you are currently drivingin an efficient and environmen‐tally-friendly manner.Displaying the current fuelconsumption1. "Settings"2. "Info display"3. "Additional indicators...
-
79 .SymbolsSymbols Descriptio...SymbolsSymbols DescriptionNo service is currently required.The deadline for service or a le‐gally mandated inspection isapproaching.The service deadline has al‐ready passed.Entering appointment datesEnter the dates for the required inspections.Ensure that ...
-
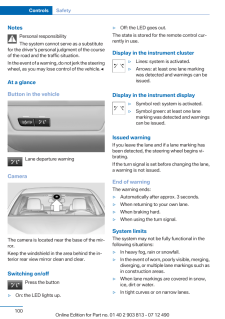
80 .At a glanceCameraThe came...At a glanceCameraThe camera is located near the base of the mir‐ror.Keep the windshield in the area behind the in‐terior rear view mirror clean and clear.Switching on/off1. "Settings"2. "Info display"3. "Speed limit information"If speed limit detection is ...
-
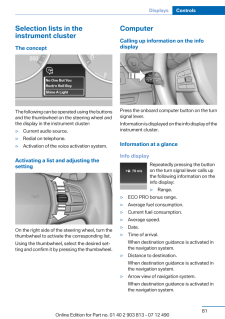
81 .Selection lists in theins...Selection lists in theinstrument clusterThe conceptThe following can be operated using the buttonsand the thumbwheel on the steering wheel andthe display in the instrument cluster:▷Current audio source.▷Redial on telephone.▷Activation of the voice activati...
-
82 .When the arrow view in th...When the arrow view in the Head-up Displayis inactive.Adjusting the info displayYou can select what information from the com‐puter is to be displayed on the info display of theinstrument cluster.1. "Settings"2. "Info display"3. Select the desired displays....
-
83 .The speed limit is stored...The speed limit is stored.Activating/deactivating the limit1."Settings"2. "Speed"3. "Warning"4. Press the controller.Setting your current speed as the limit1. "Settings"2. "Speed"3. "Select current speed"4. Press the controller.The current vehicle speed is...
-
84 .3. "Time:"4. Turn the con...3. "Time:"4. Turn the controller until the desired hoursare displayed.5. Press the controller.6. Turn the controller until the desired minutesare displayed.7. Press the controller.The time is stored.Setting the time format1. "Settings"2. "Time/Date"3. "For...
-
85 .Units of measureSetting t...Units of measureSetting the units of measureTo set the units for fuel consumption, route/dis‐tance and temperature:1. "Settings"2. "Language/Units"3. Select the desired menu item.4. Select the desired unit.The setting is stored for the remote control cur‐r...
-
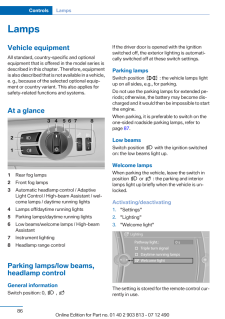
86 .LampsVehicle equipmentAll...LampsVehicle equipmentAll standard, country-specific and optionalequipment that is offered in the model series isdescribed in this chapter. Therefore, equipmentis also described that is not available in a vehicle,e. g., because of the selected optional equ...
-
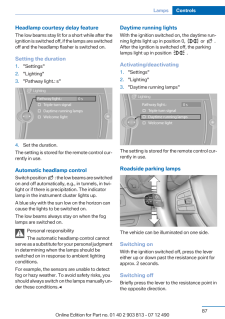
87 .Headlamp courtesy delay f...Headlamp courtesy delay featureThe low beams stay lit for a short while after theignition is switched off, if the lamps are switchedoff and the headlamp flasher is switched on.Setting the duration1. "Settings"2. "Lighting"3. "Pathway light.: s"4. Set the d...
-
88 .Adaptive light controlThe...Adaptive light controlThe conceptAdaptive light control is a variable headlampcontrol system that enables dynamic illumina‐tion of the road surface.Depending on the steering angle and other pa‐rameters, the light from the headlamp followsthe course of the ...
-
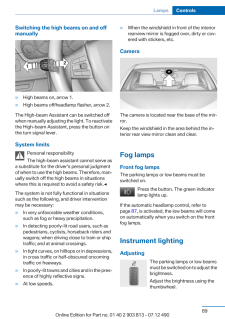
89 .Switching the high beams ...Switching the high beams on and offmanually▷High beams on, arrow 1.▷High beams off/headlamp flasher, arrow 2.The High-beam Assistant can be switched offwhen manually adjusting the light. To reactivatethe High-beam Assistant, press the button onthe turn sig...
-
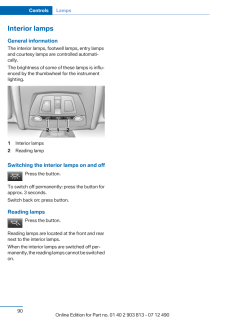
90 .Interior lampsGeneral inf...Interior lampsGeneral informationThe interior lamps, footwell lamps, entry lampsand courtesy lamps are controlled automati‐cally.The brightness of some of these lamps is influ‐enced by the thumbwheel for the instrumentlighting.1 Interior lamps2 Reading lam...
-
91 .SafetyVehicle equipmentAl...SafetyVehicle equipmentAll standard, country-specific and optionalequipment that is offered in the model series isdescribed in this chapter. Therefore, equipmentis also described that is not available in a vehicle,e. g., because of the selected optional eq...
-
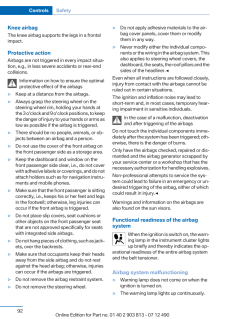
92 .Knee airbagThe knee airba...Knee airbagThe knee airbag supports the legs in a frontalimpact.Protective actionAirbags are not triggered in every impact situa‐tion, e.g., in less severe accidents or rear-endcollisions.Information on how to ensure the optimalprotective effect of the air...
-
93 .When there is a malfuncti...When there is a malfunction, have the air‐bag system checked immediatelyWhen there is a malfunction, have the airbagsystem checked immediately; otherwise, thereis a risk that the system does not function as ex‐pected in the event of an accident despite cor...
-
94 .sure that the indicator l...sure that the indicator lamp for the front pas‐senger airbags lights up. This indicates that thechild seat has been detected and the front pas‐senger airbags are not activated.Strength of the driver's and frontpassenger airbagThe strength with which the dr...
-
95 .A change in the tire infl...A change in the tire inflation pressure duringdriving is taken into account.A correction is only necessary if this is indicatedby the TPMWheels, greenThe tire inflation pressure is equal to the targetstate.One wheel is yellowA flat tire or major drop in in...
-
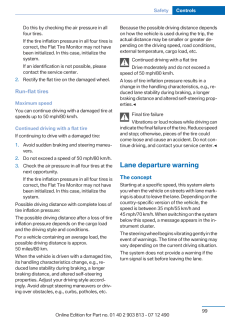
96 .Run-flat tires, refer to ...Run-flat tires, refer to page 162 , are labeledwith a circular symbol containing the lettersRSC marked on the tire sidewall.Do not continue driving without run-flattiresDo not continue driving if the vehicle is notequipped with run-flat tires; continued d...
-
97 .Message when the system w...Message when the system was notresetA Check Control message is displayed.The system detected a wheel change but wasnot reset.Warnings regarding the current tire inflationpressure are not reliable.Check the tire inflation pressure and reset thesystem.Malfun...
-
98 .In the event of a pressur...In the event of a pressure loss, the diameter andtherefore the rotational speed of the corre‐sponding wheel change. This is detected andreported as a flat tire.Functional requirementsThe system must have been initialized when thetire inflation pressure was...
-
99 .Do this by checking the a...Do this by checking the air pressure in allfour tires.If the tire inflation pressure in all four tires iscorrect, the Flat Tire Monitor may not havebeen initialized. In this case, initialize thesystem.If an identification is not possible, pleasecontact the...
-
100 .NotesPersonal responsibil...NotesPersonal responsibilityThe system cannot serve as a substitutefor the driver's personal judgment of the courseof the road and the traffic situation.In the event of a warning, do not jerk the steeringwheel, as you may lose control of the vehicle.◀At a ...
