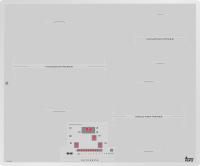
IQX 635
x
Gizport

IQX 635の取扱説明書・マニュアル [全32ページ 0.30MB]

2
123146.pdf
hiyoko_kaijyu - 2013-08-21
http://153.127.246.254/.../123146.pdf - 0.30MB - キャッシュ
5647view
32page / 0.30MB
Share (facebook)
12 / 32 ページ
 
12 / 32 ページ
ファイルを開く
現在のページURL
GBTechnical detailsThe supply voltage and frequency will beas shown on the rating plate. Class 3 hob.Technical Information* Induction power with the Power function enabled. ** Model IR 604 has a length of 600 mm.SEE THE APPLIANCE'S RATING PLATEDimensions and characteristics55600510560490505560051056049050IR 622 IT 622566005105604905211111150-60 50-6050-607.200 6.800 7.300IR 635IT 635IR 645 IT 64555700510560490501150-606.800IR 735 ABIQ 644IQ 6405560051056049050556005105604905050-6050-607.4006.9001111111 1225068590**510570492647.400IR 604221ModelHob dimensionsHeight (mm)Length (mm)Width (mm)Dimensions of the placement in the unitLength (mm) (L)Width (mm) (W)Depth (mm)ConfigurationDouble radiant hotplate700/2.100 WRadiant hotplate 1.5 00WInduction hotplate2.400 / 3.200* WInduction hotplate1.400 /1.800* WInduccion hotplate2.300 / 3.200* W Induction hotplate1.850 / 2.500* WInduction hotplate2.200 / 3.200* WInduction hotplate1.800 / 2.500* WInduction hotplate1.400 WInduction hotplate2.300 WElectricsNominal Power(W) for 230 VSupplyvoltage (V)Frequency (Hz)

参考になったと評価
  3人が参考になったと評価しています。

その他の取扱説明書
7660 view
4780 view

このマニュアルの目次

  • 1 .
    INSTALLATION INSTRUCTIONS...
    INSTALLATION INSTRUCTIONSAND RECOMMENDATIONS FOR USE AND MAINTENANCEINDUCTION HOBSEINBAU-ANLEITUNG UND EMPFEHLUNGEN FUR GEBRAUCH UND INSTANDHALTUNGINDUKTIONSKOCHFELDINSTRUCTIONS POUR L'INSTALLATIONET RECOMMANDATIONS D'UTILISATION ET D'ENTRETIENPLAQUES A IN...
  • 2 .
    Contents / Inhalt / Table...
    Contents / Inhalt / Table des MatieresGBIntroductionUser GuideInstallationPositioning the hobFastening the hobConnecting the electricityTechnical informationDimensions and characteristicsUse and MaintenanceBefore starting for the firts timeTouch Control Us...
  • 3 .
    5Introduction / Einfuhrun...
    5Introduction / Einfuhrung / PresentationNotes about the cookware to use on yourinduction hobThe size of the bottom of the cookware to beused should be big enough to completely coverthe cooking area drawn on the glass. Depending on the type of cookware (m...
  • 4 .
    6Model IR 622 / IT 622123
    6Model IR 622 / IT 62212300 / 3200* W induction hotplate2700 / 2100 W double circuit radiant hotplate.31400 / 1800* W induction hotplate41500 W radiant hotplate.* Induction power with the Power function enabled. - Residual heat indicator (H)- Maximum elect...
  • 5 .
    7Model IT 635 / IR 635124
    7Model IT 635 / IR 63512400 / 3200* W induction hotplate21400 / 1800* W induction hotplate32200 / 3200* W induction hotplate* Induction power with the Power function enabled. - Residual heat indicator (H)- Maximum induction power: 6800 watts.- Supply power...
  • 6 .
    1234Model IR 60412300 W i...
    1234Model IR 60412300 W induction hotplate21400 W induction hotplate31400 W induction hotplate42300 W induction hotplate* Induction power with the Power function enabled. - Residual heat indicator ( H)- Maximum induction power: 7400 watts.- Supply power: 2...
  • 7 .
    GB1234GBDEModel IQ 64411....
    GB1234GBDEModel IQ 64411.850 / 2.500* W induction hotplate21.850 / 2.500* W induction hotplate32.300 / 3.200* W induction hotplate41.400 / 1.800* W induction hotplate* Induction power with the Power function enabled. - Residual heat indicator (H)- Maximum ...
  • 8 .
    GB10Guide to Using the In...
    GB10Guide to Using the Instructions BookletDear customer,We are delighted that you have put yourtrust in us.We are confident that the new hob that youhave purchased will fully satisfy yourneeds.This modern, functional and practicalmodel has been manufactur...
  • 9 .
    GB11INSTALLATION AND SETU...
    GB11INSTALLATION AND SETUP SHOULDBE CARRIED OUT BY AN AUTHORISEDTECHNICIAN IN LINE WITH CURRENTINSTALLATION STANDARDS.Positioning the hobTo install these models, an opening withthe dimensions shown in figure 2 will becut into the unit's worktop.The minimum...
  • 10 .
    If a fan oven is being in...
    If a fan oven is being installed, pleaseremember that this hob has only been cer -tified to work with TEKA brand ovens. Leave a space in the front of the cabinet sothat the hot air can ventilate properly. Theopening should be at least 5 mm high. Thelongitu...
  • 11 .
    worktop because if it bec...
    worktop because if it becomes neces -sary to remove the hob from its position,the glass could break when trying todetach it.To secure the hob to the cabinet, four brac -kets should be fastened to the existing holeson the bottom part of the casing (two in t...
  • 12 .
    GBTechnical detailsThe su...
    GBTechnical detailsThe supply voltage and frequency will beas shown on the rating plate. Class 3 hob.Technical Information* Induction power with the Power function enabled. ** Model IR 604 has a length of 600 mm.SEE THE APPLIANCE'S RATING PLATEDimensions a...
  • 13 .
    Before starting for the f...
    Before starting for the first timeBefore connecting the hob to the electricalnetwork, verify that the tension (voltage)and the frequency of the hob correspondto the voltage and frequency indicated onthe hob rating plate, which is located onthe underside of...
  • 14 .
    Lock activated indicator ...
    Lock activated indicator light (modelチc604) . Decimal point in power indicators andtime indicator.- Shines (on): Chosen induction element(ready to be used).- Doesn't shine (off): Induction elementlocked (cannot be used).Keep warm sensor (models チc622) .N...
  • 15 .
    selected. The correspondi...
    selected. The corresponding decimalpoint (11) must be lit.2Use sensor (4) to decrease the powerto level 0. The hotplate will automaticallyswitch off.To turn it off quickly: Whatever thepower level, the hotplate is turned offimmediately if you touch the ...
  • 16 .
    used for cooking.LOCK FUN...
    used for cooking.LOCK FUNCTION(models ...604)Using the sensor lock (5) you can lockthe entire unit, except the on/off sensorkey (1), in order to protect the unit fromunwanted use. This is a useful safety func -tion when there are children in the home.Whe...
  • 17 .
    corresponding to the time...
    corresponding to the timed area willremain lit up.When the chosen time elapses, the timedarea will switch off and the clock will give aseries of beeps for several seconds. Thetime display will show 00and this will flashon and off, together with the pilot ...
  • 18 .
    2Before using any hotplat...
    2Before using any hotplate, touch theclock sensor (7). All the control dis -plays (9) are switched off.3Use the sensors or (7/4) to inputthe time you want.When the programmed time elapses, aseries of beeps will sound for severalseconds. To switch these...
  • 19 .
    glass - you enable the fu...
    glass - you enable the function you requi -re simply by touching the sensor with yourfinger.Each action is confirmed by a beep.SWITCHING THE APPLIANCE ON1Touch the On sensor (1) for at leastone second.The touch control is enabled, 0appears onall the powe...
  • 20 .
    To turn it off quickly: W...
    To turn it off quickly: Whatever thepower level, touch sensors and (2/4) simultaneously and the hob will beinstantly switched off.If all the hobs are at 0, all the points on thedisplay will flash.When turning off a hob, an Hwill be dis -played on the co...
  • 21 .
    with the same settings (p...
    with the same settings (power levels,cooking time) as before the pause.The second button must be pressed within10 seconds, otherwise the stove willswitch off. If cooking is not resumed within10 minutes of being paused, the stove willagain switch off.Functi...
  • 22 .
    hot, its display will sho...
    hot, its display will show an H, otherwise itwill show a 0. Touch any sensor to switchoff the beeping signal. Changing the programmed timeThe time that you have set can be chan -ged. To do so, touch the clock sensor (7) until the display of the correspon...
  • 23 .
    SWITCHING OFF QUICKLY1Tou...
    SWITCHING OFF QUICKLY1Touch the clock sensor (7) manytimes as necessary, until the correspon -ding countdown timer light (13) turns on,located centrally, below the timer dis -plays (8).2Make sure the decimal point is light (11)in the indicator (8). 3Touch...
  • 24 .
    Example:You want to cook ...
    Example:You want to cook at power level 6on aninduction cooking area and begin withrapid heating.Select power 9, touch the sensor againand Awill come on, and then come downto power level 6using the sensor. Thesystem keeps the hotplate at power 9(max...
  • 25 .
    only be activated in anot...
    only be activated in another heating ele -ment on the right. Once this function has been activated in aheating element, the heating element onthe same side will only be able to workwith the power that is left over, up to a totalof 3,600/3,700 watts. If th...
  • 26 .
    GB* Function Power, only...
    GB* Function Power, only visible when in operationTable 10123456789[P]*Models ...635 / ...645 / ...735 AB / ...640 / ...644036,51115,62235,54864,5100130-140Table 2601802883905101502102701048144230312408120168216--123456789RADIANT HOTPLATES(modelos ...622)...
  • 27 .
    GB29- The inner fan activ...
    GB29- The inner fan activates to cool the elec -tronic area.- The power level assigned to the cookingarea is adjusted.- The relevant cooking area is switched off.The internal fan is automatically enabledand disabled, depending on the tempera -ture of the e...
  • 28 .
    GB30that those people usi...
    GB30that those people using cardiac devi -ces such as pacemakers should con -sult their doctor or, if in doubt, theyshould not use the induction areas.Cleaning and careTo maintain the glass ceramic hob in goodcondition, it should be cleaned with suita -ble...
  • 29 .
    GB31When the glass's colo...
    GB31When the glass's colour changes.This does not affect its effectiveness orstability, and is generally caused by inade -quate cleaning or by poor-quality pans.Metallic sheens are caused by metal panssliding over the glass. They can be remo -ved by thorou...
  • 30 .
    Fault Possible cause Poss...
    Fault Possible cause Possible solutionBefore calling the Technical Service, pleasemake the following checks:FOR ALL THE MODELS:The induction zones are not heating upThe pan is unsuitable (itdoes not have a ferromag -netic base or it is toosmall).Check that...
  • 31 .
    GB33MODELS ...635, ...645...
    GB33MODELS ...635, ...645 AND ...735 AB:Message U400 and the beeping signalSurges in the electricitysupplyContact the TechnicalServiceA hotplate switches off and error message E2 is displayedThe glass has overheated. Remove the pan and let theglass cool do...
  • 32 .
    GB34Message E3 in the con...
    GB34Message E3 in the controlInadequate cookware due toits poor magnetic qualities. This error message disap -pears after eight seconds.Otherwise, call TechnicalSupport.When cooking at a level below 9, there will be fluctuationsin the powerThe induction ge...