クライスラー・300Cの取扱説明書・マニュアル [全592ページ 4.48MB]


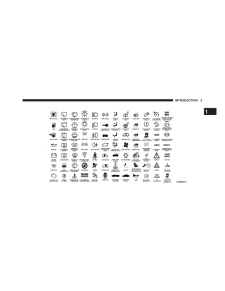
9


517 / 592 ページ
517 / 592 ページ


現在のページURL
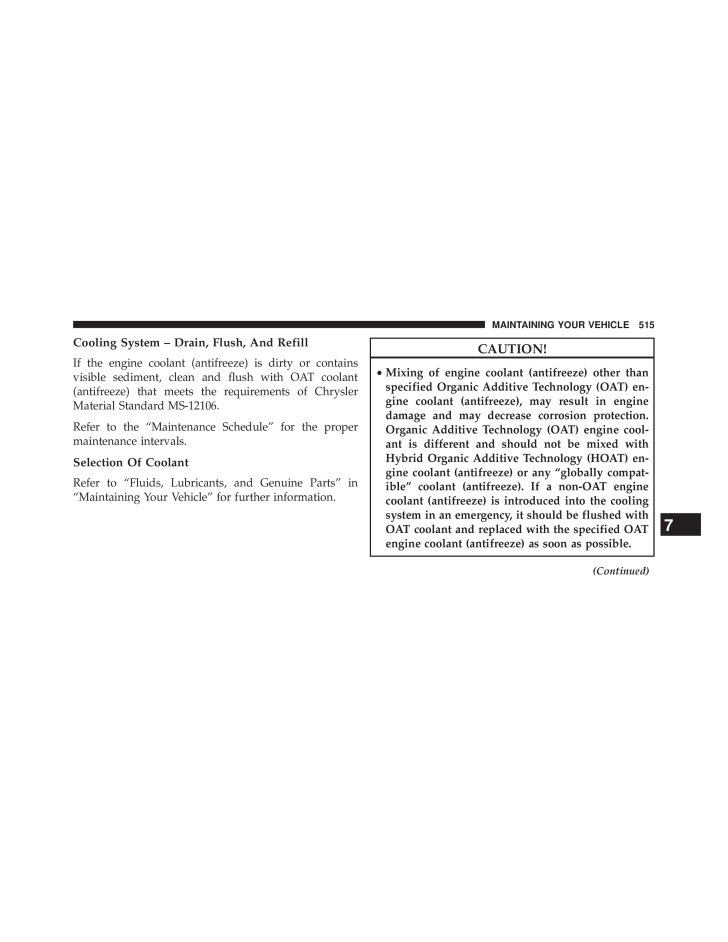
Cooling System - Drain, Flush, And RefillIf the engine coolant (antifreeze) is dirty or containsvisible sediment, clean and flush with OAT coolant(antifreeze) that meets the requirements of ChryslerMaterial Standard MS-12106.Refer to the Maintenance Schedule for the propermaintenance intervals.Selection Of CoolantRefer to Fluids, Lubricants, and Genuine Parts inMaintaining Your Vehicle for further information.CAUTION!•Mixing of engine coolant (antifreeze) other thanspecified Organic Additive Technology (OAT) en-gine coolant (antifreeze), may result in enginedamage and may decrease corrosion protection.Organic Additive Technology (OAT) engine cool-ant is different and should not be mixed withHybrid Organic Additive Technology (HOAT) en-gine coolant (antifreeze) or any "globally compat-ible" coolant (antifreeze). If a non-OAT enginecoolant (antifreeze) is introduced into the coolingsystem in an emergency, it should be flushed withOAT coolant and replaced with the specified OATengine coolant (antifreeze) as soon as possible.(Continued)7MAINTAINING YOUR VEHICLE 515
参考になったと評価  31人が参考になったと評価しています。


このマニュアルの目次
-
1 .300Chrysler Group LLC OWN...300Chrysler Group LLC OWNER’S MANUAL2013 2013 30013C481-126-AA First Edition Printed in U.S.A.
-
2 .VEHICLESSOLDINCANADA With...VEHICLESSOLDINCANADA With respect to any Vehicles Sold in Canada, the name ChryslerGroup LLC shall be deemed to be deleted and the name ChryslerCanada Inc. used in substitution therefore.DRIVINGANDALCOHOL Drunken driving is one of the most frequent causes ...
-
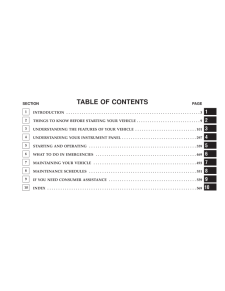
3 .TABLE OF CONTENTSSECTION ...TABLE OF CONTENTSSECTION PAGE1INTRODUCTION.............................................................32THINGS TO KNOW BEFORE STARTING YOUR VEHICLE .............................93UNDERSTANDING THE FEATURES OF YOUR VEHICLE ............................1014U...
-
4 .4 ページ目のマニュアル
-
5 .INTRODUCTIONCONTENTSINTRO...INTRODUCTIONCONTENTSINTRODUCTION........................4HOW TO USE THIS MANUAL ..............4WARNINGS AND CAUTIONS ..............6VEHICLE IDENTIFICATION NUMBER ........6VEHICLE MODIFICATIONS/ALTERATIONS ....71
-
6 .INTRODUCTIONCongratulatio...INTRODUCTIONCongratulations on selecting your new Chrysler GroupLLC vehicle. Be assured that it represents precisionworkmanship, distinctive styling, and high quality - allessentials that are traditional to our vehicles.This Owners Manual has been prepared...
-
8 .WARNINGS AND CAUTIONSThis...WARNINGS AND CAUTIONSThis Owners Manual contains WARNINGSagainst op-erating procedures that could result in a collision orbodily injury. It also contains CAUTIONSagainst proce-dures that could result in damage to your vehicle. If youdo not read this entire...
-
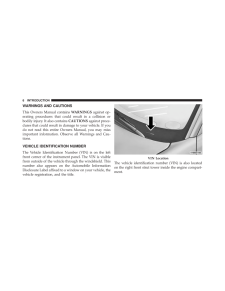
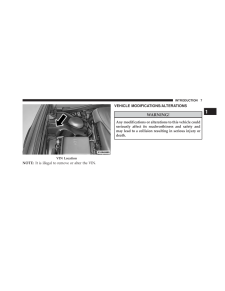
9 .NOTE:It is illegal to rem...NOTE:It is illegal to remove or alter the VIN.VEHICLE MODIFICATIONS/ALTERATIONSWARNING!Any modifications or alterations to this vehicle couldseriously affect its roadworthiness and safety andmay lead to a collision resulting in serious injury ordeath.VIN L...
-
10 .10 ページ目のマニュアル
-
11 .THINGS TO KNOW BEFORE STA...THINGS TO KNOW BEFORE STARTING YOUR VEHICLECONTENTSA WORD ABOUT YOUR KEYS .............12▫Keyless Ignition Node (KIN) ..............12▫KeyFob.............................13▫Ignition Or Accessory On Message ..........15SENTRY KEYfi.........................1...
-
12 .▫Programming Additional T...▫Programming Additional Transmitters ........24▫Transmitter Battery Replacement ...........24▫General Information....................25REMOTE STARTING SYSTEM IF EQUIPPED..........................26▫How To Use Remote Start ................26DOOR LOCKS.........
-
13 .▫Seat Belts And Pregnant ...▫Seat Belts And Pregnant Women ...........57▫Seat Belt Extender.....................57▫Supplemental Restraint System (SRS) Air Bags............................57▫Air Bag Deployment Sensors And Controls ....63▫Event Data Recorder (EDR) ...............71▫Chi...
-
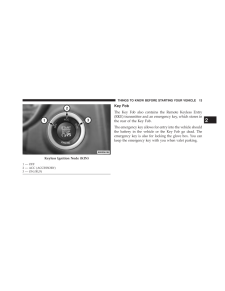
14 .A WORD ABOUT YOUR KEYSYou...A WORD ABOUT YOUR KEYSYour vehicle uses a keyless ignition system. This systemconsists of a Key Fob with Remote Keyless Entry (RKE)transmitter and a Keyless Ignition Node (KIN).Keyless Enter-N-GoTM FeatureThis vehicle is equipped with the Keyless Enter-N-G...
-
15 .Key FobThe Key Fob also c...Key FobThe Key Fob also contains the Remote Keyless Entry(RKE) transmitter and an emergency key, which stores inthe rear of the Key Fob.The emergency key allows for entry into the vehicle shouldthe battery in the vehicle or the Key Fob go dead. Theemergenc...
-
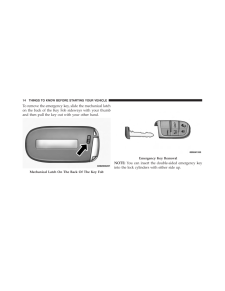
16 .To remove the emergency k...To remove the emergency key, slide the mechanical latchon the back of the Key Fob sideways with your thumband then pull the key out with your other hand.NOTE:You can insert the double-sided emergency keyinto the lock cylinders with either side up.Mechanica...
-
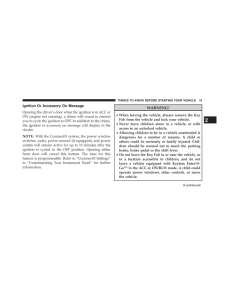
17 .Ignition Or Accessory On ...Ignition Or Accessory On MessageOpening the drivers door when the ignition is inACC orON (engine not running), a chime will sound to remindyou to cycle the ignition to OFF. In addition to the chime,the ignition or accessory on message will display in thecl...
-
18 .WARNING!(Continued)•Do no...WARNING!(Continued)•Do not leave children or animals inside parkedvehicles in hot weather. Interior heat build-up maycause serious injury or death.CAUTION!An unlocked car is an invitation to thieves. Alwaysremove the Key Fob from vehicle, cycle the ignitio...
-
19 .CAUTION!The Sentry Key(R)...CAUTION!The Sentry Key(R) Immobilizer system is not compat-ible with some after-market remote starting systems.Use of these systems may result in vehicle startingproblems and loss of security protection.All of the Key Fobs provided with your new vehicle ha...
-
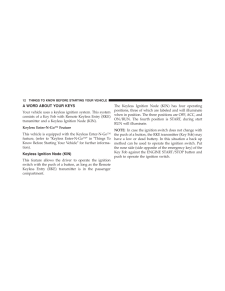
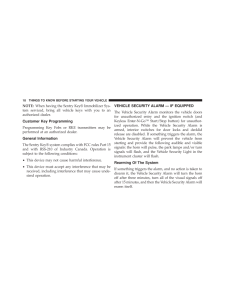
20 .NOTE:When having the Sent...NOTE:When having the Sentry Keyfi Immobilizer Sys-tem serviced, bring all vehicle keys with you to anauthorized dealer.Customer Key ProgrammingProgramming Key Fobs or RKE transmitters may beperformed at an authorized dealer.General InformationThe Sentry Ke...
-
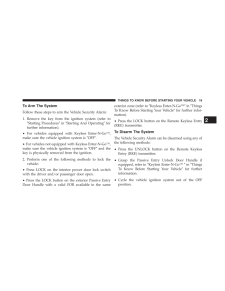
21 .To Arm The SystemFollow t...To Arm The SystemFollow these steps to arm the Vehicle Security Alarm:1. Remove the key from the ignition system (refer toStarting ProceduresinStarting And Operating forfurther information).•For vehicles equipped with Keyless Enter-N-Go,make sure the vehic...
-
22 .•For vehicles equipped wi...•For vehicles equipped with Keyless Enter-N-Go ,press the Keyless Enter-N-Go Start/Stop button(requires at least one valid Key Fob in the vehicle).•For vehicles not equipped with Keyless Enter-N-Go,insert a valid key into the ignition switch and turn theke...
-
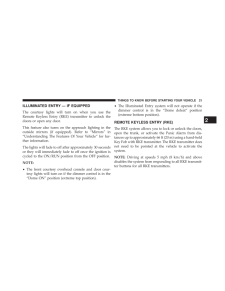
23 .ILLUMINATED ENTRY IF EQU...ILLUMINATED ENTRY IF EQUIPPEDThe courtesy lights will turn on when you use theRemote Keyless Entry (RKE) transmitter to unlock thedoors or open any door.This feature also turns on the approach lighting in theoutside mirrors (if equipped). Refer to Mirrors...
-
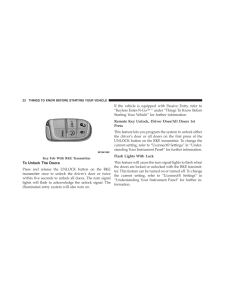
24 .To Unlock The DoorsPress ...To Unlock The DoorsPress and release the UNLOCK button on the RKEtransmitter once to unlock the drivers door or twicewithin five seconds to unlock all doors. The turn signallights will flash to acknowledge the unlock signal. Theilluminated entry system wil...
-
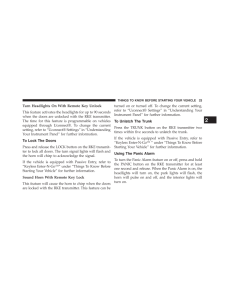
25 .Turn Headlights On With R...Turn Headlights On With Remote Key UnlockThis feature activates the headlights for up to 90 secondswhen the doors are unlocked with the RKE transmitter.The time for this feature is programmable on vehiclesequipped through Uconnectfi. To change the currents...
-
26 .The Panic Alarm will stay...The Panic Alarm will stay on for three minutes unlessyou turn it off by either pressing the PANIC button asecond time or drive the vehicle at a speed of 15 mph(24 km/h) or greater.NOTE:•The interior lights will turn off if you cycle the ignitionswitch to t...
-
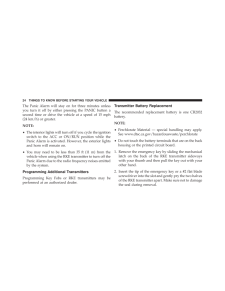
27 .3. Remove the battery by ...3. Remove the battery by turning the back cover over(battery facing downward) and tapping it lightly on asolid surface such as a table or similar, then replace thebattery. When replacing the battery, match the + signon the battery to the + sign on the insi...
-
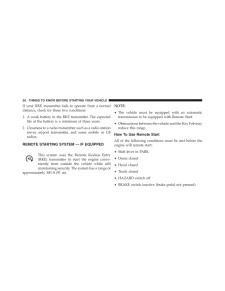
28 .If your RKE transmitter f...If your RKE transmitter fails to operate from a normaldistance, check for these two conditions:1. A weak battery in the RKE transmitter. The expectedlife of the battery is a minimum of three years.2. Closeness to a radio transmitter such as a radio station...
-
29 .•Battery at an acceptable...•Battery at an acceptable charge level•RKE PANIC button not pressed•System not disabled from previous remote start event•Vehicle theft alarm not active•Ignition in OFF positionWARNING!•Do not start or run an engine in a closed garage orconfined area. Exhau...
-
30 .To Enter Remote Start Mod...To Enter Remote Start ModePress and release the REMOTE START buttonon the RKE transmitter twice within five sec-onds. The vehicle doors will lock, parkinglights will flash and the horn will chirp twice (ifprogrammed). Then, the engine will start and the ve...
-
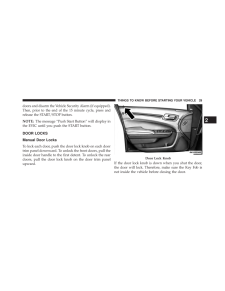
31 .doors and disarm the Vehi...doors and disarm the Vehicle SecurityAlarm (if equipped).Then, prior to the end of the 15 minute cycle, press andrelease the START/STOP button.NOTE:The message Push Start Button will display inthe EVIC until you push the START button.DOOR LOCKSManual Door ...
-
32 .WARNING!•For personal sec...WARNING!•For personal security and safety in the event of acollision, lock the vehicle doors before you drive aswell as when you park and leave the vehicle.•Never leave children alone in a vehicle, or withaccess to an unlocked vehicle.•Allowing children to...
-
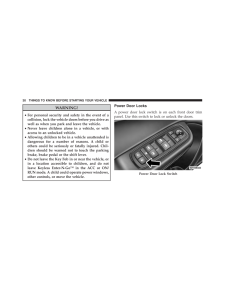
33 .The doors can also be loc...The doors can also be locked and unlocked with theKeyless Enter-N-Go (Passive Entry) system. For furtherinformation, refer to Keyless Enter-N-Go in ThingsTo Know Before Starting Your Vehicle.If you press the power door lock switch while theignition is in ...
-
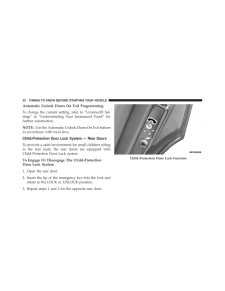
34 .Automatic Unlock Doors On...Automatic Unlock Doors On Exit ProgrammingTo change the current setting, refer to Uconnectfi Set-tings in Understanding Your Instrument Panel forfurther information.NOTE:Use theAutomatic Unlock Doors On Exit featurein accordance with local laws.Child-Prote...
-
35 .WARNING!Avoid trapping an...WARNING!Avoid trapping anyone in a vehicle in a collision.Remember that the rear doors can only be openedfrom the outside when the Child-Protection locks areengaged (locked).NOTE:For emergency exit from the rear seats when theChild-Protection Door Lock Sys...
-
36 .door handle to unlock the...door handle to unlock the drivers door automatically.The interior door panel lock knob will raise when thedoor is unlocked.NOTE:If Unlock All Doors 1st Press is programmedall doors will unlock when you grab hold of the frontdrivers door handle. To select b...
-
37 .Preventing Inadvertent Lo...Preventing Inadvertent Locking Of Passive Entry RKETransmitter In VehicleTo minimize the possibility of unintentionally locking aPassive Entry RKE transmitter inside your vehicle, thePassive Entry system is equipped with an automatic doorunlock feature whi...
-
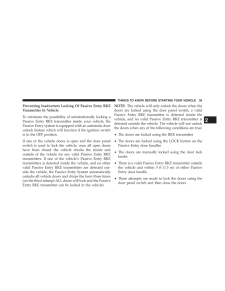
38 .To Enter The TrunkWith a ...To Enter The TrunkWith a valid Passive Entry RKE transmitter within 3 ft(1.0 m) of the deck lid, press the button on the right sideof CHMSL, (Center High Mounted Stop Light) which islocated on the deck lid.NOTE:If you inadvertently leave your vehicles Pass...
-
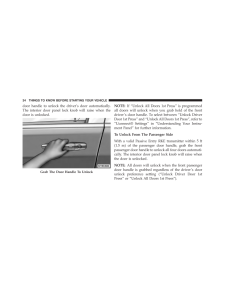
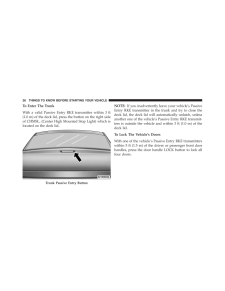
39 .Press The Door Handle But...Press The Door Handle Button To LockDo NOT grab the door handle, when pressing the doorhandle lock button. This could unlock the door(s).DO NOT Grab The Door Handle When Locking2THINGS TO KNOW BEFORE STARTING YOUR VEHICLE 37
-
40 .NOTE:•After pressing the ...NOTE:•After pressing the door handle LOCK button, youmust wait two seconds before you can lock or unlockthe doors, using either Passive Entry door handle. Thisis done to allow you to check if the vehicle is locked bypulling the door handle, without the veh...
-
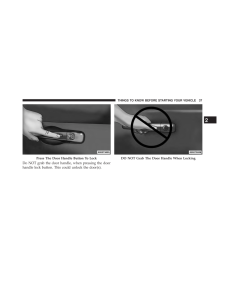
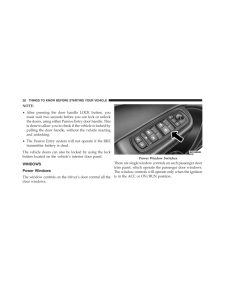
41 .NOTE:For vehicles equippe...NOTE:For vehicles equipped with the Uconnectfi, thepower window switches will remain active for up to 10minutes after the ignition is cycled to the OFF position.Opening either front door will cancel this feature. Thetime is programmable. Refer to Uconnectf...
-
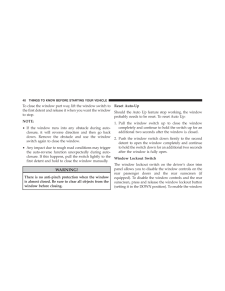
42 .To close the window part ...To close the window part way, lift the window switch tothe first detent and release it when you want the windowto stop.NOTE:•If the window runs into any obstacle during auto-closure, it will reverse direction and then go backdown. Remove the obstacle and u...
-
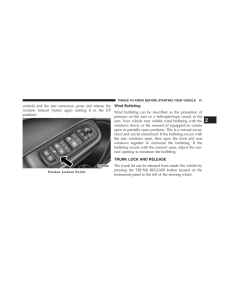
43 .controls and the rear sun...controls and the rear sunscreen, press and release thewindow lockout button again (setting it in the UPposition).Wind BuffetingWind buffeting can be described as the perception ofpressure on the ears or a helicopter-type sound in theears. Your vehicle may ...
-
44 .NOTE:The transmission mus...NOTE:The transmission must be in PARK before thebutton will operate.The trunk lid can be released fromoutside the vehicle by pressing theTRUNK button on the RemoteKeyless Entry (RKE) transmittertwice within five seconds or byusing the external release swit...
-
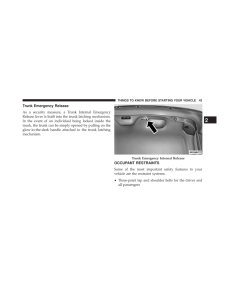
45 .Trunk Emergency ReleaseAs...Trunk Emergency ReleaseAs a security measure, a Trunk Internal EmergencyRelease lever is built into the trunk latching mechanism.In the event of an individual being locked inside thetrunk, the trunk can be simply opened by pulling on theglow-in-the-dark ha...
-
46 .•Advanced Front Air Bags ...•Advanced Front Air Bags for driver and frontpassenger•Supplemental Driver Side Knee Air Bag•Supplemental SideAir Bag Inflatable Curtains (SABIC)for the driver and passengers seated next to a window•Supplemental Seat-Mounted Side Air Bags (SAB)•An energy-a...
-
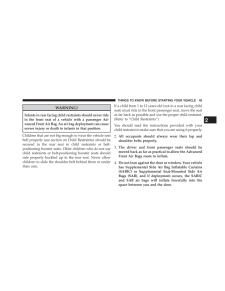
47 .WARNING!Infants in rear f...WARNING!Infants in rear facing child restraints should never ridein the front seat of a vehicle with a passenger Ad-vanced Front Air Bag. An air bag deployment can causesevere injury or death to infants in that position.Children that are not big enough to ...
-
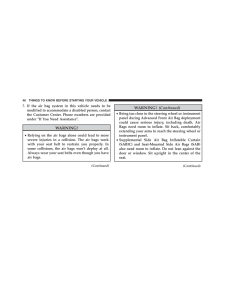
48 .5.If the air bag system i...5.If the air bag system in this vehicle needs to bemodified to accommodate a disabled person, contactthe Customer Center. Phone numbers are providedunderIf You Need Assistance.WARNING!•Relying on the air bags alone could lead to moresevere injuries in a co...
-
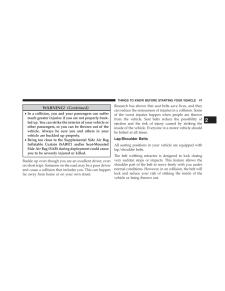
49 .WARNING!(Continued)•In a ...WARNING!(Continued)•In a collision, you and your passengers can suffermuch greater injuries if you are not properly buck-led up. You can strike the interior of your vehicle orother passengers, or you can be thrown out of thevehicle. Always be sure you and ...
-
50 .WARNING!•Do not allow peo...WARNING!•Do not allow people to ride in any area of yourvehicle that is not equipped with seats and seatbelts.•Be sure everyone in your vehicle is in a seat andusing a seat belt properly.•Wearing a seat belt incorrectly is dangerous. Seatbelts are designed...
-
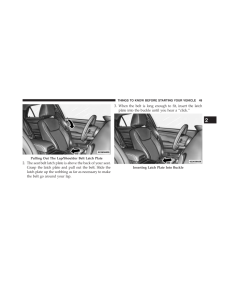
51 .2. The seat belt latch pl...2. The seat belt latch plate is above the back of your seat.Grasp the latch plate and pull out the belt. Slide thelatch plate up the webbing as far as necessary to makethe belt go around your lap.3. When the belt is long enough to fit, insert the latchplat...
-
52 .WARNING!•A belt that is b...WARNING!•A belt that is buckled into the wrong buckle willnot protect you properly. The lap portion could ridetoo high on your body, possibly causing internalinjuries. Always buckle your belt into the bucklenearest you.•A belt that is too loose will not pr...
-
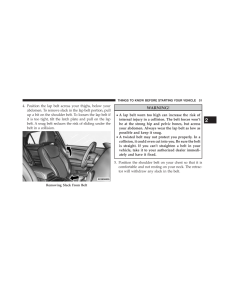
53 .4. Position the lap belt ...4. Position the lap belt across your thighs, below yourabdomen. To remove slack in the lap belt portion, pullup a bit on the shoulder belt. To loosen the lap belt ifit is too tight, tilt the latch plate and pull on the lapbelt. A snug belt reduces the risk...
-
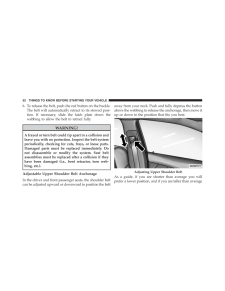
54 .6. To release the belt, p...6. To release the belt, push the red button on the buckle.The belt will automatically retract to its stowed posi-tion. If necessary, slide the latch plate down thewebbing to allow the belt to retract fully.WARNING!Afrayed or torn belt could rip apart in a ...
-
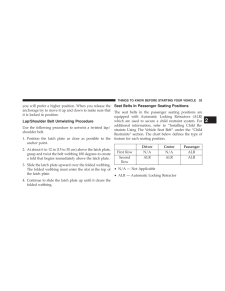
55 .you will prefer a higher ...you will prefer a higher position. When you release theanchorage try to move it up and down to make sure thatit is locked in position.Lap/Shoulder Belt Untwisting ProcedureUse the following procedure to untwist a twisted lap/shoulder belt.1. Position the l...
-
56 .If the passenger seating ...If the passenger seating position is equipped with anALR and is being used for normal usage:Only pull the belt webbing out far enough to comfortablywrap around the occupants mid-section so as to notactivate the ALR. If the ALR is activated, you will hear a...
-
57 .WARNING!•The belt and ret...WARNING!•The belt and retractor assembly must be replaced ifthe seat belt assembly Automatic Locking Retractor(ALR) feature or any other seat belt function is notworking properly when checked according to theprocedures in the Service Manual.•Failure to rep...
-
58 .Enhanced Seat Belt Use Re...Enhanced Seat Belt Use Reminder System(BeltAlertfi)BeltAlertfi is a feature intended to remind the driver andfront passenger (if equipped with front passengerBeltAlertfi) to fasten their seat belts. The feature is activewhenever the ignition is on. If the ...
-
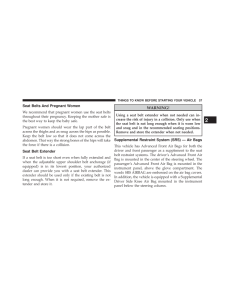
59 .Seat Belts And Pregnant W...Seat Belts And Pregnant WomenWe recommend that pregnant women use the seat beltsthroughout their pregnancy. Keeping the mother safe isthe best way to keep the baby safe.Pregnant women should wear the lap part of the beltacross the thighs and as snug across...
-
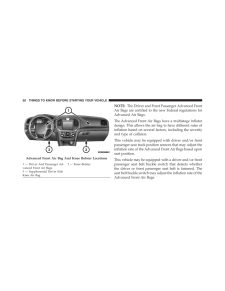
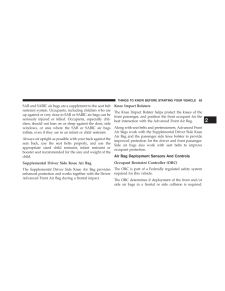
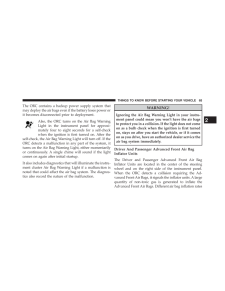
60 .NOTE:The Driver and Front...NOTE:The Driver and Front Passenger Advanced FrontAir Bags are certified to the new Federal regulations forAdvanced Air Bags.The Advanced Front Air Bags have a multistage inflatordesign. This allows the air bag to have different rates ofinflation based on ...
-
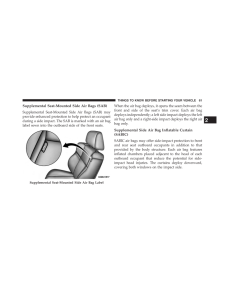
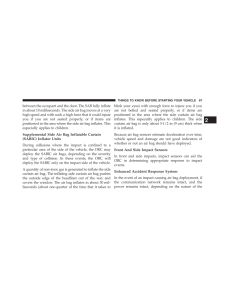
61 .This vehicle is equipped ...This vehicle is equipped with Supplemental Side Air BagInflatable Curtains (SABIC) to protect the driver, front,and rear passengers sitting next to a window. The SABICair bags are located above the side windows and theircovers are also labeled: SRS AIRBAG....
-
62 .•Supplemental SideAir Bag...•Supplemental SideAir Bag Inflatable Curtains (SABIC)•Front and Side Impact Sensors•Front Seat Belt Pretensioners, Seat Belt Buckle Switch,and Seat Track Position SensorsAdvanced Front Air Bag FeaturesThe Advanced Front Air Bag system has multistagedriver ...
-
63 .Supplemental Seat-Mounted...Supplemental Seat-Mounted Side Air Bags (SAB)Supplemental Seat-Mounted Side Air Bags (SAB) mayprovide enhanced protection to help protect an occupantduring a side impact. The SAB is marked with an air baglabel sewn into the outboard side of the front seats...
-
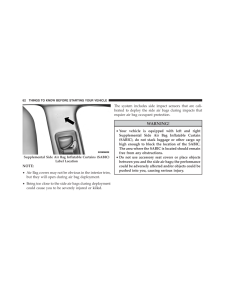
64 .NOTE:•Air Bag covers may ...NOTE:•Air Bag covers may not be obvious in the interior trim,but they will open during air bag deployment.•Being too close to the side air bags during deploymentcould cause you to be severely injured or killed.The system includes side impact sensors that a...
-
65 .SAB and SABIC air bags ar...SAB and SABIC air bags are a supplement to the seat beltrestraint system. Occupants, including children who areup against or very close to SAB or SABIC air bags can beseriously injured or killed. Occupants, especially chil-dren, should not lean on or sleep...
-
66 .Based on the impact senso...Based on the impact sensors signals, a central electronicORC deploys the Advanced Front Air Bags, SABIC airbags, SAB, Supplemental Driver Side Knee Air Bag, andfront seat belt pretensioners, as required, depending onseveral factors, including the severity ...
-
67 .The ORC contains a backup...The ORC contains a backup power supply system thatmay deploy the air bags even if the battery loses power orit becomes disconnected prior to deployment.Also, the ORC turns on the Air Bag WarningLight in the instrument panel for approxi-mately four to eight...
-
68 .are possible, based on se...are possible, based on several factors, including thecollision type and severity. The steering wheel hub trimcover and the upper right side of the instrument panelseparate and fold out of the way as the air bags inflate totheir full size. The air bags full...
-
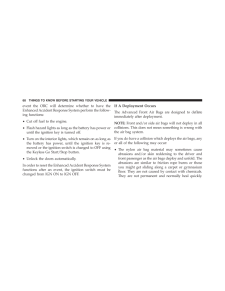
69 .between the occupant and ...between the occupant and the door. The SAB fully inflatein about 10 milliseconds. The side air bag moves at a veryhigh speed and with such a high force that it could injureyou if you are not seated properly, or if items arepositioned in the area where the ...
-
70 .event the ORC will determ...event the ORC will determine whether to have theEnhancedAccident Response System perform the follow-ing functions:•Cut off fuel to the engine.•Flash hazard lights as long as the battery has power oruntil the ignition key is turned off.•Turn on the interior...
-
71 .However, if you havent he...However, if you havent healed significantly within afew days, or if you have any blistering, see your doctorimmediately.•As the air bags deflate, you may see some smoke-likeparticles. The particles are a normal by-product of theprocess that generates the n...
-
72 .Maintaining Your Air Bag ...Maintaining Your Air Bag SystemWARNING!•Modifications to any part of the air bag systemcould cause it to fail when you need it. You couldbe injured if the air bag system is not there toprotect you. Do not modify the components orwiring, including adding an...
-
73 .Air Bag Warning LightYou ...Air Bag Warning LightYou will want to have the air bags ready toinflate for your protection in a collision. TheAir Bag Warning Light monitors the internalcircuits and interconnecting wiring associatedwith air bag system electrical components. While the air...
-
74 .time, typically 30 second...time, typically 30 seconds or less. The EDR in this vehicleis designed to record such data as:•How various systems in your vehicle were operating;•Whether or not the driver and passenger safety beltswere buckled/fastened;•How far (if at all) the driver was...
-
75 .There are different sizes...There are different sizes and types of restraints forchildren from newborn size to the child almost largeenough for an adult safety belt. Always check the childseat Owners Manual to make sure you have the correctseat for your child.Before buying any restra...
-
76 .Summary Of Recommendation...Summary Of Recommendations For Restraining Children In VehiclesChild Size, Height, Weight or Age Recommended Type of Child RestraintInfants and Toddlers Children who are two years old oryounger and who have not reached theheight or weight limits of their c...
-
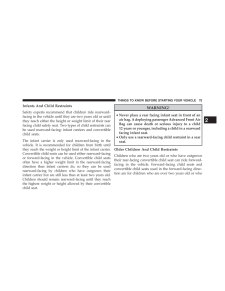
77 .Infants And Child Restrai...Infants And Child RestraintsSafety experts recommend that children ride rearward-facing in the vehicle until they are two years old or untilthey reach either the height or weight limit of their rearfacing child safety seat. Two types of child restraints ca...
-
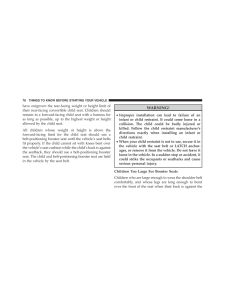
78 .have outgrown the rear-fa...have outgrown the rear-facing weight or height limit oftheir rear-facing convertible child seat. Children shouldremain in a forward-facing child seat with a harness foras long as possible, up to the highest weight or heightallowed by the child seat.All chi...
-
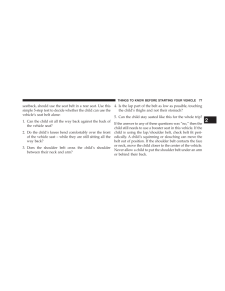
79 .seatback, should use the ...seatback, should use the seat belt in a rear seat. Use thissimple 5-step test to decide whether the child can use thevehicles seat belt alone:1. Can the child sit all the way back against the back ofthe vehicle seat?2. Do the childs knees bend comfortably ...
-
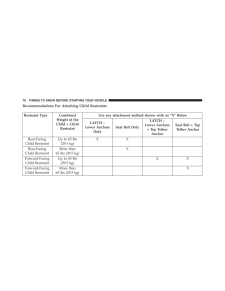
80 .Recommendations For Attac...Recommendations For Attaching Child RestraintsRestraint Type CombinedWeight of theChild + ChildRestraintUse any attachment method shown with an "X" BelowLATCH -Lower AnchorsOnlySeat Belt OnlyLATCH -Lower Anchors+ Top TetherAnchorSeat Belt + TopTether Ancho...
-
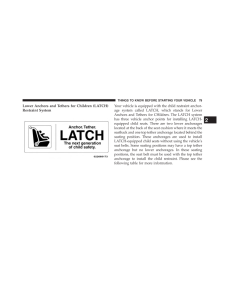
81 .Lower Anchors and Tethers...Lower Anchors and Tethers for Children (LATCH)Restraint SystemYour vehicle is equipped with the child restraint anchor-age system called LATCH, which stands for LowerAnchors and Tethers for CHildren. The LATCH systemhas three vehicle anchor points for inst...
-
82 .LATCH Positions For Insta...LATCH Positions For Installing Child Restraints InThis VehicleLower Anchorage Symbol 2 anchorages per seatingpositionTop Tether Anchorage Symbol80 THINGS TO KNOW BEFORE STARTING YOUR VEHICLE
-
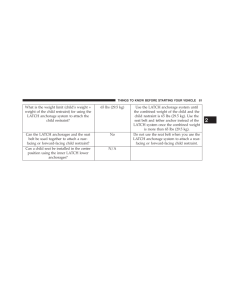
83 .What is the weight limit ...What is the weight limit (childs weight +weight of the child restraint) for using theLATCH anchorage system to attach thechild restraint?65 lbs (29.5 kg) Use the LATCH anchorage system untilthe combined weight of the child and thechild restraint is 65 lbs ...
-
84 .Can two child restraints ...Can two child restraints be attached usinga common lower LATCH anchorage?NoNever share a LATCH anchorage withtwo or more child restraints. If the centerposition does not have dedicated LATCHlower anchorages, use the seat belt to in-stall a child seat in th...
-
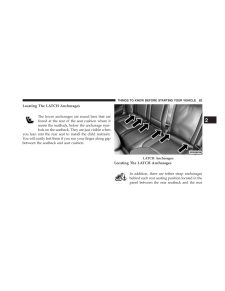
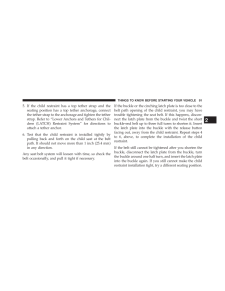
85 .Locating The LATCH Anchor...Locating The LATCH AnchoragesThe lower anchorages are round bars that arefound at the rear of the seat cushion where itmeets the seatback, below the anchorage sym-bols on the seatback. They are just visible whenyou lean into the rear seat to install the ch...
-
86 .window. These tether stra...window. These tether strap anchorages are under aplastic cover with the tether anchorage symbol on it.LATCH-compatible child restraint systems will beequipped with a rigid bar or a flexible strap on each side.Each will have a hook or connector to attach to...
-
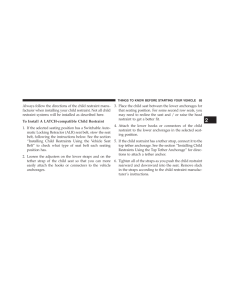
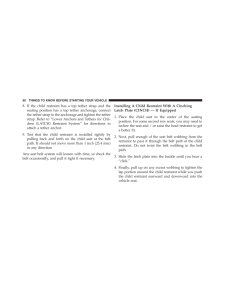
87 .Always follow the directi...Always follow the directions of the child restraint manu-facturer when installing your child restraint. Not all childrestraint systems will be installed as described here.To Install A LATCH-compatible Child Restraint1. If the selected seating position has ...
-
88 .7. Test that the child re...7. Test that the child restraint is installed tightly bypulling back and forth on the child seat at the beltpath. It should not move more than 1 inch (25.4 mm)in any direction.How To Stow An Unused ALR SeatbeltWhen using the LATCH attaching system to insta...
-
89 .make a clicking noise whi...make a clicking noise while the webbing is pulled backinto the retractor. For additional information on ALR,refer to the Automatic Locking Mode description un-der Occupant Restraints. The cinching latch plate isdesigned to hold the lap portion of the seatb...
-
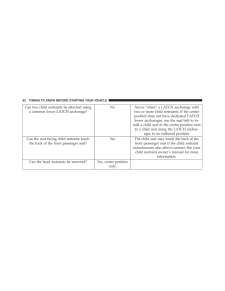
90 .What is the weight limit ...What is the weight limit (childs weight +weight of the child restraint) for using theTether Anchor with the seat belt to attach aforward facing child restraint?Weight limit of theChild RestraintAlways use the tether anchor when usingthe seat belt to instal...
-
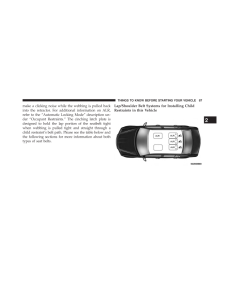
91 .Installing A Child Restra...Installing A Child Restraint with a SwitchableAutomatic Locking Retractor (ALR)1. Place the child seat in the center of the seatingposition. For some second row seats, you may need torecline the seat and/or raise the head restraint to get abetter fit.2. Pu...
-
92 .8. If the child restraint...8. If the child restraint has a top tether strap and theseating position has a top tether anchorage, connectthe tether strap to the anchorage and tighten the tetherstrap. Refer to Lower Anchors and Tethers for Chil-dren (LATCH) Restraint System for directi...
-
93 .5. If the child restraint...5. If the child restraint has a top tether strap and theseating position has a top tether anchorage, connectthe tether strap to the anchorage and tighten the tetherstrap. Refer to Lower Anchors and Tethers for Chil-dren (LATCH) Restraint System for directi...
-
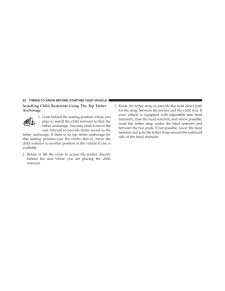
94 .Installing Child Restrain...Installing Child Restraints Using The Top TetherAnchorage1. Look behind the seating position where youplan to install the child restraint to find thetether anchorage.You may need to move theseat forward to provide better access to thetether anchorage. If t...
-
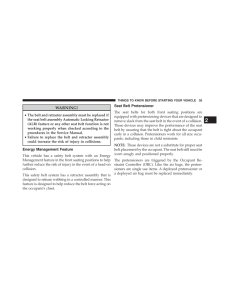
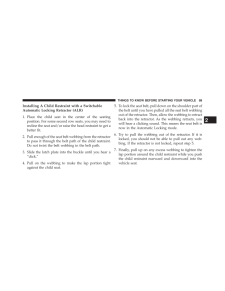
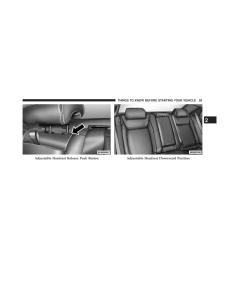
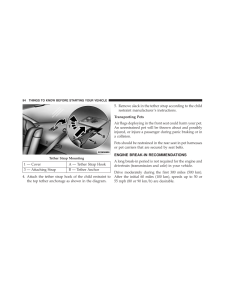
95 .Adjustable Headrest Relea...Adjustable Headrest Release Push Button Adjustable Headrest Downward Position2THINGS TO KNOW BEFORE STARTING YOUR VEHICLE 93
-
96 .1 Cover A Tether Strap ...1 Cover A Tether Strap Hook3 Attaching Strap B Tether Anchor4. Attach the tether strap hook of the child restraint tothe top tether anchorage as shown in the diagram.5. Remove slack in the tether strap according to the childrestraint manufacturers inst...
-
97 .While cruising, brief ful...While cruising, brief full-throttle acceleration within thelimits of local traffic laws contributes to a good break-in.Wide-open throttle acceleration in low gear can be detri-mental and should be avoided.The engine oil installed in the engine at the facto...
-
98 .WARNING!(Continued)•It is...WARNING!(Continued)•It is extremely dangerous to ride in a cargo area,inside or outside of a vehicle. In a collision, peopleriding in these areas are more likely to be seriouslyinjured or killed.•Do not allow people to ride in any area of yourvehicle that ...
-
99 .Whenever a change is noti...Whenever a change is noticed in the sound of the exhaustsystem, when exhaust fumes can be detected inside thevehicle, or when the underside or rear of the vehicle isdamaged, have a competent mechanic inspect the com-plete exhaust system and adjacent body a...
-
100 .Floor Mat Safety Informat...Floor Mat Safety InformationAlways use floor mats designed to fit the footwell of yourvehicle. Use only floor mats that leave the pedal areaunobstructed and that are firmly secured so that theycannot slip out of position and interfere with the pedalsor imp...
